D-Link DAP-2610 Quick Install Guide 1 - Page 10
Mounting with a ceiling bracket
 |
View all D-Link DAP-2610 manuals
Add to My Manuals
Save this manual to your list of manuals |
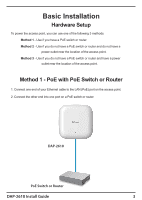
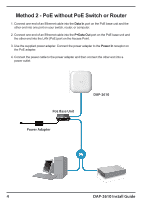
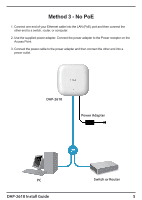
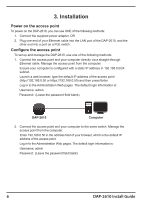
Page 10 highlights
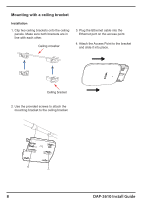
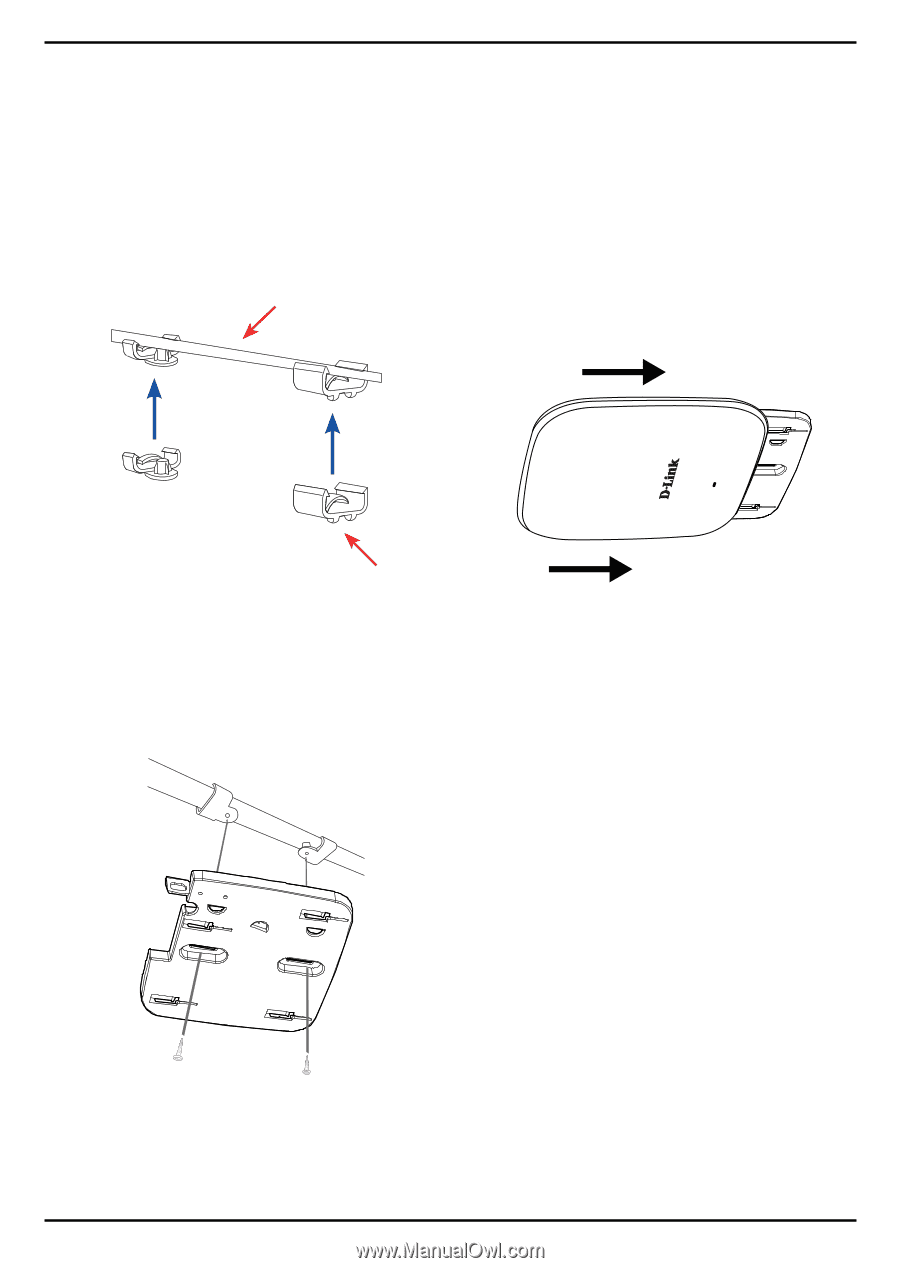
Mounting with a ceiling bracket Installation 1. Clip two ceiling brackets onto the ceiling panels. Make sure both brackets are in line with each other. Ceiling crossbar 3. Plug the Ethernet cable into the Ethernet port on the access point. 4. Attach the Access Point to the bracket and slide it into place. Ceiling bracket 2. Use the provided screws to attach the mounting bracket to the ceiling bracket. 8 DAP-2610 Install Guide
-
 1
1 -
2
-
3
-
4
-
 5
5 -
 6
6 -
 7
7 -
 8
8 -
 9
9 -
 10
10 -
 11
11 -
 12
12 -
 13
13 -
 14
14 -
 15
15 -
16
 |
 |
8
DAP-2610 Install Guide
1. Clip two ceiling brackets onto the ceiling
panels. Make sure both brackets are in
line with each other.
2. Use the provided screws to attach the
mounting bracket to the ceiling bracket.
3. Plug the Ethernet cable into the
Ethernet port on the access point.
4. Attach the Access Point to the bracket
and slide it into place.
Ceiling bracket
Ceiling crossbar
Mounting with a ceiling bracket
Installation