D-Link DCS-2102 User Manual
D-Link DCS-2102 - SECURICAM Network Camera Manual
 |
View all D-Link DCS-2102 manuals
Add to My Manuals
Save this manual to your list of manuals |
D-Link DCS-2102 manual content summary:
- D-Link DCS-2102 | User Manual - Page 1
- D-Link DCS-2102 | User Manual - Page 2
Installation ...9 Software Installation ...10 Adjusting the Camera Focus ...19 Setting up a Wireless Connection with WPS (DCS-2121 only)...20 Using the Configuration Menu ...21 LIVE VIDEO...22 LIVE VIDEO > Camera ...22 SETUP ...23 SETUP > Wizard ...23 SETUP > Network Setup...24 SETUP > Wireless (DCS - D-Link DCS-2102 | User Manual - Page 3
to Enable Remote Image Viewing ...46 Viewing Your Camera Over the Internet ...47 Viewing Your Camera Over the Internet Behind a Router...47 Frequently Asked Questions...48 Internet Camera Features ...48 Internet Camera Installation ...49 How to Ping Your IP Address...51 Time Zone Table ...53 DI/DO - D-Link DCS-2102 | User Manual - Page 4
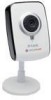
Internet Camera „ D-Link DCS-2102 Megapixel Internet Camera „ CAT 5 Ethernet Cable „ Power Adapter „ Mounting Kit „ Quick Installation Guide „ CD-ROM with Software and Product Documentation DCS-2121 Megapixel Wireless Internet Camera „ D-Link DCS-2121 Megapixel Wireless Internet Camera „ Detachable - D-Link DCS-2102 | User Manual - Page 5
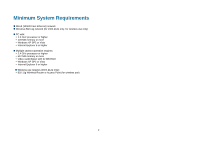
„ Wired (10/100 Fast Ethernet) network „ Wireless 802.11g network (for DCS-2121 only, for wireless use only) „ PC with: y 1.3 GHz processor or higher y 128 MB memory or more y Windows XP SP2 or Vista y Internet Explorer 6 or higher „ Multiple camera operation requires: y 2.4 GHz processor or - D-Link DCS-2102 | User Manual - Page 6
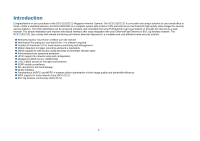
„ SD card slot for front-end storage „ DI/DO interface „ Simultaneous MJPEG and MPEG-4 streams allows optimization of both image quality and bandwidth efficiency „ WPS support for easy network setup (DCS-2121) „ 802.11g wireless connectivity (DCS-2121) 3 - D-Link DCS-2102 | User Manual - Page 7
SD slot. For the DCS-2121 Megapixel Wireless Internet Camera: „ 802.11g Wireless or Ethernet/Fast Ethernet Support: The DCS-2121 offers both 802.11g wireless and Ethernet/Fast Ethernet connectivity, making the DCS-2121 easy to integrate into your existing network environment. The DCS-2121 works with - D-Link DCS-2102 | User Manual - Page 8
Hardware Overview Front 1 5 2 6 3 4 7 1. Camera lens 2. Focus ring 3. Status LED 4. Microphone 5. Wireless antenna (DCS-2121 only) 6. SD Card slot 7. Reset button 5 Back 8 9 10 8. Antenna connector (DCS-2121 only) 9. WPS button and LED (DCS-2121 only) 10. Camera base mount - D-Link DCS-2102 | User Manual - Page 9
Bottom 1 2 3 4 1. External speaker jack 2. Power jack 3. Ethernet port 4. DI/DO port 6 - D-Link DCS-2102 | User Manual - Page 10
Hardware Installation Attach the Antenna (DCS-2121 only) Screw the wireless antenna onto the antenna connector. Connect the camera base 1. Screw the base stem into the base. 2. Take the hinge bracket and tighten the wheel. 3. Screw the hinge bracket into the base stem. 4. Screw - D-Link DCS-2102 | User Manual - Page 11
bottom of the DCS-2102/2121 and connect the power adapter to a power outlet. After connecting the power adapter, you should see the Status LED on the front of the camera turn on. The Status LED will light red when it receives power, will light green after the camera connects to the network, and will - D-Link DCS-2102 | User Manual - Page 12
content of the Installation CD-ROM includes: „View QIG:Click here to view the Quick Installation Guide for a quick step-by-step guide to installing the DCS-2102/2121. „View Manual: Click here to view the User Manual for detailed information about the DCS-2102/2121. „Installation Wizard: Click here - D-Link DCS-2102 | User Manual - Page 13
Software Installation Click the Installation Wizard button from the autorun program on the CD. Follow the simple steps below to run the Setup Wizard to guide you quickly through the installation process. Click Next. 10 - D-Link DCS-2102 | User Manual - Page 14
Click Yes. Click Next. Click Finish. 11 - D-Link DCS-2102 | User Manual - Page 15
Now, click on ffdshow from the autorun screen. This will install the proper codecs that will allow you to playback video taken by the DCS-2102/2121. Click I Agree. Click Next. 12 - D-Link DCS-2102 | User Manual - Page 16
Click Install. Click Close. 13 - D-Link DCS-2102 | User Manual - Page 17
Before using ffdshow, you must configure its properties. From your computer, please click on StartÆ ProgramsÆ ffdshowÆ Configuration. At the ffdshow properties window, scroll to the bottom and click Miscellaneous. Be sure that Autodetect is checked and that Error resilience and Error concealment are - D-Link DCS-2102 | User Manual - Page 18
to your wired network. Each camera will appear with its MAC address, current IP address, and camera name. You can choose from the following options from the buttons on the left: Wizard: Search: Link: About: Exit: This will guide you through initial network setup of the selected camera. This will - D-Link DCS-2102 | User Manual - Page 19
addresses must correspond with your network settings for you to access the camera. If you are unsure of what these settings should be, please check with your network administrator or Internet service provider. After entering your settings, click Next. (DCS-2121 only) The availability of a wireless - D-Link DCS-2102 | User Manual - Page 20
, click Back to modify your camera settings. Otherwise, click Restart to save and apply your settings. This may take a few minutes. (Wireless settings are for DCS-2121 only) Camera setup is now complete! Wait until the Link LED on the camera turns green, then click Link to launch your Web browser - D-Link DCS-2102 | User Manual - Page 21
the Link button, the Installation Wizard will automatically open your Web browser to the IP address of the DCS-2102/2121 and prompt you for a user name and password. Enter "admin" into the User name field, then click OK. If you changed your password in the Setup Wizard, enter your password then - D-Link DCS-2102 | User Manual - Page 22
such as brightness, contrast, orientation in the SETUP > Image Setup section of the web interface. Warning: Direct exposure to sunlight may cause permanent damage to the CMOS sensor. Therefore, do not expose the DCS-2102/2121's lens to direct sunlight. The camera is designed for indoor usage. Focus - D-Link DCS-2102 | User Manual - Page 23
Connection with WPS (DCS-2121 only) If your wireless access point or router supports push-button Wireless Protected Setup (WPS), you can quickly configure your wireless network and camera without using the camera's web interface. After plugging the power adapter to your camera and the front status - D-Link DCS-2102 | User Manual - Page 24
to your DCS-2102/2121. In this example, the IP address of the camera is 192.168.0.20. Your DCS-2102/2121 may have a different IP Address assigned to it by your router or Internet service. You will need to enter your User name and Password (User name is "admin", and Password is blank by default) to - D-Link DCS-2102 | User Manual - Page 25
IP camera's live video by using the buttons below. LIVE VIDEO > Camera Set Path: You can change the folder your manual recordings will be saved to. Start/Stop Audio camera. Audio is on by default. Start/Stop Talking: This will toggle sending audio to a speaker (not included) connected to the camera - D-Link DCS-2102 | User Manual - Page 26
your IP camera. SETUP > Wizard The setup wizards guide you through initial setup of your IP camera. You can use the Internet Connection Setup Wizard for initial network setup, and you can use the Motion Detection Setup Wizard to set up motion detection and snapshots. Simply follow the instructions - D-Link DCS-2102 | User Manual - Page 27
SETUP > Network Setup This option, Network Setup, allows you to configure your LAN and Internet configuration, including the settings for LAN, PPPoE, and port. DHCP Connection: This allows the camera to get an IP address automatically from your router or Internet service. If you are not sure which - D-Link DCS-2102 | User Manual - Page 28
SETUP > Wireless (DCS-2121 only) To set up your IP camera's wireless network interface settings, enable Wireless Settings in this window first. Then continue the further configuration next. Site survey: Clicking this button will scan for available wireless networks. After scanning, you can use the - D-Link DCS-2102 | User Manual - Page 29
name linked to a dynamic IP address, is useful. With most Cable and DSL connections, you are assigned a dynamic IP address and that address is used only for the duration of that specific connection. With the DCS-2102/2121, you can set up your DDNS service and the DCS-2102/2121 will automatically - D-Link DCS-2102 | User Manual - Page 30
The options in Image Setup allow you to adjust the settings for your IP camera sensor and image. Brightness: This adjusts the brightness of the camera image. This is set to 60 by default. Saturation: This adjusts the color saturation of the camera image. This is set to 60 by default. Contrast: This - D-Link DCS-2102 | User Manual - Page 31
SETUP > Audio and Video This Audio and Video option allows you to set up your IP camera's video quality, resolution, and frame rate. Video Sensor Sensor Output: You can set the camera's sensor output to VGA quality (640x640), XGA quality (1024x768), or SXGA quality (1280x1024). Note: When using SXGA - D-Link DCS-2102 | User Manual - Page 32
Note: Higher frame size, frame rate and bit rates will give you better video quality, but they will also require more network bandwidth. For best viewing results on a mobile phone, we suggest setting the Frame Rate to 5 fps and bit rate to 20 Kbps. After making any - D-Link DCS-2102 | User Manual - Page 33
SETUP > Motion Detection This option allows you to set up Motion Detection on your IP camera. In order to use motion indicate areas that will be monitored for motion. Sensitivity: This setting adjusts how sensitive the camera will be to motion, where 100% will be the most sensitive setting and 0% - D-Link DCS-2102 | User Manual - Page 34
: This will set the beginning and ending dates of the Daylight Saving period. You can have the camera's clock set automatically, or manually. Synchronize with NTP Server: Checking this checkbox will allow the camera to synchronize its clock with an NTP server. NTP Server: Use the dropdown box to the - D-Link DCS-2102 | User Manual - Page 35
network drive: Selecting this will allow you to record to a Samba network drive on your wired or wireless network. Samba Auth: Here, select Anonymous if no user name or password to at least 32M to allow for enough buffer space for the camera to record with. When storage is full: When your storage - D-Link DCS-2102 | User Manual - Page 36
to record continuously. This scheduling method can only be done when recording to a Samba drive. Scheduled Recording: This will set the camera to automatically record video during the specified times in the table below. This scheduling method can only be done when recording to a Samba drive. After - D-Link DCS-2102 | User Manual - Page 37
document. Send to: E-mail Address: When checked, the camera will send the snapshots it takes to the e-mail address specified in the following text boxes. If you do not know what to enter for the User Name, Password, or SMTP Mail Server, contact your e-mail service provider for details. User Name - D-Link DCS-2102 | User Manual - Page 38
SETUP > Digital Output This screen allows you to enable the Digital Out (D/O) D/O port. Motion Detection: When checked, the D/O port will send a signal whenever motion is detected by the camera. (When motion detection has been enabled) D/I: When checked, the D/O port will send a signal whenever a - D-Link DCS-2102 | User Manual - Page 39
> Device Management Here you can change the Admin password, add and manage Users, and adjust some camera settings. Admin Password Setting: This section lets you change the admin password used to log in to the camera and adjust settings. After installing the camera for the first time, it is highly - D-Link DCS-2102 | User Manual - Page 40
Load Configuration button to load the new configuration. Restore To Factory Defaults: Clicking this button will reset all settings to their factory defaults. If you choose to reset your settings, you will need to set up your camera again. Reboot Device: Clicking the Reboot button will reboot your - D-Link DCS-2102 | User Manual - Page 41
, go to support.dlink.com.tw and download the latest firmware to your computer's hard drive. Click on Browse..., select the firmware file, then click the Upload button. While the firmware is being upgraded, do not turn off your computer or camera, and do not disconnect your network connection from - D-Link DCS-2102 | User Manual - Page 42
STATUS The Status section provides the detail information about your IP camera. STATUS> Device Info This screen shows you various information about your camera and its current settings. 39 - D-Link DCS-2102 | User Manual - Page 43
STATUS> Log The log shows you a list of events that have happened recently. You can download the log by clicking the Download button, or you can empty the log by clicking the Clear button. 40 - D-Link DCS-2102 | User Manual - Page 44
HELP The Help screen provides you with support information about the DCS-2102/2121 for your reference. 41 - D-Link DCS-2102 | User Manual - Page 45
Installing the DCS-2102/2121 Behind a Router If you connect your cameras to an Internet router, follow these steps to allow remote access to your cameras, so you can access your cameras from any Internet-connected PC: 1) Identify your camera on the network 2) Assign a local IP address and port for - D-Link DCS-2102 | User Manual - Page 46
Local IP Address and Port for Your Camera „ Click on the SETUP tab, and select Network Setup A Local IP Address is required to configure your camera and to view your camera within your local network. You may use the default camera IP Address of 192.168.0.20. If you wish to use a different IP Address - D-Link DCS-2102 | User Manual - Page 47
Port The HTTP Port option is used when multiple cameras are being installed behind a single public IP address and will be accessed remotely OR for using a port other than the default port for image viewing. For each additional camera that is installed, you must assign the appropriate Web server port - D-Link DCS-2102 | User Manual - Page 48
Router Setup The following steps generally apply to any router that you have on your network. The D-Link DIR-300 is used as an example to clarify the configuration process. Your WAN IP Address information will be listed on following window. Note: Because a dynamic WAN IP address can change from time - D-Link DCS-2102 | User Manual - Page 49
to enable virtual server settings. „ Select a camera name. „ Enter your camera's Local IP Address in the private/local IP field. „ Select TCP under Protocol Type. „ Enter 80 for your public port, and whatever port your camera's HTTP port is set to use (80 is the default). Note: If you are using more - D-Link DCS-2102 | User Manual - Page 50
(mobile phone / pda): rtsp://:/3gpp MPEG-4 stream (PC): rtsp://:/mp4 MJPEG stream (PC): rtsp://:/jpeg To access your camera from a computer on your local (home) network, simply enter the local IP Address of your camera (i.e. 192.168.0.35). If - D-Link DCS-2102 | User Manual - Page 51
wireless (DCS-2121 only) network. Other cameras such as the D-Link DSB-C110 and DSB-C310 can be used as a PC Camera (webcam). 8 Can the Internet Camera be connected to a network if it consists of only private IP Addresses? Yes, the Internet Camera can be connected to a LAN with private IP Addresses - D-Link DCS-2102 | User Manual - Page 52
the instructions in the section titled How to PING Your IP Address:) the IP address your Internet Camera is set to use. If there is a reply, it indicates that there is another device on the network with the same IP address. You will need to run the Install Wizard again and change the IP address of - D-Link DCS-2102 | User Manual - Page 53
on your browser to allow the ActiveX plug-in to be installed. If you are using Internet Explorer version 5 or lower, then you will need to upgrade your Web browser software in order to view the streaming video transmitted by the Internet Camera. Also, make sure that your anti-virus program is not - D-Link DCS-2102 | User Manual - Page 54
Internet Groper) command can determine whether a specific IP Address is accessible by sending a packet to the specific address and waiting for a reply. It is a very useful tool to confirm if the IP Address conflicts with the Internet Camera over the network. Follow the step-by-step procedure below - D-Link DCS-2102 | User Manual - Page 55
If you fail to connect to your camera you will see the following: Check to see if you have entered your camera's IP Address correctly or reassign your camera's IP Address. 52 - D-Link DCS-2102 | User Manual - Page 56
Time Zone Table (GMT -12:00) International Dateline West (GMT -11:00) Midway Island, Samoa (GMT -10:00) Hawaii Island (GMT -09:00) Alaska (GMT -08:00) Pacific Time (US & Canada); Tijuana (GMT -07:00) Mountain Time (US & Canada) (GMT -06:00) Central Time (US & Canada) (GMT -05:00) Eastern Time (US & - D-Link DCS-2102 | User Manual - Page 57
DI/DO Input specifications DO Digital Output: „ Normal: open circuit „ Trigger: short circuit After powering on or rebooting the DCS-2121, the camera will be in Normal mode by default. DI Digital Input: „ Normal: no current „ Trigger: 12V current As the Digital Input signal is controlled by an - D-Link DCS-2102 | User Manual - Page 58
• MDI/MDIX auto-negotiation • 802.3x Flow Control support for Full-Duplex mode MIC 50dB +/- 3dB, Omni-directional I/O Connector 1 Input (photo relay, active high 12V +/- 3V, dropout: 0 VDC) 1 Output (photo relay, Close circuit current: AC 70mA or DC 100mA; 40Ohm; Open circuit voltage: 240 VAC or - D-Link DCS-2102 | User Manual - Page 59
Out Yes Reset Button Reset to factory default Dimension (WxDxH) 71.9mm x 110.0mm x 37mm (without bracket and stand) Weight DCS-2121: 281.4g (without bracket and stand) DCS-2102: 265.3g (without bracket and stand) Max Power Consumption • 6W • Input: 100-240VAC, 50/60Hz • Output: 5VDC, 2.5A Networking - D-Link DCS-2102 | User Manual - Page 60
Video Algorithm Supported • MPEG-4/MJPEG simultaneous dual-format compression • JPEG for still image Features • Adjustable image size and quality • Time stamp and text overlay • Configurable motion detection zones - D-Link DCS-2102 | User Manual - Page 61
OS Support Device Windows 2000 / Windows XP / Windows Vista / 3GPP Mobile Phone Utility Windows 2000 / Windows XP / Windows Vista Physical Environment Power • 5V 2.5A switching power adapter • External AC-to-DC Switching Power Adapter • Type: USA / UK / EUR / AUS / CN Operation Temperature 0 to 40
-
 1
1 -
 2
2 -
 3
3 -
 4
4 -
 5
5 -
 6
6 -
 7
7 -
8
-
9
-
10
-
11
-
12
-
13
-
14
-
15
-
16
-
17
-
18
-
19
-
20
-
21
-
22
-
23
-
24
-
25
-
26
-
27
-
28
-
29
-
30
-
31
-
32
-
33
-
34
-
35
-
36
-
37
-
38
-
39
-
40
-
41
-
42
-
43
-
44
-
45
-
46
-
47
-
48
-
49
-
50
-
51
-
52
-
53
-
54
-
55
-
56
-
57
-
58
-
59
-
60
-
61
 |
 |
