D-Link DCS-4633EV User Manual - Page 10
Installation, Step 4, If you are running the camera cables out the side of the camera
 |
View all D-Link DCS-4633EV manuals
Add to My Manuals
Save this manual to your list of manuals |
Page 10 highlights
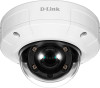
Section 2: Installation Step 4 Use the screws provided to mount the camera to the wall. If you are running the camera cables out the side of the camera, guide the camera cables through the cable channel on the base. If you are mounting the camera to the ceiling, use a flathead screwdriver to remove the plastic hole cover from the bottom of the base, then guide the cables through the bottom. Step 5 Connect the power and Ethernet cables, or just the Ethernet cable if you are using a PoE connection. D-Link DCS-4633EV User Manual 10
-
 1
1 -
2
-
3
-
4
-
 5
5 -
 6
6 -
 7
7 -
 8
8 -
 9
9 -
 10
10 -
 11
11 -
 12
12 -
 13
13 -
 14
14 -
 15
15 -
16
-
17
-
18
-
19
-
20
-
21
-
22
-
23
-
24
-
25
-
26
-
27
-
28
-
29
-
30
-
31
-
32
-
33
-
34
-
35
-
36
-
37
-
38
-
39
-
40
-
41
-
42
-
43
-
44
-
45
-
46
-
47
-
48
-
49
-
50
-
51
-
52
-
53
-
54
-
55
-
56
-
57
-
58
-
59
-
60
-
61
-
62
-
63
-
64
-
65
-
66
-
67
-
68
-
69
-
70
-
71
-
72
-
73
-
74
-
75
-
76
-
77
-
78
-
79
-
80
-
81
-
82
-
83
-
84
-
85
-
86
-
87
-
88
-
89
-
90
-
91
-
92
-
93
 |
 |

10
D-Link DCS-4633EV User Manual
Section 2: Installation
Step 4
Use the screws provided to mount the camera to the wall.
If you are running the camera cables out the side of the camera
, guide the
camera cables through the cable channel on the base.
Step 5
Connect the power and Ethernet cables, or just the Ethernet cable if you are using
a PoE connection.
If you are mounting the camera to the ceiling,
use a flathead screwdriver to
remove the plastic hole cover from the bottom of the base, then guide the cables
through the bottom.