D-Link DFE-538TX Product Manual
D-Link DFE-538TX Manual
 |
View all D-Link DFE-538TX manuals
Add to My Manuals
Save this manual to your list of manuals |
D-Link DFE-538TX manual content summary:
- D-Link DFE-538TX | Product Manual - Page 1
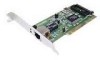
DFE-538TX Fast Ethernet Adapter for PCI Bus User's Guide Rev. 07 (Aug. 2002) Printed in Taiwan - D-Link DFE-538TX | Product Manual - Page 2
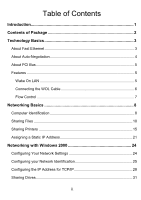
3 About Fast Ethernet 3 About Auto-Negotiation 4 About PCI Bus 5 Features ...5 Wake On LAN 5 Connecting the WOL Cable 6 Flow Control 7 Networking Basics 8 Computer Identification 8 Sharing Files 10 Sharing Printers 15 Assigning a Static IP Address 21 Networking with Windows 2000 24 - D-Link DFE-538TX | Product Manual - Page 3
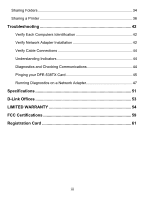
Sharing Folders 34 Sharing a Printer 36 Troubleshooting 42 Verify Each Computers Identification 42 Verify Network Adapter Installation 42 Verify Cable Connections 44 Understanding Indicators 44 Diagnostics and Checking Communications 44 Pinging your DFE-538TX Card 45 Running Diagnostics on - D-Link DFE-538TX | Product Manual - Page 4
larger network. However, this Guide is designed to help you network two computers running Windows 95/98, Me, 2000, XP and 2003 in a peer-to-peer configuration. Yet, the standards compliant DFE-538TX gives you the flexibility to expand and customize your Ethernet / Fast Ethernet network at will. The - D-Link DFE-538TX | Product Manual - Page 5
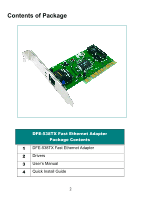
Contents of Package DFE-538TX Fast Ethernet Adapter Package Contents 1 DFE-538TX Fast Ethernet Adapter 2 Drivers 3 User's Manual 4 Quick Install Guide 2 - D-Link DFE-538TX | Product Manual - Page 6
to 200Mbps full-duplex service. To provide compatibility in traditional 10Mbps Ethernet environments (where, for example, DFE-538TX adapters are installed anticipating upgrade of supporting switch equipment to Fast Ethernet), the DFE-538TX also supports traditional 10Mbps Ethernet operation, in full - D-Link DFE-538TX | Product Manual - Page 7
will be the DFE538TX Adapter serving your station (installed in your computer), and the switch through which it is connected to the LAN. The options to be negotiated between the DFE-538TX and its supporting switch includes Ethernet type (100BASE-TX Fast Ethernet or 10BASE-T Ethernet) and duplex mode - D-Link DFE-538TX | Product Manual - Page 8
optimal data communications. About PCI Bus Your DFE-538TX Adapter delivers outstanding performance by fully exploiting the advance features of your computer's PCI bus. DFE-538TX Adapters utilize the Bus Master Mode of the PCI bus, allowing direct transfers of Ethernet packet content between computer - D-Link DFE-538TX | Product Manual - Page 9
your computer. The WOL function is system dependent, in addition to the following instructions, you may need to download WOL software from INTEL or another manufacturer's website. Please consult your computer's manual for specific BIOS settings. The WOL Cable is an interconnect cable with standard - D-Link DFE-538TX | Product Manual - Page 10
Power-ON the PC and press "Delete" or "F1" when prompted to enter the PCI/ISA BIOS CMOS Setup. Enable the WOL function or the power-ON function of the PC to your computer's manual for more information regarding the CMOS Setup Utility and BIOS settings. Flow Control The DFE-538TX implements IEEE 802. - D-Link DFE-538TX | Product Manual - Page 11
give you some new ones. However, this section is not intended to be a comprehensive guide to networking, it is just an outline of a few networking basics. If you installed your DFE-538TX on computers running Windows 95, you got an opportunity to give each computer a name during the installation of - D-Link DFE-538TX | Product Manual - Page 12
Click the "Identification" tab on the top of the dialog box. 2. Type a unique, identifying name for this particular computer in the "Computer name:" box. This will be the name that other computers on your network will use to communicate with this computer. Each computer's name must be unique on a - D-Link DFE-538TX | Product Manual - Page 13
files and folders with other computers on your network. 1. On your Desktop, right-click the icon "Network Neighborhood" and select "Properties" from the context menu. 10 - D-Link DFE-538TX | Product Manual - Page 14
This dialog box is where you will configure most of your computers network settings. It is also available through the "Network" icon in the Control Panel. 2. Click the "File and Print Sharing..." button. 11 - D-Link DFE-538TX | Product Manual - Page 15
give others access to my files." 4. Click OK on the "File and Print Sharing" dialog box. 5. Click OK on the "Network" dialog box. 6. Provide the Windows 95/98 installation CD or diskette(s) if prompted or direct Windows to the proper location of the installation files. Reboot if prompted. 12 - D-Link DFE-538TX | Product Manual - Page 16
you specifically identify as shared will be accessible to other computers on your network. 8. Find the disk drive or folder you want to share with Windows Explorer or the "My Computer" icon on your desktop. 9. Right-click on the disk drive or folder icon and select "Sharing..." 13 - D-Link DFE-538TX | Product Manual - Page 17
10. Select "Share As:" to set the parameters for sharing this particular 12. You can access a disk drive or folder shared over the network from most Windows 95/98 applications. To make this process easier, Windows allows you to map these disk drives and folders to a drive letter on another computer - D-Link DFE-538TX | Product Manual - Page 18
Network Drive..." You will then be able to assign an available drive letter. Checking "Reconnect at logon" allows Windows to map this network drive each time you start your computer. Sharing Printers "Sharing" a printer connected to one computer with other computers on your network - D-Link DFE-538TX | Product Manual - Page 19
others to print to my printer(s)." 3. Click OK on the "File and Print Sharing" dialog box. 4. Click OK on the "Network" dialog box. 5. Provide the Windows 95/98 installation CD or diskette(s) if prompted or direct Windows to the proper location of the installation files. Reboot if prompted. 16 - D-Link DFE-538TX | Product Manual - Page 20
6. You may now share any installed printers connected to this computer with other computers on your network. 17 - D-Link DFE-538TX | Product Manual - Page 21
:" are optional. Click OK. 9. Shared printers become Network Printers for other computers on the network. For a computer to access a Network Printer, the device driver or software for that printer must be installed and pointed to the proper location of the printer. This is done much the same way you - D-Link DFE-538TX | Product Manual - Page 22
START>SETTINGS>PRINTERS 11. Double click the "Add Printer" icon. 12. The "Add Printer Wizard" will appear. Click Next. 13. Choose "Network printer." Click Next. 14. Now you will identify the location of the Network Printer. If you know the name of the computer and the share name of the printer, you - D-Link DFE-538TX | Product Manual - Page 23
to must be "ON" to use the printer. If you find this inconvenient, devices known as Network Print Servers are available from multiple vendors, including D-Link. A Network Print Server would allow you to directly connect your printer to your network. 20 - D-Link DFE-538TX | Product Manual - Page 24
Assigning a Static IP Address Follow these steps to configure your DFE-538TX card for networking: 1. Go to Start> Settings> Network and Dial-up Connections 2. Right-click on Local Area Connection then click on Properties. 21 - D-Link DFE-538TX | Product Manual - Page 25
3. Highlight Internet Protocol (TCP/IP) and then click Properties. 4. The "Internet Protocol (TCP/IP) Properties" window appears. Change from "Obtain an IP address automatically" to "Use the following IP address." 5. Specify your IP address as 192.168.0.5 and your Subnet mask - D-Link DFE-538TX | Product Manual - Page 26
computers by changing the last digit from 5 to 10 for computer B. The Subnet mask will always be the same as computer A with 255.255.255.0. 7. After entering the IP address and Subnet mask, click OK and close the "TCP/IP Properties" Box. Note: Windows 2000 does not have to reboot to activate the - D-Link DFE-538TX | Product Manual - Page 27
protocols listed in the "Installing Software" section of the Quick Install Guide. If you have not installed the protocols, return to "Installing Software," select the Windows 2000 icon and follow the instructions for installing and configuring protocols. You cannot network your computers until the - D-Link DFE-538TX | Product Manual - Page 28
Configuring your Network Identification Follow these steps to configure your DFE-538TX card for networking: 1. Go to Start> Settings> Control Panel 2. Double click on the System icon. 25 - D-Link DFE-538TX | Product Manual - Page 29
3. Select the "Network Identification" tab and then click "Properties." 26 - D-Link DFE-538TX | Product Manual - Page 30
to have a unique computer name. The Workgroup name will need to be the same for both PCs. Click OK. Click OK in the "System Properties" window. 27 - D-Link DFE-538TX | Product Manual - Page 31
Configuring the IP Address for TCP/IP Follow these steps to configure your DFE-538TX card for networking: 8. Go to Start> Settings> Network and Dial-up Connections 9. Right-click on Local Area Connection then click on Properties. 28 - D-Link DFE-538TX | Product Manual - Page 32
10. Highlight Internet Protocol (TCP/IP) and then click Properties. 29 - D-Link DFE-538TX | Product Manual - Page 33
11. The "Internet Protocol (TCP/IP) Properties" window appears. Change from "Obtain an IP address automatically" to "Use the following IP address." 12. Specify your IP address as 192.168.0.1 and your Subnet - D-Link DFE-538TX | Product Manual - Page 34
as computer A with 255.255.255.0. 14. After entering the IP address and Subnet mask, click OK and close the "TCP/IP Properties" Box. Note: Windows 2000 does not have to reboot to activate the changes in IP addresses. However, it is always a good idea to reboot after making changes to Network - D-Link DFE-538TX | Product Manual - Page 35
4. Select the "Sharing" tab on the "Local Drive Properties" Window. Select "Share this folder," and click "New Share." 5. In the "New Share" box, name the drive as you would like it to appear in "My - D-Link DFE-538TX | Product Manual - Page 36
6. Choose the "Share Permissions" tab and set limits on the share as needed. The default settings allow all users to read and write to the hard drive. Click OK. 7. The shared drive should now have a hand underneath it, indicating that it is a shared drive. 33 - D-Link DFE-538TX | Product Manual - Page 37
Sharing Folders Follow these steps to share a folder: 1. You must be logged in as a member of the Administrators, Server Operators, or Power Users groups to perform these operations. 2. Double click on "My Computer" icon to open it. 3. Double click on the drive that contains the files to be shared, - D-Link DFE-538TX | Product Manual - Page 38
4. Navigate to the folder you want to share and right click on it. Choose "Sharing." Change the settings under the "Sharing" tab to "Share this folder." Set the "Permissions" on the folder and the number of users who can access the file. 5. You must enter the "Share Name" in order for it to be seen - D-Link DFE-538TX | Product Manual - Page 39
Sharing a Printer Follow these steps to share a printer: 1. All printer sharing instructions assume that you have a printer on one machine that is connected to the Local Area Network. Go through this procedure on the computer the printer is connected to. 2. Go to Start> Settings> Printers 36 - D-Link DFE-538TX | Product Manual - Page 40
3. Right click on the printer you want to share and select "Sharing." 4. Under the "Sharing" tab change the value from "Not Shared" to "Shared As" and click OK. 37 - D-Link DFE-538TX | Product Manual - Page 41
The printer should now have a hand underneath it, indicating that it is now shared. Follow these steps to access the printer from all other computers on the network, repeat as needed for each computer: 5. Go to Start > Settings > Printers 6. Double click on the "Add Printer" icon. 38 - D-Link DFE-538TX | Product Manual - Page 42
7. Click Next at the "Add Printer Wizard" screen. 8. Select "Network printer" to make the printer available as a resource on the network. 39 - D-Link DFE-538TX | Product Manual - Page 43
9. At this screen, click Next to "Browse" for a printer. 10. Select the printer and click Next to continue. 40 - D-Link DFE-538TX | Product Manual - Page 44
11. Click Yes and then click Next. 12. Click Finish to complete the printer installation. 41 - D-Link DFE-538TX | Product Manual - Page 45
best approach to troubleshooting network problems is to Adapter Installation If your Network Adapters were not properly installed, including the Network System Software or device drivers adapters" if you do not see any items branching out. You should see "D-Link DFE-538TX Fast Ethernet PCI Adapter - D-Link DFE-538TX | Product Manual - Page 46
to "D-Link DFE-538TX Fast Ethernet PCI Adapter," your adapter is not installed properly or may have a problem. Double-click the "D-Link DFE-538TX Fast Ethernet PCI Adapter" to read the explanation of the problem. This information will be helpful if you require technical support from D-Link. 43 - D-Link DFE-538TX | Product Manual - Page 47
panels. A steady green "LINK" light indicates a good connection with the switch. A flashing green "ACT" light indicates that the Network Adapter is sending or receiving data. Diagnostics and Checking Communications Included on the diskette labeled "DFE-538TX PCI Ethernet Adapter Driver Program" is - D-Link DFE-538TX | Product Manual - Page 48
"D-Link PCI Fast Ethernet Adapter Diagnostic Program." 4. Read and follow the instructions on the screen. (Press the F1 key anytime for additional help.) 5. "Adapter Basic Diagnostic" will determine if any problems exist with a DFE- 538TX. 6. "Network Diagnostic" will determine if any problems exist - D-Link DFE-538TX | Product Manual - Page 49
1. Go to Start> Programs> MS-Dos Prompt. 46 - D-Link DFE-538TX | Product Manual - Page 50
Windows. Running Diagnostics on a Network Adapter Follow these steps to run Diagnostics: 1. Boot up the computer with a DOS Boot Disk and wait for the DOS prompt to appear. It should look similar to c:\>. 2. Remove the boot disk and replace it with the Diagnostics Disk provided with your DFE-538TX - D-Link DFE-538TX | Product Manual - Page 51
3. Type in "A:" then "cd diag" and hit enter. Note: The letter "A" represents the floppy drive 4. Then type in "diag" and hit enter. (This will bring up another screen.) 5. Go down to the bottom of the screen and follow the instruction to enter the diagnostics by hitting the space bar. 48 - D-Link DFE-538TX | Product Manual - Page 52
6. Go to View Current Configuration, hit enter and check the Ethernet Address for the card (If the address is A5-A5-A5-A5-A5, FF-FF-FF-FF-FF, or any single alphanumeric pair all the way across, that is an indication of a defective card). 49 - D-Link DFE-538TX | Product Manual - Page 53
7. Go back to the main menu to run on-board diagnostics on the card. 8. Once the diagnostics has run for a while, hit the Esc key to back out of the diagnostic program (Note: The Diagnostic Program will run continuously until you ESC out). Remove the floppy disk and reboot the computer. 50 - D-Link DFE-538TX | Product Manual - Page 54
Network Type: • Fast Ethernet 100Base-TX IEEE 802.3u standard for 100 Mbps baseband CSMA/CD local area network • Ethernet 10Base-T IEEE 802.3 standard for 10Mbps baseband CSMA/CD local area network Jumperless Hardware Auto-negotiation functionality ACPI PCI power management support Remote Wake up - D-Link DFE-538TX | Product Manual - Page 55
to 131° F) Humidity: 10% to 90% non-condensing Power Consumption: 0.32W (96mA @ 3.3V) max. PCB Layer: 2 Layers Available Drivers: Microsoft Windows 95 / 98 Macintosh 8.0 or higher Microsoft Windows Me / 2K / XP / 2003 Linux Microsoft Windows NT 4.0 Packet Driver Novell Netware 3.12, 4.1x - D-Link DFE-538TX | Product Manual - Page 56
-france.fr Netherlands Weena 290 3012 NJ Rotterdam Netherlands Tel: +31-10-282-1445 Fax: +31-10-282-1331 URL: www.dlink-benelux.com Belgium Rue des Colonies 11 South Africa TEL: 27-12-665-2165 FAX: 27-12-665-2186 URL: www..d-link.co.za Russia Grafsky per., 14, floor 6 Moscow 129626 Russia TEL: 7-095 - D-Link DFE-538TX | Product Manual - Page 57
PRODUCT. Submitting A Claim. Any claim under this limited warranty must be submitted in writing before the end of the Warranty Period to an Authorized D-Link Service Office. The claim must include a written description of the Hardware defect or Software nonconformance in sufficient detail to allow - D-Link DFE-538TX | Product Manual - Page 58
covered in the operating manual for the product, and normal maintenance; Damage that occurs in shipment, due to act of God, failures due to power surge, and cosmetic damage; and Any hardware, software, firmware or other products or services provided by anyone other than D-Link. Disclaimer of Other - D-Link DFE-538TX | Product Manual - Page 59
REMEDY FOR A BREACH OF THE FOREGOING LIMITED WARRANTY IS REPAIR, REPLACEMENT OR REFUND OF THE DEFECTIVE OR NON-CONFORMING PRODUCT. GOVERNING LAW: This Limited Warranty shall be governed by the laws of the state of California. Some states do not allow exclusion or limitation of incidental or - D-Link DFE-538TX | Product Manual - Page 60
installation. This equipment generates, uses and can radiate radio frequency energy and, if not installed and used in accordance with the instructions, may cause harmful interference to radio communications. However, there is no guarantee that interference will not occur in a particular installation - D-Link DFE-538TX | Product Manual - Page 61
part of this publication may be reproduced in any form or by any means or used to make any derivative such as translation, transformation, or adaptation without permission from D-Link Corporation/D-Link Systems Inc., as stipulated by the United States Copyright Act of 1976. 60 - D-Link DFE-538TX | Product Manual - Page 62
-99 100-499 500-999 1000 or more 3. What network protocol(s) does your organization use ? XNS/IPX TCP/IP DECnet Others 4. What network operating system(s) does your organization use ? D-Link LANsmart Novell NetWare NetWare Lite SCO Unix/Xenix PC NFS 3Com 3+Open Banyan Vines DECnet Pathwork Windows - D-Link DFE-538TX | Product Manual - Page 63
Registration Register your product on-line at: http://support.dlink.com/register Product registration is entirely voluntary and failure to complete or return this form will not diminish your warranty rights.
-
 1
1 -
 2
2 -
 3
3 -
 4
4 -
 5
5 -
 6
6 -
 7
7 -
8
-
9
-
10
-
11
-
12
-
13
-
14
-
15
-
16
-
17
-
18
-
19
-
20
-
21
-
22
-
23
-
24
-
25
-
26
-
27
-
28
-
29
-
30
-
31
-
32
-
33
-
34
-
35
-
36
-
37
-
38
-
39
-
40
-
41
-
42
-
43
-
44
-
45
-
46
-
47
-
48
-
49
-
50
-
51
-
52
-
53
-
54
-
55
-
56
-
57
-
58
-
59
-
60
-
61
-
62
-
63
 |
 |

DFE-538TX
Fast Ethernet Adapter
for PCI Bus
User’s Guide
Rev. 07 (Aug. 2002)
Printed in Taiwan