D-Link DHP-346AV Product Manual - Page 8
Hardware Installation - powerline av
 |
UPC - 790069347320
View all D-Link DHP-346AV manuals
Add to My Manuals
Save this manual to your list of manuals |
Page 8 highlights
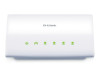
Section 2 - Installation Hardware Installation Step 1 Connect the supplied power cord into the power receptor located on the back of the PowerLine AV 4-Port Switch. Note: Power source is confirmed when the green LED Power Indicator on the PowerLine AV 4- Port Switch is illuminated. Step 2 Connect the included Ethernet cable to the network cable connector located on the PowerLine AV 4-Port Switch and attach the other end of the Ethernet cable to the game console, media player, Internet TV or Computer. Note: Network Connectivity is confirmed when the PowerLine and Ethernet LED indicators on the PowerLine AV 4-Port Switch are illuminated. Network Diagram Wireless Router 1 2 LAN 3 4 RESET INTERNET USB 5V - - - 3A Cable/ DSL Modem INTERNET (Existing Powerline Network) Game Console TV NAS Storage DHP-346AV Blu-ray DVD Player D-Link DHP-346AV User Manual 8
-
 1
1 -
2
-
 3
3 -
 4
4 -
 5
5 -
 6
6 -
 7
7 -
 8
8 -
 9
9 -
 10
10 -
 11
11 -
 12
12 -
 13
13 -
14
-
15
-
16
-
17
-
18
-
19
-
20
-
21
-
22
-
23
 |
 |
