D-Link DIS-300G-14PSW Quick Installation Guide 2 - Page 3
Wall Mounting, Ethernet Interface (RJ45 Ethernet), or STP Shielded Twisted Pair Ethernet cables.
 |
View all D-Link DIS-300G-14PSW manuals
Add to My Manuals
Save this manual to your list of manuals |
Page 3 highlights
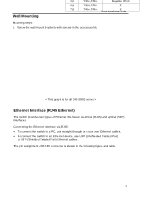
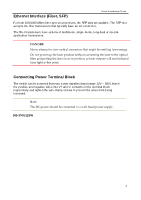
Wall Mounting Quick Installation Guide Mounting steps: 1. Screw the wall-mount brackets with screws in the accessory kit. < This graph is for all DIS-300G series > Ethernet Interface (RJ45 Ethernet) The switch provides two types of Ethernet interfaces: electrical (RJ45) and optical (SFP) interfaces. Connecting the Ethernet interface via RJ45: ● To connect the switch to a PC, use straight-through or cross-over Ethernet cables, ● To connect the switch to an Ethernet device, use UTP (Unshielded Twisted Pair) or STP (Shielded Twisted Pair) Ethernet cables. The pin assignment of RJ-45 connector is shown in the following figure and table. PoE Assignment Pin Assignment (for DIS-300G-8PSW/DIS-300G- 14PSW only) 1,2 T/Rx+,T/Rx- Positive VPort 3,6 T/Rx+,T/Rx- Negative VPort 4,5 T/Rx+,T/Rx- X 7,8 T/Rx+,T/Rx- X 3
-
 1
1 -
 2
2 -
 3
3 -
 4
4 -
 5
5 -
 6
6 -
 7
7 -
 8
8
 |
 |