D-Link DMS-106XT Quick Install Guide - Page 2
Connect the Switch to Your Network - d link
 |
View all D-Link DMS-106XT manuals
Add to My Manuals
Save this manual to your list of manuals |
Page 2 highlights
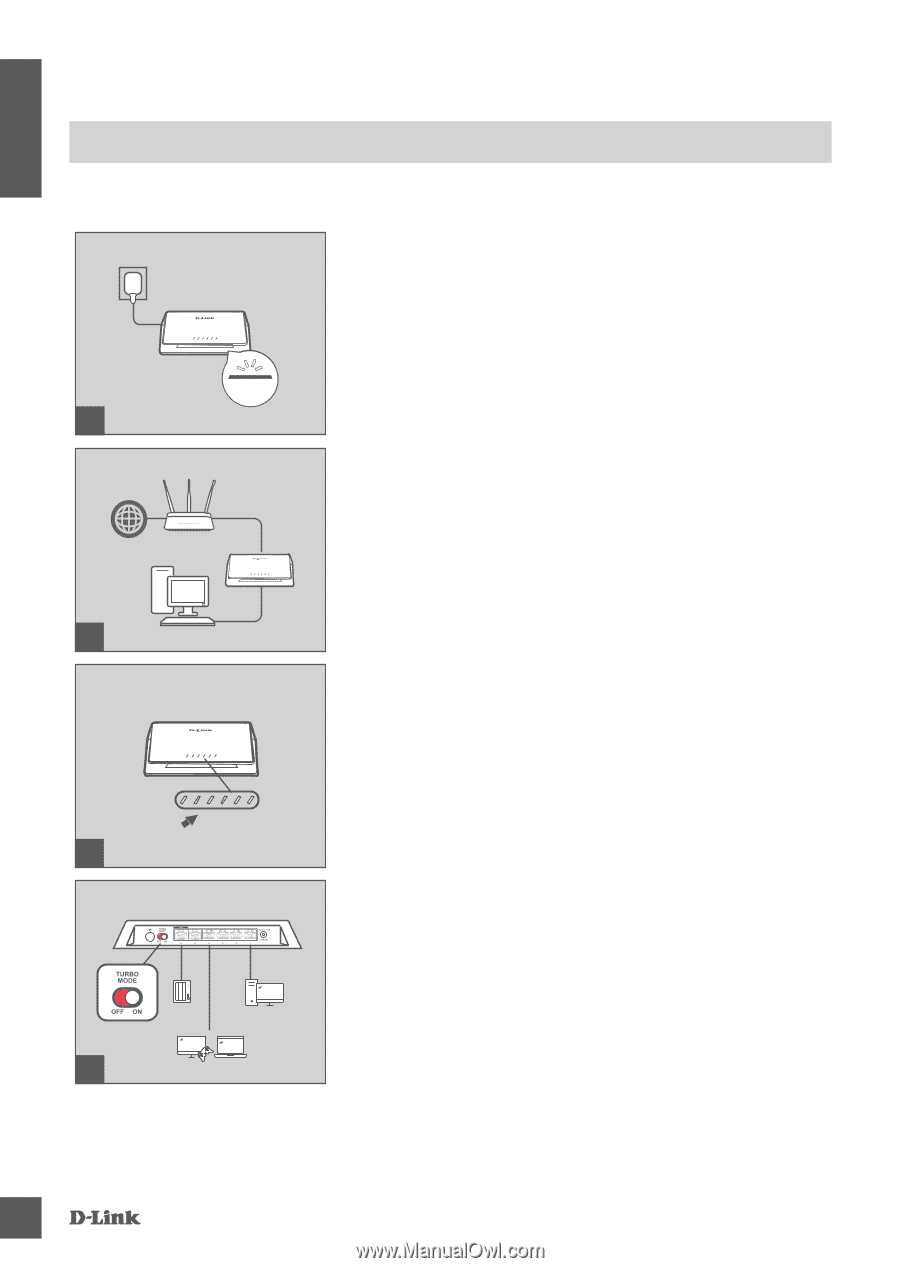
ENGLISH Connect the Switch to Your Network Power 1 Internet Router Installation & Setup Step 1 Plug the supplied power adapter into the DMS-106XT and the other end into a power outlet, power strip, or surge protector (recommended). Verify that the Power indicator is lit on the switch. Step 2 If your switch will be up-linking to your existing gateway/router/ firewall, connect another Ethernet cable from your gateway/router/ firewall LAN port to an available port on your switch. 2 LED 3 4 Step 3 Connect one end of an Ethernet cable into the device you want to connect to the switch and the other end into one of the Ethernet ports on the switch. Check the Link lights (LEDs) on the switch to verify a proper connection. Step 4 (optional) Turn on TURBO mode to enable low latency and multicast function to make your network efficient for multi-media application (e.g. gaming, video streaming or file download.. etc). The port-based QoS will be activated as well when TURBO mode is on. The user may connect the device to the desired port. Port 1 & Port 6> Port 2> Port 3> Port 4>Port 5 (Port 6 10GE uplink port has the highest priority as Port 1). If you just need normal data transmission, leave the switch in standard mode to enable excellent performance in a Wi-Fi 6 network. 2 D M S -10 6X T
-
 1
1 -
 2
2 -
 3
3 -
 4
4 -
 5
5 -
 6
6 -
 7
7 -
 8
8 -
9
-
10
-
11
-
12
-
13
-
14
-
15
-
16
-
17
-
18
-
19
-
20
-
21
-
22
-
23
-
24
-
25
-
26
-
27
-
28
-
29
-
30
-
31
-
32
-
33
-
34
-
35
-
36
-
37
-
38
-
39
-
40
-
41
-
42
-
43
-
44
-
45
-
46
-
47
-
48
-
49
-
50
-
51
-
52
-
53
-
54
-
55
-
56
-
57
-
58
-
59
-
60
-
61
-
62
-
63
-
64
-
65
-
66
-
67
-
68
-
69
-
70
-
71
-
72
-
73
-
74
-
75
-
76
-
77
-
78
-
79
-
80
-
81
-
82
-
83
-
84
-
85
-
86
-
87
-
88
-
89
-
90
-
91
-
92
-
93
-
94
-
95
-
96
-
97
-
98
-
99
-
100
-
101
-
102
-
103
-
104
-
105
-
106
-
107
-
108
-
109
-
110
-
111
-
112
-
113
-
114
-
115
-
116
-
117
-
118
-
119
-
120
-
121
-
122
-
123
-
124
-
125
-
126
-
127
-
128
-
129
 |
 |