D-Link DNR-202L Quick Install Guide - Page 3
Installation, Windows Only - setup
 |
View all D-Link DNR-202L manuals
Add to My Manuals
Save this manual to your list of manuals |
Page 3 highlights
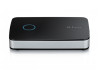
ENGLISH Installation - Windows Only Step 1: Connect the included Ethernet cable to the Ethernet port located on the rear panel of the DNR-202L and attach it to your network. Step 2: Connect the power supply to the power connector located on the rear panel of the DNR-202L and connect it to a wall outlet or power strip. Power is confirmed when the blue LED Power Indicator located on the front panel is lit. Step 3: Open your web browser and go to http://www.mydlink.com/support. Then, click the Storage tab and select your product to download the Setup Wizard. Step 4: Click the Start button to start the wizard and follow the instructions to set up your NVR. If you want to add cameras to your previously-configured DNR-202L, click the Skip button. Note: Ensure that cameras have been installed on the network before initiating the DNR-202L setup. 3
-
 1
1 -
 2
2 -
 3
3 -
 4
4 -
 5
5 -
 6
6 -
 7
7 -
 8
8
 |
 |
