D-Link DSN-3400-10 Software User's Guide for DSN-1100-10 - Page 36
Setting the System Date and Time
 |
UPC - 790069299766
View all D-Link DSN-3400-10 manuals
Add to My Manuals
Save this manual to your list of manuals |
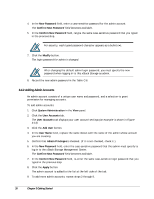
Page 36 highlights
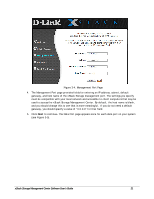
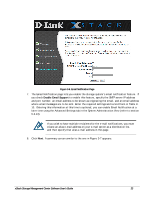
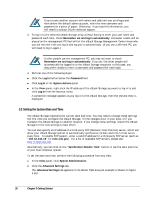
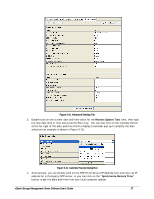
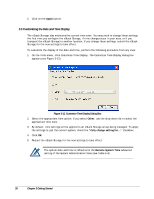
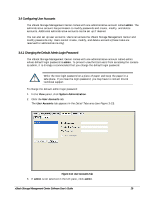
If you create another account with admin and add/edit user privileges and then delete the default admin account, write the new username and password on a piece of paper. Otherwise, if you lose this information, you will need to contact D-Link technical support. 3. To log in to the selected xStack Storage array without having to enter your user name and password each time, check Remember me and log in automatically. A browser cookie will be placed on the management PC that will let the xStack Storage Management Center know who you are the next time you log in and log you in automatically. (If you use a different PC, you will need to log in again.) If other people use the management PC, you may not want to check Remember me and log in automatically. If you do, the other people will automatically be logged in to the xStack Storage resources. In this case, you may prefer simply to enter a username and password for each login. 4. Perform one of the following steps: Click the Log In button below the Password field. Click Log In in the System Actions panel. In the View panel, right-click the IP address of the xStack Storage you want to log in to and click Log In from the shortcut menu. A connection message appears as you log in to the xStack Storage, then the Volume View is displayed. 3.2 Setting the System Date and Time The xStack Storage maintains the current date and time. You may need to change these settings the first time you configure the xStack Storage, if time changes occur in your area, or if you transport the xStack Storage to another location. If you change these settings, restart the xStack Storage for the new settings to take effect. You can also specify an IP address of a third-party NTP (Network Time Protocol) server, which will allow your xStack Storage system to automatically synchronize its date and time to that server every hour. To enable NTP support, enter a valid IP address for a third-party NTP server (such as "192.43.244.18" for time.nist.gov). For a list of available NTP servers, please see: http://www.ntp.org. Alternatively, you can click on the "Synchronize Remote Time" button to use the date and time of your host computer system. To set the date and time, perform the following procedure from any view. 1. In the View panel, click System Administration. 2. Click the Advanced Settings tab. The Advanced Settings tab appears in the Detail Tabs area (an example is shown in Figure 3-10). 26 Chapter 3 Getting Started
-
 1
1 -
2
-
3
-
4
-
5
-
6
-
7
-
8
-
9
-
10
-
11
-
12
-
13
-
14
-
15
-
16
-
17
-
18
-
19
-
20
-
21
-
22
-
23
-
24
-
25
-
26
-
27
-
28
-
29
-
30
-
 31
31 -
 32
32 -
 33
33 -
 34
34 -
 35
35 -
 36
36 -
 37
37 -
 38
38 -
 39
39 -
 40
40 -
 41
41 -
42
-
43
-
44
-
45
-
46
-
47
-
48
-
49
-
50
-
51
-
52
-
53
-
54
-
55
-
56
-
57
-
58
-
59
-
60
-
61
-
62
-
63
-
64
-
65
-
66
-
67
-
68
-
69
-
70
-
71
-
72
-
73
-
74
-
75
-
76
-
77
-
78
-
79
-
80
-
81
-
82
-
83
-
84
-
85
-
86
-
87
-
88
-
89
-
90
-
91
-
92
-
93
-
94
-
95
-
96
-
97
-
98
-
99
-
100
-
101
-
102
-
103
-
104
-
105
-
106
-
107
-
108
-
109
-
110
-
111
-
112
-
113
-
114
-
115
-
116
-
117
-
118
-
119
-
120
-
121
-
122
-
123
-
124
-
125
-
126
-
127
-
128
-
129
-
130
-
131
-
132
-
133
-
134
-
135
-
136
-
137
-
138
-
139
-
140
-
141
-
142
-
143
-
144
-
145
-
146
-
147
-
148
-
149
-
150
-
151
-
152
-
153
-
154
-
155
-
156
-
157
-
158
 |
 |
