D-Link DUB-1312 Quick Install Guide - Page 4
English - driver windows 10
 |
View all D-Link DUB-1312 manuals
Add to My Manuals
Save this manual to your list of manuals |
Page 4 highlights
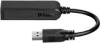
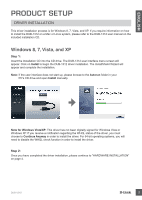
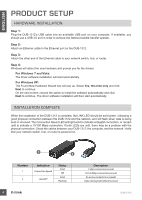
ENGLISH PRODUCT SETUP HARDWARE INSTALLATION Step 1: Plug the DUB-1312's USB cable into an available USB port on your computer. If available, you should use a USB 3.0 port in order to achieve the fastest possible transfer speeds. Step 2: Attach an Ethernet cable to the Ethernet port on the DUB-1312. Step 3: Attach the other end of the Ethernet cable to your network switch, hub, or router. Step 4: Windows will detect the new hardware and prompt you for the drivers. For Windows 7 and Vista: The driver software installation will start automatically. For Windows XP: The Found New Hardware Wizard box will pop up. Select Yes, this time only and click Next to continue. On the next screen, choose the option to install the software automatically and click Next to continue. The driver software installation will then start automatically. INSTALLATION COMPLETE When the installation of the DUB-1312 is complete, the LINK LED should be solid green, indicating a good physical connection between the DUB-1312 and the network, and will flash when data is being sent or received. The Connection Speed LED will light solid to indicate a Gigabit connection, or remain unlit to indicate a 10/100 Mbps connection. If both LEDs are unlit, there may be a problem with the physical connection. Check the cables between your DUB-1312, the computer, and the network. Verify that your network switch, hub, or router is powered on. 1 2 Number 1 2 Indication Connection Speed Link/ACT Status Solid Off Solid Flashing Description 1 Gbps connection present 10/100 Mbps connection present An active connection is present Data is being transmitted/received 4 DUB-1312
-
 1
1 -
 2
2 -
 3
3 -
 4
4 -
 5
5 -
 6
6 -
 7
7 -
 8
8 -
 9
9 -
 10
10 -
11
-
12
-
13
-
14
-
15
-
16
-
17
-
18
-
19
-
20
-
21
-
22
-
23
-
24
 |
 |
