Dacor EH3612 Installation Instructions - Page 45
If the hood fails to operate properly
 |
View all Dacor EH3612 manuals
Add to My Manuals
Save this manual to your list of manuals |
Page 45 highlights
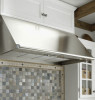
Installation Instructions Verifying Proper Operation Installation Checklist Feature keys Main power switch Filters 1. Make sure the main power switch is off. 2. Turn on power at the circuit breaker panel or fuse box. 3. Turn on the main power switch. The control panel will flash several times during initialization. 4. Install the filter(s). ON OFF 5. Touch the LIGHTS feature key. Verify that all the lights come on. 6. Touch the LIGHTS key again to turn the lights to the low setting. 7. Touch the LIGHTS key again to turn the lights off. 8. Touch the FAN feature key once and release. Verify that one light is showing on the fan speed indicator and that the fan is on at low speed. Touch and release the FAN key repeatedly, three times. Verify that with each touch of the key, the number of lights on the fan speed indicator increases and that the fan speed increases. 9. Touch the FAN key again to turn the fan off. If the hood fails to operate properly: • Verify that power is supplied to the hood. • Check the electrical connections to ensure that the installation has been completed correctly. • Repeat the above test. • If the hood still does not work, contact Dacor Distinctive Service at (877) 337-3226. Do not attempt to repair the appliance yourself. If you need service, be sure to have the model and serial numbers available when you call. See the inside cover for location. Do not attempt to repair the appliance yourself. Dacor is not responsible for service required to correct a faulty installation. warning • To ensure a safe and proper installation, the following checklist should be completed by the installer to ensure that no part of the installation has been overlooked. • Proper installation is the responsibility of the homeowner. The importance of proper installation of your Dacor range hood cannot be overemphasized. □□ Is the hood properly attached to the wall according to the instructions on page 12? □□ Is the duct work completely installed? Are all joints attached with sheet metal screws and wrapped with duct tape? See page 12. □□ Is the range hood wired and grounded according to these instructions and in accordance with all applicable electrical codes? See Page 12. □□ Are the filters properly installed according to the use and care manual? □□ Has proper operation been verified? □□ Has the warranty been activated on-line or the warranty card been filled out completely and mailed? 15
-
 1
1 -
2
-
3
-
4
-
5
-
6
-
7
-
8
-
9
-
10
-
11
-
12
-
13
-
14
-
15
-
16
-
17
-
18
-
19
-
20
-
21
-
22
-
23
-
24
-
25
-
26
-
27
-
28
-
29
-
30
-
31
-
32
-
33
-
34
-
35
-
36
-
37
-
38
-
39
-
 40
40 -
 41
41 -
 42
42 -
 43
43 -
 44
44 -
 45
45 -
 46
46 -
 47
47 -
 48
48
 |
 |
