Danby DAR125SLDD Product Manual - Page 5
Installation Instructions - wattage
 |
View all Danby DAR125SLDD manuals
Add to My Manuals
Save this manual to your list of manuals |
Page 5 highlights
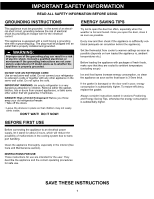
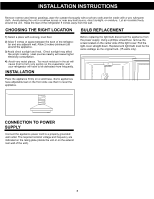
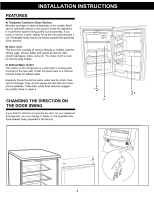
INSTALLATION INSTRUCTIONS Remove exterior and interior packings, wipe the outside thoroughly with a soft dry cloth and the inside with a wet, lukewarm cloth. Avoid placing the unit in a narrow recess or near any heat source, direct sunlight, or moisture. Let air circulate freely around the unit. Keep the rear of the refrigerator 5 inches away from the wall. CHOOSING THE RIGHT LOCATION BULB REPLACEMENT 1) Select a place with a strong, level floor. 2) Allow 5 inches of space between the back of the refrigerator and any adjacent wall. Allow 2 inches (minimum) all around the appliance. 3) Avoid direct sunlight and heat. Direct sunlight may affect the acrylic coating. Heat sources nearby will cause higher electricity consumption. 4) Avoid very moist places. Too much moisture in the air will cause frost to form very quickly on the evaporator, and your refrigerator will have to be defrosted more frequently. INSTALLATION Before replacing the light bulb disconnect the appliance from the power supply. Using a phillips screwdriver, remove the screw located on the center side of the light cover. Pull the light cover straight down. Replacement light bulb must be the same wattage as the original bulb. (15 watts only) Place the appliance firmly on a solid base. Some appliances have adjustable feet on the front side; use them to level the appliance. CONNECTION TO POWER SUPPLY Connect the appliance power cord to a properly grounded wall outlet. The required nominal voltage and frequency are indicated on the rating plate (inside the unit or on the exterior rear wall of the unit). 3
-
 1
1 -
 2
2 -
 3
3 -
 4
4 -
 5
5 -
 6
6 -
 7
7 -
 8
8 -
 9
9 -
 10
10 -
 11
11 -
12
-
13
-
14
-
15
-
16
-
17
-
18
-
19
 |
 |
