Danby DPAC8KDB Product Manual - Page 12
Maintenance
 |
View all Danby DPAC8KDB manuals
Add to My Manuals
Save this manual to your list of manuals |
Page 12 highlights
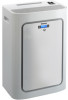
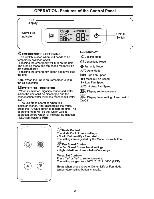
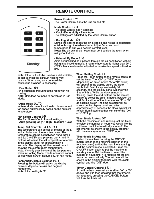
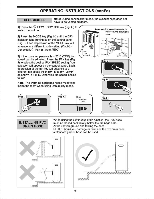
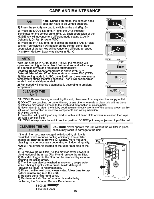
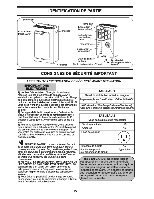
CARE AND MAINTENANCE FAN Note: During Fan mode, the exhaust hose does not have to be vented outdoors. 1) Press the (on/off) key pad to switch on the unit (Fig. G). 2) Press the MODE key (Fig. H) until the DRY indicator illuminates on the control panel (Fig. L). Each depression of the FI H MODE key will advance to a different mode setting (CoolO- Dehumidify0- Fan • - Auto AUTO) 3) Press the FAN key (Fig. J) to select the desired FAN SPEED setting. Your selection will appear on the control panel. Each depression of the fan key will advance to a different fan speed (Highlise- Med.o*- Lows.) as shown in Fig. K. AUTO Fig.K With unit running in AUTO mode (Fig.M), the machine will operateaccording to the ambient temperature, and will change its operational type and fan speed automatically: Cooling Mode: When temperature is above 25°C (77°F) Dehumidifier Mode: When temperature is below 25°C (77°F). 1) After setting mode to AUTO, the unit will test the environmental temperature during the first 3 seconds. Then it will decide which mode to automatically operate in. 2) Fan speed will change automatically according to ambient temperature. CLEANING Till UNIT In. L 2 FI~yM AUTOc-c-L. ) CAUTION: Before cleaning or servicing this unit, disconnect from any electrical supply outlet. 1) DO NOT use gasoline, benzene, thinner, or any other chemicals to clean this unit, as these substances may cause damage to the finish and deformation of plastic parts. 2) Never attempt to clean the unit by pouring water directly over any of the surface areas, as this will cause deterioration of electrical components and wiring insulation. 3) Unplug the unit. 4. Clean the unit by wiping off any dirt/dust with a soft damp cloth or vacuum cleaner, then wipe dry with a dry soft cloth. CAUTION: Always store the unit in vertical position. DO NOT put heavy objects on top of the unit. CLEANING THE AIR CAUTION: Never operate this unit without the air filter in place, FILTER as this may result in damage to the unit. If the air filter becomes clogged with dust/dirt, air flow is restricted, which reduces cooling efficiency. The air filter should be cleaned every two (2) weeks. More frequent cleaning may be necessary depending on indoor air quality. ig. 5 NOTE: The air filter is located at the upper rear side of the unit. 1) To remove the air filter: Pull the air filter cover upward in the direction of the arrow (Fig. 5) and remove the air filter. 2) Dust/dirt clogged in the filter can be removed by vacuum cleaning the soiled areas. 3) The filter can also be washed in lukewarm, soapy water while rubbing it lightly with a brush. A mild detergent (diswashing liquid) is recommended. 4) Rinse the filter well using clean water. Allow time to dry before reinstalling into the unit 5) Replace the air filter and cover. \ 6) Replacement air filter information is available by contacting the Customer Service Department at: 1-800-26-WNW 1-800-263-2629 10
-
 1
1 -
2
-
3
-
4
-
5
-
6
-
 7
7 -
 8
8 -
 9
9 -
 10
10 -
 11
11 -
 12
12 -
 13
13 -
 14
14 -
 15
15 -
 16
16 -
 17
17 -
18
-
19
-
20
-
21
-
22
-
23
-
24
-
25
-
26
-
27
-
28
 |
 |