Danby DWC114BLSDD Product Manual - Page 9
Installation Instructions - Door Swing Reversal - wine cooler
 |
View all Danby DWC114BLSDD manuals
Add to My Manuals
Save this manual to your list of manuals |
Page 9 highlights
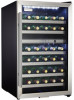
Installation Instructions - Door Swing Reversal TOOLS REQUIRED Phillips #2 screwdriver and an adjustable wrench. WARNING! Excessive Weight Hazard Use two or more people when moving the wine cooler. 1 Rubber cover 2 Screws 3 Decorative cover 4 Screws 5 Top hinge 6 Decorative nail 7 Screws 8 Lower hinge 9 Cabinet leg 10 Extrusion-board of lamp switch 11 Screws 12 Decorative nail 1ˊClose the door and take out rubber cover (1), unscrew two screws (2) and remove decorative cover (3). (Fig.1) 2ˊUnscrew screws (4) and take out top hinge (5), then remove the door. (Fig. 2) 3ˊPut door safety, unscrew decorative nail (12) and take out 2 screws (11) at bottom, pull out extrusion-board of lamp switch (10) and fix it at top of door. Block holes at bottom of door with spare decorative nail. (Fig. 5) 4ˊPull out decorative nail (6) from left top of cabinet. (Fig.3) 5ˊUnscrew 3 screws (7) from right bottom of cabinet and remove lower hinge (8). (Fig.4) 6ˊPull out cabinet leg (9) from left bottom of cabinet and fix it onto right bottom of cabinet. (Fig.4) 7ˊFix the lower hinge (8) onto left bottom of cabinet with screws (7). (Fig. 4) 8ˊThe door revolves 180 degrees, put lower door axis to aim at lower hinge (8) and install the door onto lower hinge (8), then close the door carefully. (Fig.5) 9ˊFix top hinge (5) onto left top of cabinet with screws (4), adjust door and install decorative cover (3) and rubber cover (1). (Fig.6) 10. Block 3 screw holes at right top of cabinet with spare decorative nail. 8
-
 1
1 -
2
-
3
-
 4
4 -
 5
5 -
 6
6 -
 7
7 -
 8
8 -
 9
9 -
 10
10 -
 11
11 -
 12
12 -
 13
13 -
 14
14 -
15
-
16
-
17
-
18
-
19
-
20
-
21
-
22
-
23
-
24
 |
 |
