DeLonghi BCO130T Owner Manual - Page 10
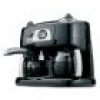
Cleaning And Maintenance, Cleaning The Milk Reservoir And, Frother, Descaling, Espresso/cappuccino, - coffee and espresso maker
 |
View all DeLonghi BCO130T manuals
Add to My Manuals
Save this manual to your list of manuals |
Page 10 highlights
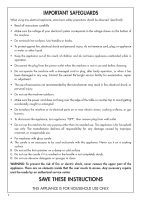
NOTE: Each level of the milk reservoir indicates the quantity of milk necessary to make one cappuccino. NOTE: When using small cups, to prevent the milk from splashing out, fit the splash hood onto the milk reservoir spout (Fig. 29). 9.When you have finished, turn the appliance off by pressing the ESPRESSO/CAPPUCCINO ON/OFF button. Important: After making the last cappuccino and before turning the appliance off, raise the milk intake tube above the level of any milk left (as shown in Fig. 30) and let the steam vent for a few seconds. Close the steam knob with the tube raised as described above. To ensure hygiene, we recommend that you always follow this procedure to prevent milk from stagnating in the internal circuits of the machine. 10.To make four cappuccinos, repeat the previous steps, paying attention to the quantity of water, milk and ground coffee indicated in the table at the end of the instructions. Before positioning the Vario System selector in the Cappuccino position, let the coffee drip into the carafe until it reaches level 4 on the COFFEE LEVEL side (as shown in Figure 31). NOTE: When pouring milk into the reservoir, never exceed level 4; otherwise the milk may continue to drip from the spout after you have finished making the cappuccino. CLEANING AND MAINTENANCE • Before carrying out any cleaning operations, let the appliance cool down and unplug it from the mains outlet. • Never immerse the coffee maker in water: it is an electrical appliance. • Do not use solvents or abrasive detergents to clean the appliance. A soft damp cloth is sufficient. • Clean the filter-holder, drip tray, boiler outlet, carafe and water tank regularly. Never wash the filter-holder in the dishwasher. • From time to time, check to make sure that holes in the espresso coffee filter are not obstructed. If necessary, clean using a pin (see Fig. 32). • Check the Flavor Savor periodically, removing it from the filter-holder cone by pulling it upwards (Fig. 33). Clean it thoroughly and replace. CLEANING THE MILK RESERVOIR AND FROTHER The milk reservoir and frother must be cleaned after every use. Proceed as follows: 1. Remove the milk reservoir by pressing catch A (Fig. 34) and at the same time pulling the reservoir upwards. 2. Remove the red frother by pressing catch B and at the same time pulling the frother upwards (Fig. 34). 3. Remove the rubber mixer (Fig. 35). 4. Wash the reservoir, frother and mixer thoroughly with hot water. Make sure the four holes on the frother (Fig. 36), in particular the holes indicated by the arrows (C), are not obstructed. If necessary, clean using a toothpick. 5. Once clean, re-assemble all the components correctly. In particular, make sure the rubber mixer is fully inserted and the milk reservoir and red frother are inserted until you hear a click. If these components are not cleaned after each use, the frother may not work properly, the milk may not be drawn up, or milk may drip from the reservoir spout. DESCALING THE ESPRESSO/CAPPUCCINO SECTION Over time, heating the water used to make the coffee leads to lime scale buildup in the internal circuits of the appliance. We therefore recommend that you descale the espresso maker every 2-6 months (depending on the hardness of the water and the frequency of use). Proceed as follows: 1. Fill the small carafe with water up to level 4 on the WATER LEVEL side. 2. Dissolve 1 spoonful (about 15-20 grams) of citric acid (sold at drugstores) in the water. 3. Pour the solution into the boiler and screw on the cap. 4. Make sure the steam knob is closed and attach the filter-holder. 5. Place the carafe under the espresso filter-holder. 6. Turn the Vario System selector to LIGHT and turn the coffee maker on. 7. After a few minutes, the solution begins to run into the carafe. Every now and then, turn the steam knob to let out a little of the solution from the milk reservoir spout. 8. When all the solution has run through, turn the appliance off and let it cool down. 9. To eliminate the descaling solution residues, repeat steps 1 to 8 at least twice, using water only (without adding citric acid). 11
-
 1
1 -
2
-
3
-
4
-
 5
5 -
 6
6 -
 7
7 -
 8
8 -
 9
9 -
 10
10 -
 11
11 -
 12
12 -
 13
13
 |
 |
