DeLonghi D660UX Owner Manual - Page 6
DeLonghi D660UX Manual
 |
View all DeLonghi D660UX manuals
Add to My Manuals
Save this manual to your list of manuals |
Page 6 highlights
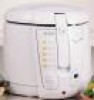
FRYING I . As ADO ri as ihe pilot lamp switches off, move the handl.e Alder in the handle (G] bock. wands. then move the handle downwards to lower the basket Iwo rhe oil • A considerable quantity of steam will escape h-am the Mier cover, when the basket its lowered into the oil. This is perfectly normal. • it is also oarmel far -drops of condonSO' Pion to fall from Phe lid onto the plastic side and araenci the brisket hanclia while in use. • When basket .5 la...feted into the the inside of the Inspection window lif provided] will inwiriedic.* become morn kip, This steam will ciisoppeor gradually n:t5 the food is cooked. For models with viewing wiTidow, grease the gloss door with a 'MU cpg before cooking to reduce the. accumulation of condensate and Ihereby IN VIE MOOELS FITTED WITH THE ELECTRONIC MINUTE TIMER 1. 50 the cooking time by pressing key 14'; etpley •M' will show 'fie minutes set. 2. The Egunn wilt begin Scaling immediately afterwards, 1,irifying that the coo:Inns time hot. shorted. The last minute will be visualised in seconds. .3. In the event of error, the Frew cooking time be set by limping the burFon pressed clo.ral for more than 2 seconds. The display will rani itself, then roped' os lor porn! 1 labove). 4, The minute timer wili show the end of the onokirvg time with two leriel, al beeps at on intereol of ofxio 20 seconds_ In order to switch elf the audible dorm rou th,ily need peesx minute tinier key Ikl" WARNING: the minute timer does net ance off. the appli- Reflacing the mine* honer battery (Ifig,4) ▪ Remove lie minute timer from its compartrrierif by prying from the upper side ism fib, 4A). TCPTFI the battery CaVlif Ng- 410 11266914 err true 160d irr dri cirtfackwia dirOdiOrr LAM .1.0 rs redeased. • Replace .the ixprrery with anarfpig- aithe scene type. EN OF FRYING TIME When die selected frying lime is elapsed,. raise the lake and check Ifni. foccti5 golciari brown as. di ire. Ails can be dare without opaning the /id in models with window. When Ihe food is cooked, 'witch the appliance off by unplugging it AEIg.5). Leowe the corncob to drip For o moment and riven open the lid and FEMME the bosirer wilIKKer 14014ing if too vigeroushk tifrying robe donsin temFilmes reg. pot/x:Peg de rfrO open gd; waif for iierpetor rr fa go offend fower &mire again fsec •C12'4425.X100likt FILTERING OF OIL OR FAT II is odwsable ro Mier the ea OF far after frying in order to remove any bocl particles. especicilly If he fmael is coated In lareadcrumhs or flour. Food panicles rernainin9 in the oil tend to burn, which causes the oil to 4r....lri,r•ria more qvickly For models Fitted with o drainage Probe Proceed as folicrws: 1 . Robe the kd of the ityer (lad rernow the bull el. Check that the ol is sufficierrily eel fobor.rl 2 hasiT4. 2. Oben the panty' (PI and rerroye the drainage lutre {O] os shown in lig. 6- 3, Remove the cop (fig 7y Toke cane to inifith the end al the tube with two lingers so rl-ai Ihe oir doe: not drain unlit the tube hos burn placed in o receptacleDrain the oil into a suitable recepiocle S. Ike a sponge or a paper kitchen towel ro remove deport from the bowl iler4oce the drainage tube Os comporkrneril. DO M it forget to la€e th9 cap. 7. Mace the filter supplied with the appliance in the Lick torn al the basket 'Pig. BI. Spore Msgr.& con b obtained from your dealer or from ow service centres. Pour the oil very slowly into the basket, eniwing lhol it does runr oyorfiow from the filter Rfig. 91. Norm After iilrerieo the ail, it eon be lab in the fryer- However,. Should o long period of time pass between ono frying oncl the next, it is adv4oble to store the oil in a closed container,. OW expowd 10 direct light in order to Mead its deterivralionTv drain the oil ,into the reoeploole., rerlDVIEP the rmh drainage tube and proceed at shown in Fig 7. ail used rot frying sh.Duld be stored separately from ait .esoel far other fords. /I fat Is 'used for frying, this should not be allowed to cool too much,. otherwise it may sandal... o
-
 1
1 -
 2
2 -
 3
3 -
 4
4 -
 5
5 -
 6
6 -
 7
7 -
 8
8 -
 9
9 -
 10
10
 |
 |
