DeLonghi D689UX Owner Manual - Page 6
Operating Instructions
 |
View all DeLonghi D689UX manuals
Add to My Manuals
Save this manual to your list of manuals |
Page 6 highlights
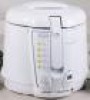
D6 16-01-2003 16:07 Pagina 6 OPERATING INSTRUCTIONS FILLING THE BOWL • Raise the basket into its upper position by lifting upwards on the handle (Fig. 1). • Push on the I button (Fig. 1) and open the lid. • Remove the basket by pulling it up (Fig. 2). The cover must ALWAYS be closed whenever the basket is raised or lowered. • Pour 2 lt. of oil into the bowl (or approx.1,8 kg./3,6 lb fat). The level of oil in the bowl must always be between the minimum and maximum marks. The maximum level mark should never be exceeded. For best results use a good peanut seed oil. Olive oil is optimal due to its slower degradation, but prolonged use accentuates its flavour. Above all, avoid mixing different oils. If using blocks of solid fat, cut into small pieces to avoid fryer heating dry in the first few minutes. The temperature must be set to 150°C/300°F until the fat has melted completely. The required temperature can then be set. Melt solid fat directly in pot. Only when completely melted, should the basket be lowered. PRE-HEATING 1. Place the food to be fried in the basket. Do not over- fill the basket (maximum 1 kg/2lb of fresh potatoes). 2. Replace the basket in the bowl in the raised position and close lid by lightly pushing down until catch snaps shut. 3. Set the sliding thermostat control (P) (fig. 3) to the desired temperature (see enclosed table). When the selected temperature is reached, the control light will switch off. FRYING 1. As soon as the pilot lamp switches off, move the handle slider in the handle (G) backwards, then move the handle downwards to lower the basket into the oil. • A considerable quantity of steam will escape from the filter cover, when the basket is lowered into the oil. This is perfectly normal. • It is also normal for drops of condensation to fall from the lid onto the plastic sides and around the basket handle while in use. • When basket is lowered into the oil, the inside of the inspection window (if provided) will immediately become steam up. This steam will disappear gradually as the food is cooked. For models with viewing window, grease the glass door with a little oil before cooking to reduce the accumulation of condensate and thereby improve visibility. • Never move the appliance while the oil is still hot. • To move the appliance, use the special lifting handles (L). (Never lift by the basket handle). IN THE MODELS FITTED WITH THE ELECTRONIC MINUTE TIMER 1. Set the cooking time by pressing key "N"; display "M" will show the minutes set. 2. The figures will begin flashing immediately afterwards, signifying that the cooking time has started. The last minute will be visualised in seconds. 3. In the event of error, the new cooking time can be set by keeping the button pressed down for more than 2 seconds. The display will reset itself, then repeat as for point 1 (above). 4. The minute timer will show the end of the cooking time with two series of beeps at an interval of about 20 seconds. In order to switch off the audible alarm you only need press minute timer key "N". WARNING: the minute timer does not switch the appliance off. Replacing the minute timer battery (fig.4) • Remove the minute timer from its compartment by prying it from the upper side (see fig. 4A). • Turn the battery cover (fig. 4B) placed on the back in an anticlockwise direction until it is released. • Replace the battery with another of the same type. • Remember to dispose of the battery in accordance with the laws currently in force regarding the disposal of toxic products. END OF FRYING TIME When the selected frying time is elapsed, raise the basket and check that food is golden brown as desired. This can be done without opening the lid in models with window. When the food is completely cooked, switch the appliance off by setting the thermostat control to "Off" 6
-
 1
1 -
 2
2 -
 3
3 -
 4
4 -
 5
5 -
 6
6 -
 7
7 -
 8
8 -
 9
9 -
 10
10 -
 11
11 -
 12
12 -
13
-
14
-
15
-
16
-
17
-
18
-
19
-
20
-
21
-
22
-
23
-
24
-
25
-
26
-
27
-
28
-
29
-
30
-
31
 |
 |
