DeLonghi DCU500T Owner Manual - Page 6
Installation, How To Make Coffee - 20 50 cup coffee urn
 |
View all DeLonghi DCU500T manuals
Add to My Manuals
Save this manual to your list of manuals |
Page 6 highlights
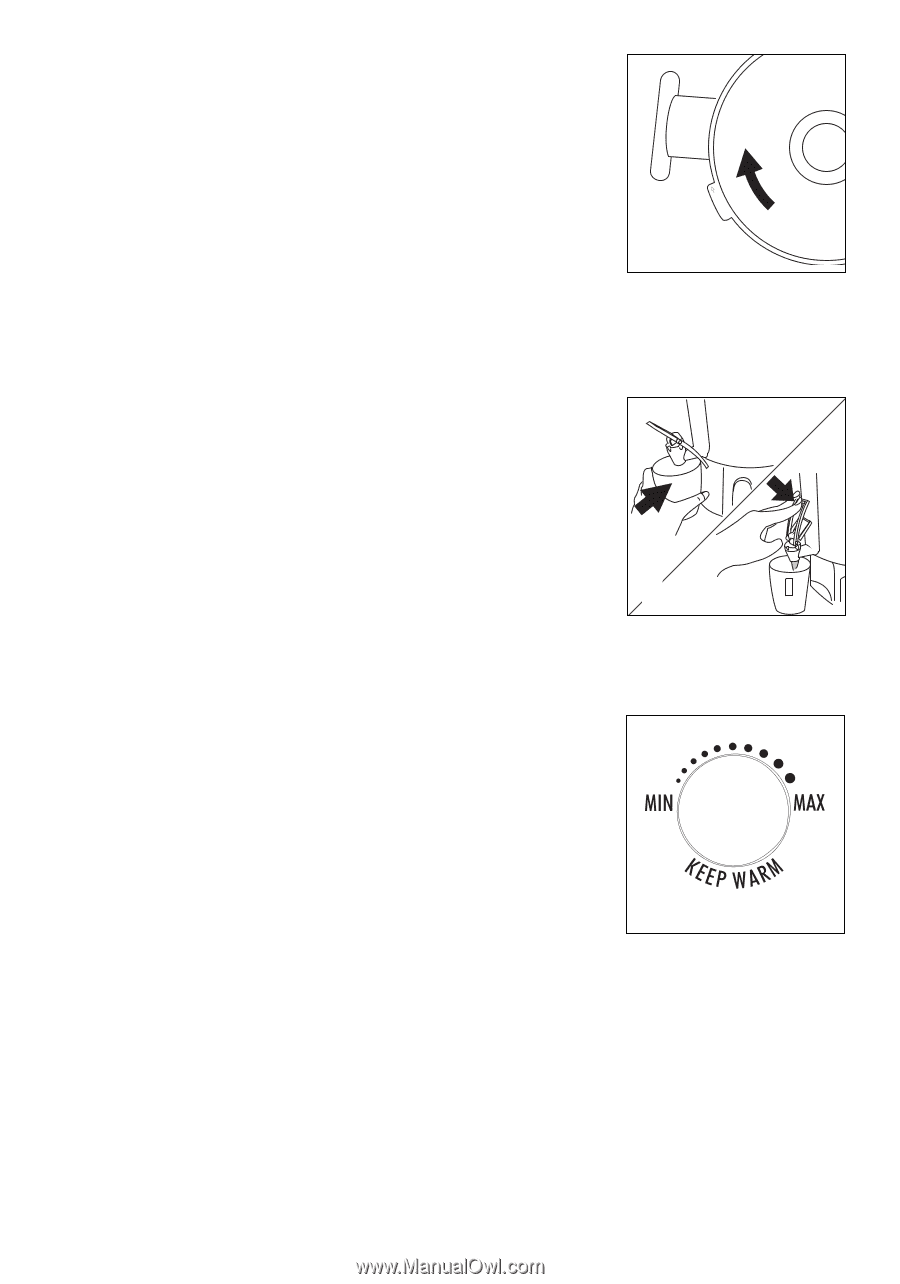
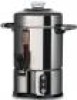
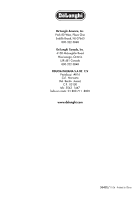
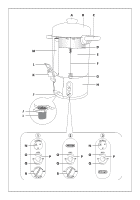
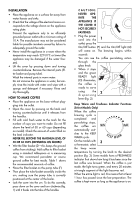
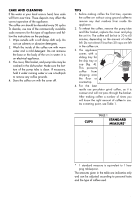
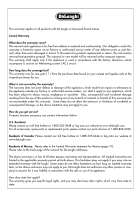
INSTALLATION • Place the appliance on a surface far away from water faucets and sinks. • Check that the voltage of the electrical mains corresponds to the voltage shown on the appliance rating plate. Connect the appliance only to an efficiently grounded power outlet with a minimum rating of 10 A. The manufacturer may not be considered liable for possible incidents caused by failure to adequately ground the outlet. • Never install the appliance in a room where the temperature may reach 32°F/0°C or lower (the appliance may be damaged if the water freezes). • Lift the cover by pressing down and turning counterclockwise. Remove the internal parts (filter basket and pump tube). Wash the internal parts in warm water. Do not immerse the appliance in water, but simply rinse the inside with water and wipe with a sponge and detergent if necessary. Rinse and dry thoroughly. HOW TO MAKE COFFEE • Place the appliance on the base without plug- ging into the outlet. • Open the cover by pressing on the knob and turning counterclockwise until it releases from the handles. • Fill with cold fresh water to the mark for the number of cups you want to make. Do not fill above the level of 50 or 60 cups (depending on model). Check the amount of water filled on the level indicator. NEVER FILL BEYOND THE MAXIMUM LEVEL OF 50 OR 60 CUPS (DEPENDING ON MODEL)! • Wet the filter basket (D - this keeps the ground coffee from sticking). Add coffee to filter basket using a standard tablespoon or a measuring cup. We recommend percolator or course ground coffee for best results. Table 1 shows the recommended amounts of coffee. • Place the filter basket on the pump tube (F). • Then place the tube-basket assembly inside the urn, making sure the pump tube is correctly positioned at the center of the boiler. • Lock the cover into the urn. To do this correctly, press down on the cover and turn clockwise (fig. 1) until it hooks into the tabs of the handles. 6 CAUTION: NEVER OPE- RATE THE APPLIANCE IF THE COVER IS NOT SECURELY TURN TO LOCK FASTENED. • Plug the power cord into the 1 outlet; press the On/Off button (P) and the On/Off light (Q) will come on. The brewing begins within seconds. You can see the coffee percolating action through the glass knob. • When it stops and the green READY light (O) illuminates, the coffee is ready to serve using the 2 dispensing lever (fig. 2). Keep Warm and Freshness Indicator Functions (Select Models Only) When the coffee brewing cycle is completed and percolating stops, the coffee urn automatically switches to the KEEP WARM cycle. On the models with 3 a thermostat, select the keep warm temperature by turning the knob to the desired position (fig. 3). Some models have a FRESHNESS indicator that shows how long it has been since the last coffee was brewed. When the coffee is just made, the light turns green, and every 20 minutes a triangle segment of the light becomes red. When the entire light is red, this means that at least 1 hour has passed since the last preparation. The coffee is kept warm as long as the appliance is on.
-
 1
1 -
 2
2 -
 3
3 -
 4
4 -
 5
5 -
 6
6 -
 7
7 -
 8
8
 |
 |