DeLonghi ESAM6620 Owner Manual - Page 12
Preliminary Checks - instructions
 |
View all DeLonghi ESAM6620 manuals
Add to My Manuals
Save this manual to your list of manuals |
Page 12 highlights
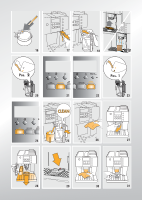
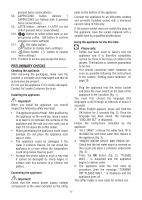
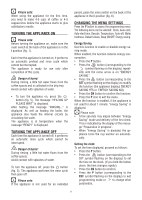
pressed twice consecutively) C8. cappuccino button: delivers 1 cappuccino (or frothed milk if pressed twice consecutively) C9. latte button: delivers 1 latte (or hot milk if pressed twice consecutively) C10. Button to select coffee taste or use pre-ground coffee. (OK button to confirm changes to menu settings) C11. Hot water button. (SET button to change menu settings) C12. Rinse button. ( button to change menu settings). C13. P button to access and escape the menu. PRELIMINARY CHECKS Checking the appliance After removing the packaging, make sure the product is complete and undamaged and that all accessories are present. Do not use the appliance if it is visibly damaged. Contact De'Longhi Customer Services. Installing the appliance Important! When you install the appliance, you should respect the following safety warnings: • The appliance gives off heat. After positioning the appliance on the work top, leave a space of at least 3 cm between the surfaces of the appliance and the side and rear walls and at least 15 cm above the coffee maker. • Water penetrating the appliance could cause damage. Do not place the appliance near taps or sinks. • The appliance could be damaged if the water it contains freezes. Do not install the appliance in a room where the temperature could drop below freezing point. • Arrange the power cable in such a way that it cannot be damaged by sharp edges or contact with hot surfaces (e.g. electric hot plates). Connecting the appliance Important! Check that the mains power supply voltage corresponds to the value indicated on the rating plate on the bottom of the appliance. Connect the appliance to an efficiently earthed and correctly installed socket with a minimum current rating of 10A only. If the power socket does not match the plug on the appliance, have the socket replaced with a suitable type by a qualified professional. Using the appliance for the first time Please note: • Coffee has been used to factory test the appliance and it is therefore completely normal for there to be traces of coffee in the grinder. The machine is, however, guaranteed to be new. • You should customise water hardness as soon as possible following the instructions in the section "Setting water hardness" on page 19. 1. Plug the appliance into the mains socket and place the main switch on the back of the appliance in the I position (fig. 1). You must first choose the language (the languages scroll through at intervals of about 3 seconds). 2. When English appears, press and hold the OK button for 3 seconds (fig. 2). Once the language has been saved, the message "ENGLISH SET" is displayed. Follow the instructions indicated by the appliance: 3. "FILL TANK!": remove the water tank, fill to the MAX line with fresh water then replace in the appliance (fig. 3). 4. "INSERT WATER SPOUT AND PRESS OK": Check that the hot water spout is inserted on the nozzle and place a container underneath (fig. 4). 5. Press the OK button (fig. 2). "PLEASE WAIT..." is displayed and the appliance begins to deliver water. 6. The appliance ends the first start up procedure, then the message "TURNING OFF PLEASE WAIT..." is displayed and the appliance goes off. The coffee maker is now ready for normal use. 10
-
 1
1 -
2
-
3
-
4
-
5
-
6
-
 7
7 -
 8
8 -
 9
9 -
 10
10 -
 11
11 -
 12
12 -
 13
13 -
 14
14 -
 15
15 -
 16
16 -
 17
17 -
18
-
19
-
20
-
21
-
22
-
23
-
24
-
25
 |
 |