DeLonghi HWB5050T Owner Manual - Page 5
When programmed, the appliance will function automatically each day at the times set.
 |
View all DeLonghi HWB5050T manuals
Add to My Manuals
Save this manual to your list of manuals |
Page 5 highlights
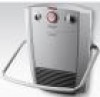
OPERATION AND USE 1. Make sure the the function selector is in the "0" position before turning the heater on. 2. Turn the appliance on by placing the thermostat (B) in the maximum position and the func- tion selector (A) in one of the following positions: /1/2. - Summer mode (fan only): turn the function selector (A) to the position. - Min power operation: turn the function selector (A) to position 1. The red light comes on. - Max power operation: turn the function selector (A) to the "2" position. - To turn the appliance off: turn the function selector to the "0" position. Adjusting the thermostat (B) When the room has reached the required temperature,turn the thermostat slowly counter-clockwise until the light turns off and no further. The thermostat will automatically maintain the temperature set and keep it constant. Frost prevention mode (anti-freeze setting) With the thermostat dial at minimum and the function selector on "2", the appliance maintains room temperature at about 41°F (5°C ), preventing freezing with minimal energy consumption. 24 HOUR TIMER (C) To set the heating periods proceed as follows: Check the time on your clock or watch. If it is 10.00 AM for example, turn the numbered programmer disk until the number 10 is alligned coincides with the pointer ▲ marked on the programmer. Set the periods of time during which you want the appliance to operate by pushing the teeth towards the center. Each notch corresponds to a period of 15 min. At the end of this procedure, red sectors corresponding to the operating periods can be seen below the notches. - When programmed, the appliance will function automatically each day at the times set. (Important: the heater must be plugged in for the timer to keep the correct time). - To modify programming, return the red teeth to the initial position and set the new opera- ting periods. - To use the appliance without programming, push all the teeth into the centre. In this case, to turn the appliance off completely, as well as turning off the switches, also unplug from the mains to avoid the programmer operating uselessly. TOWEL WARMING FUNCTION This heater is equipped with a a towel warming bar (E) to dry towels. Lift the rail (E) up slowly until you hear a click sound. Now you can hang towels on the bar to dry them or warm them up. When the appliance is not used for drying towels, lift the rail upwards as far as it will go then move it downwards (fig. 1). Important: Never overload the towel warming bar (E) and avoid drying delicate fabrics. ATTENTION A safety device switches the fan heater off if it accidentally overheats. To reset the unit for normal operation, unplug the heater for a few minutes, and eliminate the cause of over-heating. 5
-
 1
1 -
 2
2 -
 3
3 -
 4
4 -
 5
5 -
 6
6 -
 7
7 -
 8
8 -
 9
9 -
 10
10 -
 11
11 -
12
-
13
-
14
-
15
-
16
-
17
-
18
 |
 |
