DeLonghi TCH7090ER Owner Manual - Page 5
Insert two AAA R03/1.5V batteries - instructions
 |
View all DeLonghi TCH7090ER manuals
Add to My Manuals
Save this manual to your list of manuals |
Page 5 highlights
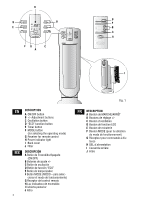
6. Eco function In this operating mode the appliance will automatically set the power level to guarantee the best comfort reducing the energy consumption. In this operating mode the unit may switch the heating power level from maximum to minimum and viceversa, several time in an hour. The maximum temperature setting is 79°F (26°C). To activate this function, press the ECO button (D). The unit, will always start at the maximum power. 7. If you want the appliance to distribute the airflow over a larger area, press the oscillation button (C) ( ). The appliance will then oscillate right and left. To stop the oscillation in the desired position, just press oscillation button (C) again. 8. To turn off the appliance press button ON/OFF (A). The display could show the count down for about 6 seconds. NOTE: The display can show the temperature in both °F and °C. To change the temperature scale, press and hold the + key for few seconds, then release. Please be informed that as this is not a precision device, the showed temperature not necessary corresponds to the real one. 24-HOUR DIGITAL TIMER This function can be activated from any operating mode. Delayed switch-on: with the appliance in the OFF position, press the timer button (E) ( ). The display shows the symbol and the time remaining before switch-on. To set the timer, use the + and - adjustment buttons (B), then wait a few seconds for the programming to be set. The display returns to show "G" for standby and the symbol to indicate you have set the timer. When the programmed time has been reached, the appliance turns on with the same settings it had during the previous operation. Delayed shut-off: with the appliance on, press the timer button (E) ( ). The display shows the symbol and the time remaining before shut-off. To set the timer, use the + and - adjustment buttons (B), then wait a few seconds for the programming to be set. The display returns to show the current settings and the symbol to indicate you have set the timer. When the programmed time as been reached the appliance shuts off automatically. If you want to go back to operation without the timer, press the timer button (F) twice. The timer symbol disappears from the display. USING THE REMOTE CONTROL - The remote control functions correspond to those on the control panel. See the section "Operation and Use" on the previous page for a description of the functions. Inserting or replacing the batteries - Remove the cover on the rear of the remo- te control; - Insert two AAA (R03/1.5V) batteries (included but packaged separately) making sure they are in the correct position (see the instructions inside the battery compartment); - Do not mix old and new batteries - Do not mix alkaline, standard (carbonzinc), or rechargeable (ni-cad, ni-mh, etc) batteries - Replace the cover; - Old batteries must be removed and disposed of in accordance with current legislation as they are harmful to the environment. MAINTENANCE - Before carrying out any maintenance, always remove the plug from the power outlet. - During the season when the appliance is being used, regularly clean the air intake and outlet grilles using a vacuum cleaner. - Never use abrasive powders or solvents to clean the appliance. - Remove the back grille by pulling it outward (Fig. 1). - Remove the dust filter that filters impurities from the air taken in from the room, blow it lightly, then reposition it in the appliance. 5
-
 1
1 -
 2
2 -
 3
3 -
 4
4 -
 5
5 -
 6
6 -
 7
7
 |
 |