Definitive Technology UIW BP/A UIW Series Manual - Page 5
Step by Step Installation, High Frequency Equalization Switch
 |
View all Definitive Technology UIW BP/A manuals
Add to My Manuals
Save this manual to your list of manuals |
Page 5 highlights
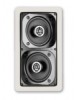
High Frequency Equalization Switch On the UIW 55, 65 and 75, you will note that there is a two position switch marked HF EQ on the top of the crossover circuit board facing the speaker baffle. This can be set to either H (brighter) or L (less bright), depending on personal listening preferences as well as your chosen mounting position. Step by Step Installation The included template is the exact size of the required speaker opening. Once you have decided on a general location for your speaker, hold the template in the preferred position on the wall or ceiling and trace around it taking care that the opening is level. Use a saw or knife to cut the opening. Run color coded wires between the speaker cavity and the amplifier unit. When running the wires inside the wall to the opening, leave a minimum of 12" of additional length in the cavity to facilitate speaker connection. Connect the speaker wires to the In-Wall unit taking care to make red to red ("+") and black to black ("-") terminal connections. Refer to your amplifier or receiver loudspeaker wiring instructions, turn off the unit and connect the speaker wires to the appropriate colored output terminal on the unit, again making red to red ("+") and black to black ("-") connections. This will ensure absolute phase throughout the system. The metal pivoting dogs are pre-installed in the loudspeaker frame with Phillips screws. The dogs can be rotated left or right by turning the screws. To install speaker, first rotate screws one-half turn counter clockwise to swing the dogs into position to clear the edge of the wall cutout. Then place speaker frame in position in the cutout and rotate screws clockwise one-half turn to grip the wall and tighten by hand until frame is stable but loose enough to be adjusted in final position. Level the speaker frame and snug screws into place taking care not to overtighten. Fit grill on frame. 5
-
 1
1 -
 2
2 -
 3
3 -
 4
4 -
 5
5 -
 6
6 -
 7
7 -
 8
8
 |
 |
