Dell 3000cn User's Guide - Page 101
Printing, Tips for Successful Printing, Sending a Job to Print - drivers windows 7
 |
View all Dell 3000cn manuals
Add to My Manuals
Save this manual to your list of manuals |
Page 101 highlights
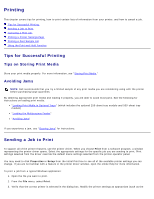
Printing This chapter covers tips for printing, how to print certain lists of information from your printer, and how to cancel a job. Tips for Successful Printing Sending a Job to Print Canceling a Print Job Printing a Printer Settings Page Printing a Font Sample List Using the Print and Hold Function Tips for Successful Printing Tips on Storing Print Media Store your print media properly. For more information, see "Storing Print Media." Avoiding Jams NOTE: Dell recommends that you try a limited sample of any print media you are considering using with the printer before purchasing large quantities. By selecting appropriate print media and loading it properly, you are able to avoid most jams. See the following for instructions on loading print media: "Loading Print Media in Optional Trays" (which includes the optional 250-sheet tray module and 500-sheet tray module) "Loading the Multipurpose Feeder" "Avoiding Jams" If you experience a jam, see "Clearing Jams" for instructions. Sending a Job to Print To support all of the printer features, use the printer driver. When you choose Print from a software program, a window representing the printer driver opens. Select the appropriate settings for the specific job you are sending to print. Print settings selected from the driver override the default menu settings selected from the printer operator panel. You may need to click Properties or Setup from the initial Print box to see all of the available printer settings you can change. If you are not familiar with a feature in the printer driver window, open the online Help for more information. To print a job from a typical Windows application: 1. Open the file you want to print. 2. From the File menu, select Print. 3. Verify that the correct printer is selected in the dialog box. Modify the printer settings as appropriate (such as the
-
 1
1 -
2
-
3
-
4
-
5
-
6
-
7
-
8
-
9
-
10
-
11
-
12
-
13
-
14
-
15
-
16
-
17
-
18
-
19
-
20
-
21
-
22
-
23
-
24
-
25
-
26
-
27
-
28
-
29
-
30
-
31
-
32
-
33
-
34
-
35
-
36
-
37
-
38
-
39
-
40
-
41
-
42
-
43
-
44
-
45
-
46
-
47
-
48
-
49
-
50
-
51
-
52
-
53
-
54
-
55
-
56
-
57
-
58
-
59
-
60
-
61
-
62
-
63
-
64
-
65
-
66
-
67
-
68
-
69
-
70
-
71
-
72
-
73
-
74
-
75
-
76
-
77
-
78
-
79
-
80
-
81
-
82
-
83
-
84
-
85
-
86
-
87
-
88
-
89
-
90
-
91
-
92
-
93
-
94
-
95
-
 96
96 -
 97
97 -
 98
98 -
 99
99 -
 100
100 -
 101
101 -
 102
102 -
 103
103 -
 104
104 -
 105
105 -
 106
106 -
107
-
108
-
109
-
110
-
111
-
112
-
113
-
114
-
115
-
116
-
117
-
118
-
119
-
120
-
121
-
122
-
123
-
124
-
125
-
126
-
127
-
128
-
129
-
130
-
131
-
132
-
133
-
134
-
135
-
136
-
137
-
138
-
139
-
140
-
141
-
142
-
143
-
144
-
145
-
146
-
147
-
148
-
149
-
150
-
151
-
152
-
153
-
154
-
155
-
156
-
157
-
158
-
159
-
160
-
161
-
162
-
163
-
164
-
165
-
166
-
167
-
168
-
169
-
170
-
171
-
172
-
173
-
174
-
175
-
176
-
177
-
178
-
179
-
180
-
181
-
182
-
183
-
184
-
185
-
186
-
187
-
188
-
189
-
190
-
191
-
192
-
193
-
194
 |
 |
