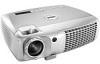
Dell 4100MP Dell 4100MP Projector User's Guide - Page 18
Powering On/Off the Projector, Source - remote control
 |
View all Dell 4100MP manuals
Add to My Manuals
Save this manual to your list of manuals |
Page 18 highlights
1a) Connection with PC: 1 Power cord 2 RS232 cable 1b) Connection with Commercial RS232 control box: 1 Power cord 2 RS232 cable 3 Commercial RS232 control box Note: RS232 cable not provided by Dell. Consult professional installer for cable and RS232 remote control software. Refer to RS232 pin assignment and commands. Powering On/Off the Projector Powering On the Projector NOTE: Turn on the projector before you turn on the source. 1. Ensure that the lens cap has been removed. 2. Ensure that the power cord and appropriate signal cable(s) are securely connected. The power button light will blink blue. 3. Press the power button to turn on the projector. The Dell logo will be displayed for 30 seconds. 4. Turn on your source (computer, notebook, DVD, etc.). The projector automatically detects your source. l If the "Searching for signal..." message appears on the screen, ensure that the appropriate signal cable(s) are securely connected. l If you are connecting multiple sources to the projector simultaneously, press the Source button on the remote control or control panel to select the desired source.
-
 1
1 -
2
-
3
-
4
-
5
-
6
-
7
-
8
-
9
-
10
-
11
-
12
-
 13
13 -
 14
14 -
 15
15 -
 16
16 -
 17
17 -
 18
18 -
 19
19 -
 20
20 -
 21
21 -
 22
22 -
 23
23 -
24
-
25
-
26
-
27
-
28
-
29
-
30
-
31
-
32
-
33
-
34
-
35
-
36
-
37
-
38
-
39
-
40
-
41
-
42
-
43
-
44
-
45
-
46
-
47
-
48
-
49
-
50
 |
 |
