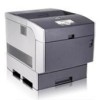
Dell 5100cn Color Laser Printer OwnersManual.book - Page 24
Network Set-Up, Disable Microsoft® Windows® XP Firewall Before Printer Software Installation - checks
 |
View all Dell 5100cn Color Laser Printer manuals
Add to My Manuals
Save this manual to your list of manuals |
Page 24 highlights
www.dell.com/supplies | support.dell.com Network Set-Up NOTE: To use this printer in a UNIX or Linux environment, you need to install a UX Filter or Linux Driver. For more information on how to install and use these, refer to your User's Guide. NOTE: When using a CD drive in a Linux environment, you need to mount the CD according to your system environment. The command strings are mount/media/cdrom. NOTE: For additional network set-up configurations, refer to your User's Guide. Disable Microsoft® Windows® XP Firewall Before Printer Software Installation NOTE: This step may not be necessary if you have Windows XP Service Pack 2 installed. If your printer is connected directly to a network and the Windows XP firewall is enabled, you cannot view your networked printer(s) when you run the Dell™ printer installation software. To prevent this situation, disable the Windows XP firewall before you install the Dell printer software. To disable or enable your XP firewall, perform the following steps. NOTICE: Dell recommends that you enable your Windows XP firewall after you install the printer software. Enabling the Windows XP firewall after you install the printer software does not limit the use of your network printer. 1. Click the Start button and click Help and Support. 2. In the Search box, type firewall and then click the green arrow. 3. In the Pick a Task list, click Enable or disable Internet Connection Firewall and then follow the instructions on the screen. Print and Check the Printer Settings Page 1. Print the Printer Settings page. a. When Ready to Print appears in the LCD, press Menu. b. Press until Configure appears, and then press or . c. Press until Reports appears, and then press or . d. Printer Settings is displayed. Press . The Printer Settings page is printed. 2. Under the TCP/IP heading, verify the IP address. If the IP address is 0.0.0.0, wait for a few minutes to resolve the IP address automatically, and then print the Printer Settings page again. 24 Setting Up for Network Printing
-
 1
1 -
2
-
3
-
4
-
5
-
6
-
7
-
8
-
9
-
10
-
11
-
12
-
13
-
14
-
15
-
16
-
17
-
18
-
 19
19 -
 20
20 -
 21
21 -
 22
22 -
 23
23 -
 24
24 -
 25
25 -
 26
26 -
 27
27 -
 28
28 -
 29
29 -
30
-
31
-
32
-
33
-
34
-
35
-
36
-
37
-
38
-
39
-
40
-
41
-
42
-
43
-
44
-
45
-
46
-
47
-
48
-
49
-
50
-
51
-
52
-
53
-
54
-
55
-
56
-
57
-
58
-
59
-
60
-
61
-
62
-
63
-
64
-
65
-
66
-
67
-
68
-
69
-
70
-
71
-
72
-
73
-
74
-
75
-
76
-
77
-
78
-
79
-
80
-
81
-
82
-
83
-
84
-
85
-
86
-
87
-
88
-
89
-
90
-
91
-
92
-
93
-
94
-
95
-
96
-
97
-
98
 |
 |
