Dell 966 All In One Photo Printer User Guide - Page 15
Changing the Pickup Code, Receiving a Fax Using Dell Fax Solutions
 |
View all Dell 966 All In One Photo Printer manuals
Add to My Manuals
Save this manual to your list of manuals |
Page 15 highlights
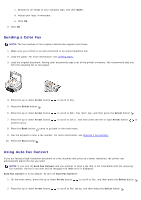
button . b. Press the up or down Arrow button to scroll to Auto Answer. c. Press the left or right Arrow button . to scroll to On or Scheduled, and then press the Select button d. If you selected Scheduled, the Auto Answer Schedule screen appears. Use the keypad to specify the time you want Auto Answer to be turned on and turned off. e. Press the Select button . 3. When the telephone rings, pick up the telephone, and listen for the fax calling tone. 4. If you hear the fax calling tone, press DELL# (3355#) on the printer operator panel. NOTE: DELL# is the default answer code. However, you can change this to any code. For more information, see Changing the Pickup Code. Changing the Pickup Code 1. From the main menu, press the up or down Arrow button . to scroll to Fax, and then press the Select button 2. Press the up or down Arrow button to scroll to Fax Setup, and then press the Select button . 3. Press the up or down Arrow button . to scroll to Ringing and Answering, and then press the Select button 4. Press the up or down Arrow button . to scroll to Manual Pickup Keycode, and then press the Select button 5. Use the keypad to specify a new one- to seven-digit keycode. NOTE: Valid characters for the pickup code are 0-9, pound (#), and star (*). Any other characters entered are ignored. 6. Press the Select button . Receiving a Fax Using Dell Fax Solutions 1. Click Start® Programs or All Programs ® Dell PC Fax® Dell PC Fax. For Windows Vista: a. Click ® Programs. b. Click Dell PC Fax. c. Click Dell PC Fax. 2. From Receiving Faxes, choose how you want to receive the fax. Select Automatically if you want the software to receive faxes, or Manually if you want to decide when to answer incoming faxes. If you choose to manually receive the fax, you have to click Answer Now whenever someone is attempting to send you a fax. 3. Select the check box beside Print incoming faxes if you want all incoming faxes printed upon receipt.
-
 1
1 -
2
-
3
-
4
-
5
-
6
-
7
-
8
-
9
-
 10
10 -
 11
11 -
 12
12 -
 13
13 -
 14
14 -
 15
15 -
 16
16 -
 17
17 -
 18
18 -
 19
19 -
 20
20 -
21
-
22
-
23
-
24
-
25
-
26
-
27
-
28
-
29
-
30
-
31
-
32
-
33
-
34
-
35
-
36
-
37
-
38
-
39
-
40
-
41
-
42
-
43
-
44
-
45
-
46
-
47
-
48
-
49
-
50
-
51
-
52
-
53
-
54
-
55
-
56
-
57
-
58
-
59
-
60
-
61
-
62
-
63
-
64
-
65
-
66
-
67
-
68
-
69
-
70
-
71
-
72
-
73
-
74
-
75
-
76
-
77
-
78
-
79
-
80
-
81
-
82
-
83
-
84
-
85
-
86
-
87
-
88
-
89
-
90
-
91
-
92
-
93
-
94
-
95
-
96
-
97
-
98
-
99
-
100
-
101
-
102
-
103
-
104
-
105
-
106
-
107
-
108
-
109
-
110
-
111
-
112
-
113
-
114
-
115
-
116
-
117
-
118
-
119
-
120
-
121
-
122
-
123
-
124
-
125
-
126
-
127
-
128
-
129
-
130
-
131
-
132
-
133
-
134
-
135
 |
 |