Dell Alienware m15 R4 Alienware Command Center User Guide - Page 12
Fusion, Creating overclock profiles, Assigning overclock profile to your computer
 |
View all Dell Alienware m15 R4 manuals
Add to My Manuals
Save this manual to your list of manuals |
Page 12 highlights
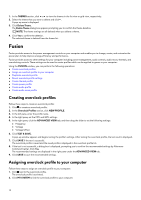
1. In the THEMES section, click or to view the themes in the list view or grid view, respectively. 2. Select the theme that you want to delete and click . A pop-up menu is displayed. 3. Click Delete Theme. The Delete Theme dialog box appears prompting you to confirm the theme deletion. NOTE: The theme settings are all deleted when you delete a theme. 4. Click Yes to confirm the deletion. The selected theme is deleted from the theme list. Fusion Fusion provides access to the power management controls on your computer and enables you to change, create, and customize the power plan to help improve energy efficiency and performance. Fusion provides access to other settings for your computer including power management, audio controls, audio recon, thermals, and overclocking controls. These settings can be used to create profiles which can be applied to games or your computer. Using the FUSION window, you can perform the following operations: ● Create overclock profiles ● Assign an overclock profile to your computer ● Duplicate overclock profile ● Revert overclock profile settings ● Create thermal profile ● Create power profile ● Create audio profile ● Create audio recon profile Creating overclock profiles Follow these steps to create an overclock profile: 1. Click to create an overclock profile. 2. In the Overclock Profiles section, click NEW PROFILE. 3. In the left pane, enter the profile name. 4. In the right pane, set the CPU and GPU settings. 5. In the right pane, click the ADVANCED VIEW tab, and then drag the slider to set the following settings: ● Frequency ● Voltage ● Voltage Offset 6. Click TEST & SAVE. A pop-up window appears and begins testing the profile's settings. After testing the overclock profile, the test result is displayed. 7. Click SAVE if the test is successful. The overclock profile is saved and the saved profile is displayed in the overclock profile list. 8. If the test is not successful, a dialog box is displayed, prompting you to confirm the recommended settings by Alienware Command Center. Click Yes. The recommended settings are displayed in the right pane under the ADVANCED VIEW tab. 9. Click SAVE to save the recommended settings. Assigning overclock profile to your computer Follow these steps to assign an overclock profile to your computer: 1. Click next to the overclock profile. The overclock profile is activated. 2. Click MY SYSTEM to link the overclock profile to your computer. 12
-
 1
1 -
2
-
3
-
4
-
5
-
6
-
 7
7 -
 8
8 -
 9
9 -
 10
10 -
 11
11 -
 12
12 -
 13
13 -
 14
14 -
 15
15 -
 16
16
 |
 |