Dell DR6000 NetVault - Setting Up the DR Series System as an RDA or VTL Backup
Dell DR6000 Manual
 |
View all Dell DR6000 manuals
Add to My Manuals
Save this manual to your list of manuals |
Dell DR6000 manual content summary:
- Dell DR6000 | NetVault - Setting Up the DR Series System as an RDA or VTL Backup - Page 1
Setting Up the Dell™ DR Series System as an RDA or VTL Backup Target for Dell™ NetVault Backup Dell Engineering June 2015 A Dell Technical White Paper - Dell DR6000 | NetVault - Setting Up the DR Series System as an RDA or VTL Backup - Page 2
third party products does not necessarily constitute Dell's recommendation of those products. Please consult your Dell representative for additional information. Trademarks used in this text: Dell™, the Dell logo, and PowerVault™ are trademarks of Dell Inc. Other Dell trademarks may be used in this - Dell DR6000 | NetVault - Setting Up the DR Series System as an RDA or VTL Backup - Page 3
details and management...32 A.1.2 NDMP account details and management...33 A.1.3 VTL Default Account Summary Table: ...34 A.2 Managing VTL media and space use...34 VTL media 37 A.2.8 Space reclamation guidelines...38 3 Setting Up the Dell DR Series System as an RDA or VTL Backup Target for - Dell DR6000 | NetVault - Setting Up the DR Series System as an RDA or VTL Backup - Page 4
to set up the Dell DR Series system as a backup target for Dell NetVault Backup. This document is a quick reference guide and does not used. IMPORTANT: About VTL Replication Support: It is important to note that VTL-to-VTL replication is not currently supported. If you require replication of your - Dell DR6000 | NetVault - Setting Up the DR Series System as an RDA or VTL Backup - Page 5
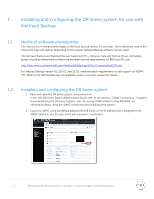
NetVault software prerequisites The instructions in this document apply Supported VTLs, Libraries, Tape and Optical Drives compatibly guides default address 192.168.0.120, or the IP address that is assigned to the iDRAC interface. Use the user name and password: "root/calvin". 6 Setting Up the Dell - Dell DR6000 | NetVault - Setting Up the DR Series System as an RDA or VTL Backup - Page 6
the virtual console. 4. After the virtual console is open, log on to the system as user administrator and the password St0r@ge! (The "0" in the password is the numeral zero). 5. Set the user-defined networking preferences. 7 Setting Up the Dell DR Series System as an RDA or VTL Backup Target for - Dell DR6000 | NetVault - Setting Up the DR Series System as an RDA or VTL Backup - Page 7
St0r@ge! (The "0" in the password is the numeral zero.). 8. Join the DR Series system to Active Directory. NOTE: If you do not want to add the DR Series system to Active Directory, see the DR Series System Owner's Manual for guest logon instructions. 8 Setting Up the Dell DR Series System as an - Dell DR6000 | NetVault - Setting Up the DR Series System as an RDA or VTL Backup - Page 8
a. Select Active Directory from the left navigation area of the DR Series GUI b. Enter your Active Directory credentials. 9 Setting Up the Dell DR Series System as an RDA or VTL Backup Target for Dell NetVault Backup - Dell DR6000 | NetVault - Setting Up the DR Series System as an RDA or VTL Backup - Page 9
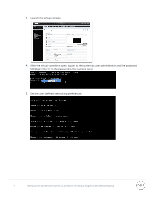
2 Creating and configuring the RDA target container(s) for NetVault Backup 1. Create the RDS container in the Dell DR Series system by selecting Containers in the left navigation area, and then clicking Create at the top of the page. 2. Enter a Container Name, select - Dell DR6000 | NetVault - Setting Up the DR Series System as an RDA or VTL Backup - Page 10
3. Click Create a New Container. Confirm that the container is added. 2.1 Adding the RDA target container(s) for NetVault Backup 1. Open the NetVault Backup web console. 11 Setting Up the Dell DR Series System as an RDA or VTL Backup Target for Dell NetVault Backup - Dell DR6000 | NetVault - Setting Up the DR Series System as an RDA or VTL Backup - Page 11
2. Add the RDA container to NetVault Backup by selecting and starting the wizard, Guided Configuration > Add Storage Devices. 3. In the Storage Configuration Wizard - Add Storage Devices page, select Add Dell RDA Devices. 12 Setting Up the Dell DR Series System as an RDA or VTL Backup Target for - Dell DR6000 | NetVault - Setting Up the DR Series System as an RDA or VTL Backup - Page 12
to add the RDA device. Enter the RDA container name and save. Note: The default username is backup_user and the password is St0r@ge! (The "0" in the password is the numeral zero). The suggested Block Size is 524288 bytes (512KB) to achieve optimal performance. Also, specify the Stream Limit required - Dell DR6000 | NetVault - Setting Up the DR Series System as an RDA or VTL Backup - Page 13
the NVBU clients. The Passthrough mode does target side dedupe on the DR Series system. The default mode for each client is decided based on the number of CPU cores in the client machine drop down menu, and click Submit. 14 Setting Up the Dell DR Series System as an RDA or VTL Backup Target for - Dell DR6000 | NetVault - Setting Up the DR Series System as an RDA or VTL Backup - Page 14
less performance than passthrough back-ups. It is recommended to keep the default that the DR Series system chooses to use rather than forcing the mode .software.dell.com/doc107040 • Creating a backup job for NetVault 10: http://documents.software.dell.com/DOC229690 15 Setting Up the Dell DR - Dell DR6000 | NetVault - Setting Up the DR Series System as an RDA or VTL Backup - Page 15
Create at the top of the page. 2. Enter the container name, select the Virtual Tape Library (VTL) option, and click Next. 16 Setting Up the Dell DR Series System as an RDA or VTL Backup Target for - Dell DR6000 | NetVault - Setting Up the DR Series System as an RDA or VTL Backup - Page 16
. For NetVault, you must also specific Auto as the Marker Type. Click Next. 4. Finalize VTL creation by clicking Create a New Container. 17 Setting Up the Dell DR Series System as an RDA or VTL Backup Target for - Dell DR6000 | NetVault - Setting Up the DR Series System as an RDA or VTL Backup - Page 17
field. Click Quick Connection to open the Quick Connect dialog box, which indicates a connection was made but is set as inactive. 18 Setting Up the Dell DR Series System as an RDA or VTL Backup Target for - Dell DR6000 | NetVault - Setting Up the DR Series System as an RDA or VTL Backup - Page 18
Target from the list, click the Connect button, and then in the Connect To Target dialog box, click the Advanced button. 19 Setting Up the Dell DR Series System as an RDA or VTL Backup Target for - Dell DR6000 | NetVault - Setting Up the DR Series System as an RDA or VTL Backup - Page 19
3. In Advanced Settings, select to Enable CHAP log on and enter the User Name and Target Secret / Password. Select OK. Refer to Appendix A for further details about accounts and credentials. 20 Setting Up the Dell DR Series System as an RDA or VTL Backup Target for Dell NetVault Backup - Dell DR6000 | NetVault - Setting Up the DR Series System as an RDA or VTL Backup - Page 20
article at http://catalog.update.microsoft.com/v7/site/home.aspx for information about acquiring Microsoft Device Drivers, e.g., StorageTek Library Drivers. 21 Setting Up the Dell DR Series System as an RDA or VTL Backup Target for - Dell DR6000 | NetVault - Setting Up the DR Series System as an RDA or VTL Backup - Page 21
.authmethod = CHAP b. Modify the following lines: # To set a CHAP username and password for initiator # authentication by the target(s), uncomment the following lines: node.session.auth.username or IQN of DR:PORT> --login 22 Setting Up the Dell DR Series System as an RDA or VTL Backup Target for - Dell DR6000 | NetVault - Setting Up the DR Series System as an RDA or VTL Backup - Page 22
with DR VTL(s) by using the following command: iscsiadm -m session For example: iscsiadm -m session = tcp: [8] 10.8.230.108:3260,1 iqn.198405.com.dell:dr4000.3071067.interoprhel52n1.30 5. Review dmesg or /var/log/messages for details about the tape devices created upon adding the DR Series system - Dell DR6000 | NetVault - Setting Up the DR Series System as an RDA or VTL Backup - Page 23
has been added, click the Create Backup job... button to commit the library. The VTL should show up ready for use. 24 Setting Up the Dell DR Series System as an RDA or VTL Backup Target for - Dell DR6000 | NetVault - Setting Up the DR Series System as an RDA or VTL Backup - Page 24
the left navigation area of the DR Series system, and then click the Create link at the top of the page. 25 Setting Up the Dell DR Series System as an RDA or VTL Backup Target for - Dell DR6000 | NetVault - Setting Up the DR Series System as an RDA or VTL Backup - Page 25
by providing the storage node or media node IP Address or FQDN. Select the Marker Type as Unix Dump. Click Next. 26 Setting Up the Dell DR Series System as an RDA or VTL Backup Target for - Dell DR6000 | NetVault - Setting Up the DR Series System as an RDA or VTL Backup - Page 26
, the IP address, and DR the credentials. Provide the logon credentials for the ndmp user account on the DR Series system. 27 Setting Up the Dell DR Series System as an RDA or VTL Backup Target for - Dell DR6000 | NetVault - Setting Up the DR Series System as an RDA or VTL Backup - Page 27
. Click Next to complete the workflow to add the NDMP tape library. The VTL should now show up ready for use. 28 Setting Up the Dell DR Series System as an RDA or VTL Backup Target for - Dell DR6000 | NetVault - Setting Up the DR Series System as an RDA or VTL Backup - Page 28
4. Label all the media with labels and place them in their respective media groups for use. 29 Setting Up the Dell DR Series System as an RDA or VTL Backup Target for Dell NetVault Backup - Dell DR6000 | NetVault - Setting Up the DR Series System as an RDA or VTL Backup - Page 29
should run at least 40 hours per week when backups are not taking place, and generally after a backup job has completed. 30 Setting Up the Dell DR Series System as an RDA or VTL Backup Target for - Dell DR6000 | NetVault - Setting Up the DR Series System as an RDA or VTL Backup - Page 30
backup jobs are completed, the ratios will increase. Backup jobs with a 12-week retention will average a 15x ratio, in most cases. 31 Setting Up the Dell DR Series System as an RDA or VTL Backup Target for - Dell DR6000 | NetVault - Setting Up the DR Series System as an RDA or VTL Backup - Page 31
: >iscsi --show --user user : dr9-interop-a7 The default iSCSI password is St0r@ge!iscsi. You can modify this password in the iSCSI tab of the Clients page. Click Edit CHAP Password and enter a new password as needed. IMPORTANT NOTE: iSCSI CHAP passwords must be between 12 and 16 characters long - Dell DR6000 | NetVault - Setting Up the DR Series System as an RDA or VTL Backup - Page 32
ndmp_user NDMP Port: 10000 The default password is St0r@ge! It can be modified by running the ndmp -setpassword command: > ndmp --setpassword Enter new NDMP password:######### Re-type NDMP password:######### NDMP password successfully updated. 33 Setting Up the Dell DR Series System as an - Dell DR6000 | NetVault - Setting Up the DR Series System as an RDA or VTL Backup - Page 33
Account Summary Table: Service NDMP iSCSI Account ndmp_user Default Credentials St0r@ge! St0r@ge!iscsi CLI Modifier , compression, and encryption at rest functionality. Backup applications (such as Dell NetVault, Symantec BackupExec, Symantec NetBackup, and so on) should be - Dell DR6000 | NetVault - Setting Up the DR Series System as an RDA or VTL Backup - Page 34
Virtual Tape Library would be created with 152 (121TB divided by 800GB) pieces of media at 800GB for each piece media. 35 Setting Up the Dell DR Series System as an RDA or VTL Backup Target for - Dell DR6000 | NetVault - Setting Up the DR Series System as an RDA or VTL Backup - Page 35
space can be reconciled thus enabling the physical space to be reclaimed. A.2.5 VTL media count guidelines Type Capacity Max number of Tapes supported LTO-4 800GiB 2000 LTO-3 400GiB 4000 LTO-2 200GiB 8000 LTO-1 100Gib 10000 LTO-1 50Gib 10000 LTO-1 10GiB 10000 36 Setting Up the - Dell DR6000 | NetVault - Setting Up the DR Series System as an RDA or VTL Backup - Page 36
, which in turn will update the new inventory status resulting in the newly added tapes appearing for use within NetVault: Backup. 37 Setting Up the Dell DR Series System as an RDA or VTL Backup Target for - Dell DR6000 | NetVault - Setting Up the DR Series System as an RDA or VTL Backup - Page 37
In the event that space becomes an issue or that a user impact requires manual cleaning media can either be manually Erased, Blanked, Scratched or otherwise recycled and a manual cleaning cycle initiated on the DR unit. 38 Setting Up the Dell DR Series System as an RDA or VTL Backup Target for - Dell DR6000 | NetVault - Setting Up the DR Series System as an RDA or VTL Backup - Page 38
Backup the following can be used when a situation dictates that space must be reclaimed manually. 1. From the Explore Storage: Tape & VTL Storage: Explore Tape Storage page select Devices: Tape Library Management Page. 39 Setting Up the Dell DR Series System as an RDA or VTL Backup Target for - Dell DR6000 | NetVault - Setting Up the DR Series System as an RDA or VTL Backup - Page 39
.4 GiB : 8558.199 : 0.00 MiB/s : 0.00 MiB/s : 66 : 33595753405 : 24926224990 : 22734553886 : 0 : 0.0 GiB : Done : Running : Disabled : 101 : 0 : 25.81 % : 8.79 % : 32.33 % 40 Setting Up the Dell DR Series System as an RDA or VTL Backup Target for
-
 1
1 -
 2
2 -
 3
3 -
 4
4 -
 5
5 -
 6
6 -
 7
7 -
8
-
9
-
10
-
11
-
12
-
13
-
14
-
15
-
16
-
17
-
18
-
19
-
20
-
21
-
22
-
23
-
24
-
25
-
26
-
27
-
28
-
29
-
30
-
31
-
32
-
33
-
34
-
35
-
36
-
37
-
38
-
39
 |
 |

Setting Up the Dell
™
DR Series System as an
RDA or VTL Backup Target for Dell
™
NetVault Backup
Dell Engineering
June 2015
A Dell Technical White Paper