Dell E157FPT User Guide - Page 27
Setting Up Your Monitor
 |
View all Dell E157FPT manuals
Add to My Manuals
Save this manual to your list of manuals |
Page 27 highlights
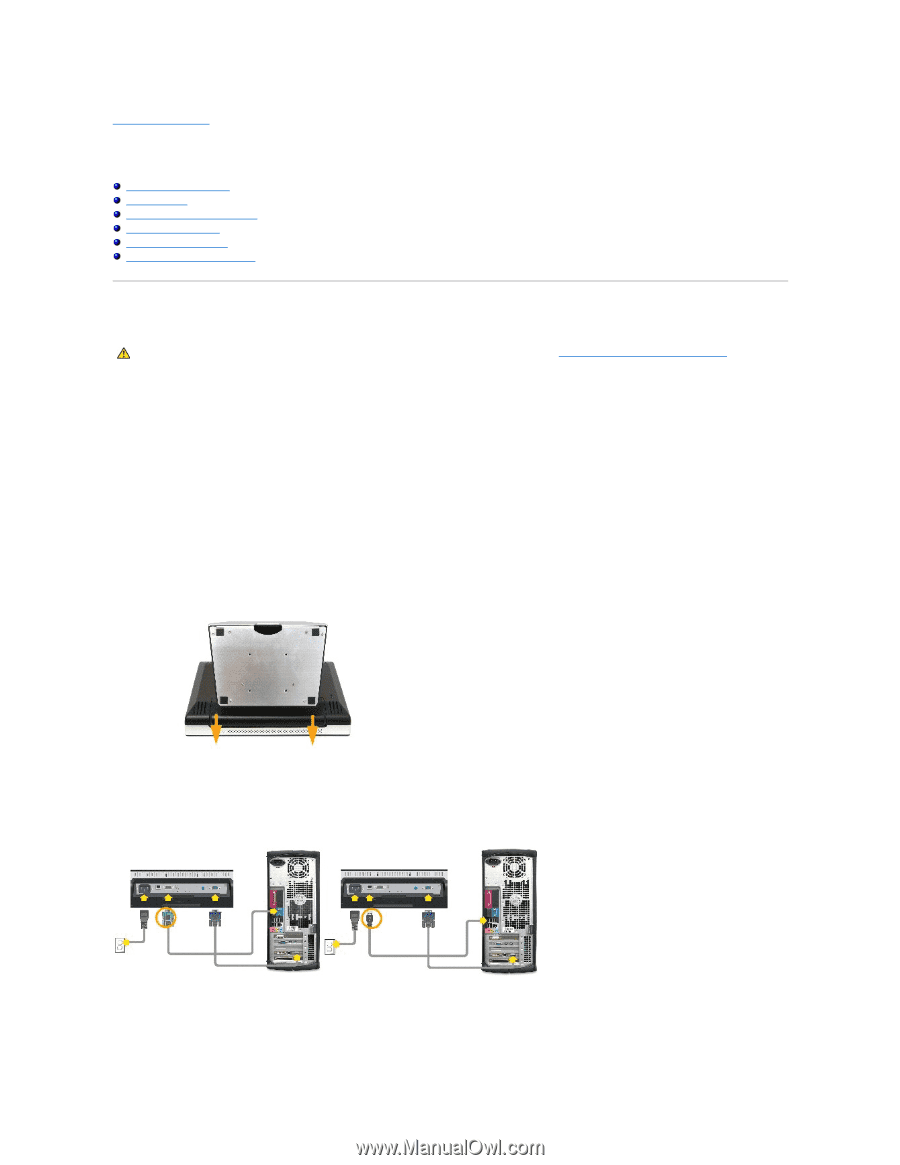
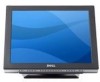
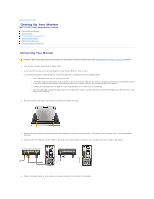
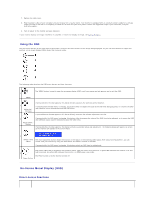
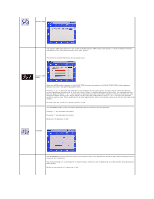
Back to Contents Page Setting Up Your Monitor Dell™ E157FPT Touch Screen Monitor Contents Connecting Your Monitor Using the OSD On-Screen Menu/Display (OSD) Special OSD Functions OSD Warning Messages Setting the Optimal Resolution Connecting Your Monitor CAUTION: Before you begin any of the procedures in this section, follow the instructions in the CAUTION:General Safety Instructions section. 1. Turn off your computer and unplug its power cable. 2. If you have NOT purchased the optional Magnetic Stripe Reader (MSR) kit, skip to step 3. If you have purchased the optional MSR kit, remove the MSR and its accessories from the shipping carton. ¡ Place the MSR on the rear left side of the monitor. ¡ The MSR's large tab should extend towards the center of the monitor. Align the two holes in the MSR tab with the two corresponding holes in the back surface of the monitor, then fasten the MSR to the monitor using the two screws provided in the MSR Kit. ¡ Connect the USB cable from the MSR Kit to the USB connector on the lower end of the MSR tab. ¡ Run the USB cable through the cable holder on the back of the monitor. Connect the other end of the USB cable to a USB connector on the back of your computer. 3. Place the monitor face down, then remove the cable cover below the stand. 4. Connect the video cable to the corresponding video connector on the back of your computer. (The graphic is for illustration only. System appearance may vary). 5. Connect either the USB touch screen cable or the serial touch screen cable to the back of your computer and then to back of the display. 6. Connect the power cable for your display to the power connector on the back of the display.
-
 1
1 -
2
-
3
-
4
-
5
-
6
-
7
-
8
-
9
-
10
-
11
-
12
-
13
-
14
-
15
-
16
-
17
-
18
-
19
-
20
-
21
-
 22
22 -
 23
23 -
 24
24 -
 25
25 -
 26
26 -
 27
27 -
 28
28 -
 29
29 -
 30
30 -
 31
31 -
 32
32 -
33
-
34
-
35
-
36
-
37
-
38
-
39
-
40
-
41
-
42
-
43
-
44
-
45
-
46
-
47
-
48
-
49
-
50
-
51
-
52
 |
 |