Dell E2318HX Users Guide 1 - Page 7
Identifying Parts and Controls - vesa mount
 |
View all Dell E2318HX manuals
Add to My Manuals
Save this manual to your list of manuals |
Page 7 highlights
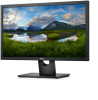
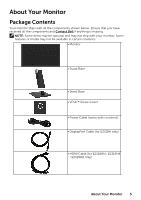
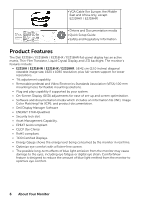
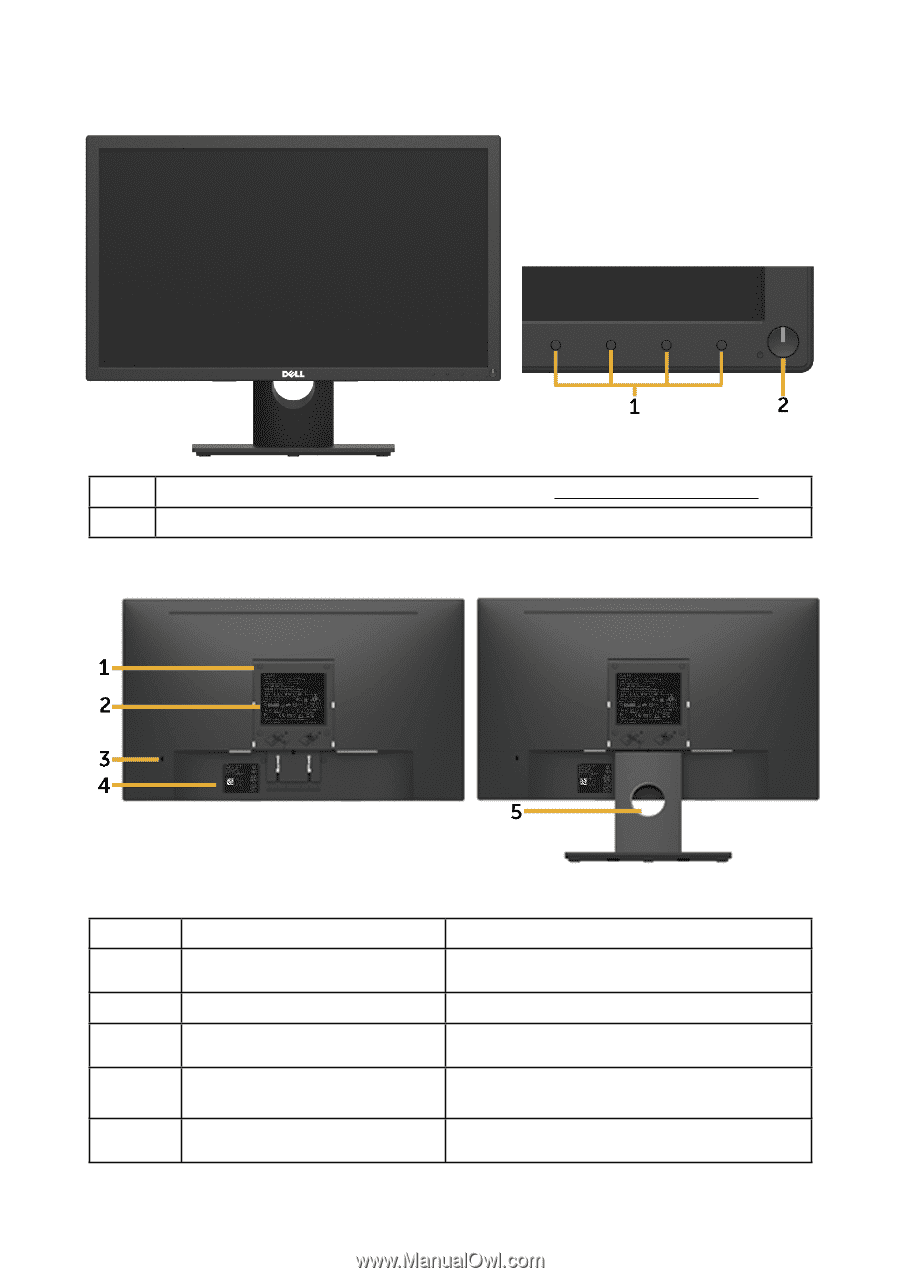
Identifying Parts and Controls Front View 1 Function buttons (For more information, see Operating the Monitor) 2 Power On/Off button (with LED indicator) Back View Back View with Monitor Stand Label 1 2 3 4 5 Description VESA mounting holes (100 mm) Regulatory rating label Security lock slot Barcode serial number label Cable management slot Use To mount the monitor. Lists the regulatory approvals. Secures monitor with security lock (security lock not included). Refer to this label if you need to contact Dell for technical support. Use to organize cables by placing them through the slot. About Your Monitor 7
-
 1
1 -
 2
2 -
 3
3 -
 4
4 -
 5
5 -
 6
6 -
 7
7 -
 8
8 -
 9
9 -
 10
10 -
 11
11 -
 12
12 -
13
-
14
-
15
-
16
-
17
-
18
-
19
-
20
-
21
-
22
-
23
-
24
-
25
-
26
-
27
-
28
-
29
-
30
-
31
-
32
-
33
-
34
-
35
-
36
-
37
-
38
-
39
-
40
-
41
-
42
-
43
-
44
-
45
-
46
-
47
-
48
-
49
 |
 |
About Your Monitor
7
Identifying Parts and Controls
Front View
1
Function buttons (For more information, see
Operating the Monitor
)
2
Power On/Off button (with LED indicator)
Back View
Back View with Monitor Stand
Label
Description
Use
1
VESA mounting holes (100
mm)
To mount the monitor.
2
Regulatory rating label
Lists the regulatory approvals.
3
Security lock slot
Secures monitor with security lock
(security lock not included).
4
Barcode serial number label
Refer to this label if you need to contact
Dell for technical support.
5
Cable management slot
Use to organize cables by placing them
through the slot.