Dell Inspiron 20 3048 Me and My Dell
Dell Inspiron 20 3048 Manual
 |
View all Dell Inspiron 20 3048 manuals
Add to My Manuals
Save this manual to your list of manuals |
Dell Inspiron 20 3048 manual content summary:
- Dell Inspiron 20 3048 | Me and My Dell - Page 1
Me and My Dell © 2014 Dell Inc. - Dell Inspiron 20 3048 | Me and My Dell - Page 2
. CAUTION: A CAUTION indicates potential damage to hardware or loss of data if instructions are not followed. WARNING: A WARNING indicates a potential for property damage, personal injury, or death. Copyright © 2014 Dell Inc. All rights reserved. This product is protected by U.S. and international - Dell Inspiron 20 3048 | Me and My Dell - Page 3
account 12 Local account 12 Locking and unlocking your computer 12 Accessing the desktop 13 Turning off your computer 13 Start screen and tiles 14 Apps 14 Closing an 5.1/7.1 Audio 18 Connecting 5.1 Speakers 19 Connecting 7.1 Speakers 20 Setting Up Your Printer 21 Contents 3 - Dell Inspiron 20 3048 | Me and My Dell - Page 4
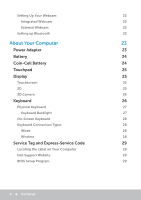
External Webcam 22 Setting up Bluetooth 22 About Your Computer 23 Power Adapter 23 Battery 24 Coin-Cell Battery 24 Touchpad 25 Display 28 Wireless 28 Service Tag and Express-Service Code 29 Locating the Label on Your Computer 29 Dell Support Website 29 BIOS Setup Program 29 - Dell Inspiron 20 3048 | Me and My Dell - Page 5
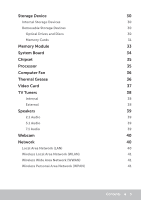
Storage Device 30 Internal Storage Devices 30 Removable Storage Devices 30 Optical Drives and Discs 30 Memory Cards 31 Memory Module 33 System Board 34 Chipset 35 Processor 35 Computer Fan 36 Thermal Grease 36 Video Card 37 TV Tuners 38 Internal 38 External 38 - Dell Inspiron 20 3048 | Me and My Dell - Page 6
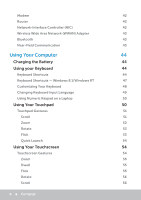
Modem 42 Router 42 Network‑Interface Controller (NIC) 42 Wireless Wide Area Network (WWAN) Adapter 43 Bluetooth 43 Near-Field Communication 43 Using Your Computer 44 Charging the Battery 44 Using your Keyboard 44 Keyboard Shortcuts 44 Keyboard Shortcuts - Windows 8.1/Windows RT - Dell Inspiron 20 3048 | Me and My Dell - Page 7
(VGA) 62 Digital Visual Interface (DVI) 62 DisplayPort 62 Mini-DisplayPort 62 Advantages of DisplayPort 63 HDMI 63 Advantages of HDMI 63 Mini HDMI 63 Micro HDMI 64 S/PDIF 64 Software and Applications 65 Computrace 65 Enabling Computrace 66 Getting Help on Computrace 66 - Dell Inspiron 20 3048 | Me and My Dell - Page 8
System 73 System Recovery Options 73 Dell Backup and Recovery 74 Dell Backup and Recovery Basic 74 Accessing Dell Backup and Recovery 74 Creating System Reinstall Discs 75 Restoring Your Computer 75 Dell Backup and Recovery Premium 75 Upgrading to Dell Backup and Recovery Premium 75 - Dell Inspiron 20 3048 | Me and My Dell - Page 9
DataSafe Local Backup 77 Creating system reinstall disks 77 Restoring your computer to a previous date or factory settings 77 Dell DataSafe Local Backup Premium 78 Upgrading to Dell DataSafe Local Backup Premium 78 Restoring system data 78 Restoring data using File and Folder Local Backup - Dell Inspiron 20 3048 | Me and My Dell - Page 10
Codes 89 BIOS 90 Changing BIOS Settings 90 Entering BIOS Setup Program 90 Resetting BIOS Password 91 Remove the CMOS Battery 91 Use System‑Board Jumper 91 Changing the Boot Sequence 92 Using Boot Menu 92 Using BIOS Setup Program 92 Getting Help and Contacting Dell 93 Getting - Dell Inspiron 20 3048 | Me and My Dell - Page 11
References Computer Maintenance Power Management Configuring Power Settings Configuring the Power Button Behavior Improving Battery Life Dell Longevity Mode Dell Desktop Mode Migration Tips Migrating from one Windows Operating System to a newer Operating System Ergonomic Instructions Dell and the - Dell Inspiron 20 3048 | Me and My Dell - Page 12
It also associates the email, OneDrive, and other linked accounts with your user profile on the computer. The settings of your computer are backed up in and follow the instructions on the screen. Local account Tap or click Sign in without a Microsoft account and follow the instructions on the screen. - Dell Inspiron 20 3048 | Me and My Dell - Page 13
Windows - tap or click the Desktop tile on the Start screen. Turning off your computer On the Start screen, click or tap the power icon → Shut down. Charms Charms so on. Also allows to send video and audio to supported devices, such as a TV. Provides access to notifications, volume controls, - Dell Inspiron 20 3048 | Me and My Dell - Page 14
, and so on. You can customize the Start screen by adding, resizing, or removing tiles. You can also move tiles around and group them together. Some of the them together. To snap apps: 1. Open the two apps. 2. Drag and release one of the apps to the right-side of the screen to dock the app. 3. Drag - Dell Inspiron 20 3048 | Me and My Dell - Page 15
More Information You can get more information on Windows 8.1 and the new features using any of the following resources. • Help + Tips tile • dell.com/support • microsoft.com More Information 15 - Dell Inspiron 20 3048 | Me and My Dell - Page 16
instructions specific to your computer or tablet, see the Quick Start Guide that shipped with your computer or at dell.com/support your modem and router, contact your internet service provider. Connecting to the Internet Using LAN Turn on/off file sharing (optional). 16 Setting Up Your Computer - Dell Inspiron 20 3048 | Me and My Dell - Page 17
a default network key. For details, contact the router manufacturer. 5. Turn on/off file sharing (optional). Connecting to the Internet Using WWAN WWAN connects directly to the service provider's network, like your cell phone. If you purchased a tablet with a network service contract, the internet - Dell Inspiron 20 3048 | Me and My Dell - Page 18
audio, connect the speakers to the 3.5 mm headphone port or the audio port. Dell desktops may support 5.1/7.1 audio. If you are setting up 5.1/7.1 audio, you must connect the speakers tone from every speaker. 4. Click Next and follow the instructions on the screen. 18 Setting Up Your Computer - Dell Inspiron 20 3048 | Me and My Dell - Page 19
Connecting 5.1 Speakers 1 Rear audio connector on the 5 computer 2 Center/LFE surround out on 6 the computer 3 Front audio connector on 7 the computer 4 5.1 channel audio cable Center/LFE surround out on the speaker Front audio connector on the speaker Rear audio connector on the speaker Setting - Dell Inspiron 20 3048 | Me and My Dell - Page 20
connector on 8 Rear audio connector on the the computer speaker 4 Front audio connector on 9 Side audio connector on the the computer speaker 5 7.1 channel audio cable 20 Setting Up Your Computer - Dell Inspiron 20 3048 | Me and My Dell - Page 21
USB. Some printers may also support Wi-Fi and Bluetooth connection. NOTE: The features supported by your printer and the instructions in the Add Printer Wizard. NOTE: You may be prompted to install the printer driver while adding your printer. Use the printer-driver media or download the drivers - Dell Inspiron 20 3048 | Me and My Dell - Page 22
media that is shipped with your webcam to install the drivers and other required software to use all the features of Setting up Bluetooth You can enable Bluetooth on your computer by turning on the wireless. Most laptops and tablets are shipped with dell.com/support. 22 Setting Up Your Computer - Dell Inspiron 20 3048 | Me and My Dell - Page 23
About Your Computer Power Adapter Power adapters are used to supply power to portable computers and certain desktop computers. The Dell power-adapter kit consists of the power adapter and the power cable. The power‑adapter rating (65 W, 90 W, and so on) depends on the computer it is designed for, - Dell Inspiron 20 3048 | Me and My Dell - Page 24
the battery on your computer may be user replaceable or may require a Dell service technician to replace. NOTE: High-capacity batteries generally have a Battery Coin-cell battery provides power to the Complementary Metal‑Oxide Semiconductor (CMOS) chip while the computer is turned off. The CMOS chip - Dell Inspiron 20 3048 | Me and My Dell - Page 25
drag or move selected items, and click by tapping the surface. Gesture‑enabled touchpads support gestures such as zoom, pinch, rotate, scroll, and so on. You can are then combined and interpreted by the brain as one image with depth. NOTE: You may need specially designed 3D glasses to be able - Dell Inspiron 20 3048 | Me and My Dell - Page 26
wireless-card drivers and Intel Wireless Display Connection Manager available at dell.com/support. NOTE: Wireless display may not be supported on generally have on-screen keyboards and some tablets also support external keyboards. Dell desktops have an external keyboard connected using USB or - Dell Inspiron 20 3048 | Me and My Dell - Page 27
laptop and desktop computers. Laptops generally have a built-in keyboard. External keyboards are generally used with desktop computers. Some the keyboard in dark environments. You can turn on the backlight manually or configure the backlight to turn on automatically when your computer is placed in - Dell Inspiron 20 3048 | Me and My Dell - Page 28
your computer at dell.com/support. On-Screen Keyboard On-screen keyboards are available on almost all computers and tablets, however, they are generally used in touchscreen devices such as tablets and all-in-one and do not require additional power source, such as batteries. - Dell Inspiron 20 3048 | Me and My Dell - Page 29
of the label on your device, see the Quick Start Guide that shipped with your computer or at dell.com/support. Dell Support Website 1. Go to dell.com/support. 2. Click Detect Service Tag and follow the instructions on the screen. BIOS Setup Program 1. Turn on (or restart) your computer. 2. When the - Dell Inspiron 20 3048 | Me and My Dell - Page 30
devices that you can remove from your computer without turning the computer off are called removable storage devices. Commonly used removable storage devices include: • Optical discs • Memory cards • Flash drives • External hard drives Optical Drives and Discs Your computer may support a DVD RW or - Dell Inspiron 20 3048 | Me and My Dell - Page 31
cards, also referred to as media or flash cards, use flash memory to store data. They are re-writeable, fast, and retain data even when power supply is cut off. They are commonly used in devices such as digital cameras, mobile phones, media players, gaming consoles, and so on. Your computer may - Dell Inspiron 20 3048 | Me and My Dell - Page 32
Extreme Digital (xD) Memory Stick XC (MSXC) Compact Flash I , II/Compact Flash MD Memory Stick Duo Memory Stick Pro Duo Memory Stick Pro-HG Duo Memory Stick (MS)/Memory Stick Pro (MS Pro) Smart Media/Smart Media XD 32 Storage Device - Dell Inspiron 20 3048 | Me and My Dell - Page 33
memory‑module types are: • Dual In-line Memory Module (DIMM) - Used in desktop computers. • Small Outline Dual In-line Memory Module (SODIMM) - Smaller in size than DIMMs. Generally used in laptop computers, however, may also be used in some compact desktops and all-in-one computers. Memory Module - Dell Inspiron 20 3048 | Me and My Dell - Page 34
the BIOS The figure below lists the basic components of a desktop system board. NOTE: Size, shape, and location of components may vary based on the type of system board and the computer it is designed for. 1 processor socket 3 power connector 5 PCI-Express x1 connector 7 eSATA connector 2 memory - Dell Inspiron 20 3048 | Me and My Dell - Page 35
in the processor. Processor Processors receive data and instructions from applications and process the data as requested by the software. Processors are designed specifically for desktops, laptops, mobile devices, and so on. Generally the processor designed for one type of device cannot be used on - Dell Inspiron 20 3048 | Me and My Dell - Page 36
the internal components of a computer by expelling hot air from the computer. Computer fans are commonly used to cool components that have high power consumption and thus generate a high amount of heat. Keeping the components cool helps in protecting them from overheating, malfunctioning, and damage - Dell Inspiron 20 3048 | Me and My Dell - Page 37
on the processor. Integrated video cards generally share the system memory (RAM) and the may also utilize the processor to perform video BIOS setup program to select which card to use. Switchable graphics allow computers equipped with both a low‑power integrated graphics chip, and a high‑power - Dell Inspiron 20 3048 | Me and My Dell - Page 38
You can use TV tuners to watch television on your computer. TV tuners are available for desktop and laptop computers as internal or external devices. NOTE: TV Tuners are not supported in all computers. Internal • PCI-E • PCI External • USB • PC Card • ExpressCard TV tuners are mostly standalone - Dell Inspiron 20 3048 | Me and My Dell - Page 39
Desktops also have a built-in speaker, however, they are used only to produce beeps to indicate errors or failures. You can also connect external speakers to your computer or tablet. Speakers may support , left surround, and right surround) and one low-frequency audio channel. 7.1 Audio 7.1 refers - Dell Inspiron 20 3048 | Me and My Dell - Page 40
mainly defined by the number of pixels it can capture. To use the webcam, you must install webcam drivers and software. If you ordered the webcam along with your computer, the drivers and software are generally installed when you receive your computer.For more information on using up the webcam, see - Dell Inspiron 20 3048 | Me and My Dell - Page 41
Wi-Fi (802.11x). Wireless Wide Area Network (WWAN) Also known as Mobile Broadband, this service is generally provided by the phone companies for use on mobile devices. A mobile device or laptop must support WWAN technology to connect to this network. Wireless Personal Area Network (WPAN) Devices are - Dell Inspiron 20 3048 | Me and My Dell - Page 42
external. • Digital modem - Used to send and receive data to and from a digital telephone line, like Digital Subscriber Line (DSL) or Integrated Services Digital Network (ISDN). Router A router is a device that forwards data between computer networks. The most familiar type of routers are home and - Dell Inspiron 20 3048 | Me and My Dell - Page 43
class laptops. A SIM card and a service contract may be required for WWAN connectivity. large business or ISP networks up to the powerful core routers that forward data at high speed so on. On Dell laptops and tablets that support NFC, it is enabled by default when wireless in turned on. NOTE: For - Dell Inspiron 20 3048 | Me and My Dell - Page 44
turned off. The internal circuitry of the battery prevents it from overcharging. NOTE: If the battery becomes too hot due to being in a hot environment, it may not charge when you connect the power select the default behavior of the key using BIOS setup program or using keyboard shortcuts. < - Dell Inspiron 20 3048 | Me and My Dell - Page 45
mode using the Advanced tab in the Power Options Properties window. Rename the selected item. Search for a file or folder. Display the address bar drop-down in Windows Explorer. Refresh the active window. Cycle through screen elements in a window or on the desktop. Activate the menu bar in the - Dell Inspiron 20 3048 | Me and My Dell - Page 46
the previous paragraph. with an arrow key Select a block of text. with any arrow key Select more than one item in a window or on the desktop, or select text within a document. Windows key and Minimize all open windows. Windows key and Restore all minimized - Dell Inspiron 20 3048 | Me and My Dell - Page 47
options available in the app. Switch input language and keyboard layout. Switch to a previously selected input language and keyboard layout. Cycle through open apps (except desktop apps). Using your Keyboard 47 - Dell Inspiron 20 3048 | Me and My Dell - Page 48
. Cycle through open apps (except desktop apps) in the reverse order. Snap an app to the left. Snap an app to the right. NOTE: For special shortcut keys available on your computer, see the Quick Start Guide that shipped with your computer or at dell.com/support. Customizing Your Keyboard You can - Dell Inspiron 20 3048 | Me and My Dell - Page 49
Windows 7 1. Click Start → Control Panel. 2. If your Control Panel is displayed by Category, click on the View by: drop-down menu and select Small icons or Large icons. 3. Click Keyboard. 4. Adjust the keyboard settings you want to change and click OK to save the settings and close the window. - Dell Inspiron 20 3048 | Me and My Dell - Page 50
on the touchpad. • To select and move (or drag) an object, position the cursor on the object and tap twice quickly on the touchpad without removing your finger from the touchpad after the second tap, then move the selected object by sliding your finger over the surface. 50 Using Your Touchpad - Dell Inspiron 20 3048 | Me and My Dell - Page 51
on your computer. NOTE: You can change the touchpad gestures settings by double‑clicking the touchpad icon in the notification area. Your computer may support Scroll, Zoom, Rotate, Flick, and Quick Launch gestures. Scroll Pan - Allows you to move the focus on the selected object when the entire - Dell Inspiron 20 3048 | Me and My Dell - Page 52
at the bottom edge of the touchpad, move your finger clockwise to scroll right and counterclockwise to scroll left. One‑finger zoom - Allows you to zoom-in or zoom-out by moving one finger in the zoom zone (at the left edge of the touchpad). Move a finger up in the zoom zone - Dell Inspiron 20 3048 | Me and My Dell - Page 53
Two‑finger zoom - Allows you to zoom-in or zoom-out using two fingers. Place two fingers on the touchpad and then move them apart to zoom‑in. Place two fingers on the touchpad and then bring them closer to zoom‑out. Rotate Twist - Allows you to rotate active content, in 90‑degree increments, using - Dell Inspiron 20 3048 | Me and My Dell - Page 54
Quick Launch Allows you to open your favorite applications. Tap three fingers on the touchpad to launch the pre‑configured application. NOTE: Use the touchpad configuration tool to choose the application to be launched. Using Your Touchscreen NOTE: Avoid using the touchscreen in dusty, hot, or humid - Dell Inspiron 20 3048 | Me and My Dell - Page 55
Zoom Place two fingers on the touchscreen and then move them apart to zoom‑in. Place two fingers on the touchscreen and then bring them closer to zoom‑out. Dwell Touch and hold the item on the screen to open the context menu. Flick Move a finger quickly in the desired direction to flip through - Dell Inspiron 20 3048 | Me and My Dell - Page 56
Rotate Scroll Rotate clockwise - Keeping a finger or thumb in place, move the other finger in an arched direction to the right Rotate counter-clockwise - Keeping a finger or thumb in place, move the other finger in an arched direction to the left You can also rotate the active content by moving - Dell Inspiron 20 3048 | Me and My Dell - Page 57
drivers installed on your computer. Pairing a Bluetooth device with your computer 1. Enable Bluetooth on your computer or tablet and the device you are pairing. On a Dell laptop, turn sure that your device is discoverable. 4. Follow the instructions on the screen to complete the pairing process. NOTE - Dell Inspiron 20 3048 | Me and My Dell - Page 58
If your computer or display has a built-in webcam, the drivers are installed and configured at the factory. The webcam gets activated automatically when you start a video chat or video capture application. You can also use Dell Webcam Central (Windows 7 only) to capture still images and videos - Dell Inspiron 20 3048 | Me and My Dell - Page 59
Start Guide that shipped with your computer or Specifications at dell.com/support. Types of Audio Ports Headphone port - Connect headphones, powered carries only frequency information (80 Hz and below). The LFE channel drives a subwoofer to provide extremely low bass extension. Systems not using - Dell Inspiron 20 3048 | Me and My Dell - Page 60
you to charge your USB devices even when the computer in turned off. USB also supports Plug-and-Play and hot swapping. Plug‑and‑Play - cable, one for standard USB plug and the other for power, thus allowing higher-power devices to be connected without the use of an independent power supply. It - Dell Inspiron 20 3048 | Me and My Dell - Page 61
port enables a user to run the USB 3.0 ports in USB 2.0 mode temporarily for troubleshooting purposes and also when operating system is reinstalled using a USB optical drive or a flash drive. eSATA eSATA allows you to connect external storage devices, such as hard drives and optical drives, to your - Dell Inspiron 20 3048 | Me and My Dell - Page 62
monitors, projectors, and so on. You can connect to a HDMI or DVI port using a VGA port by using the VGA to HDMI or VGA to DVI adapters. Digital Visual Interface (DVI) Digital such as monitors, projectors, and so on. It supports both video and audio signals. DisplayPort was designed specifically - Dell Inspiron 20 3048 | Me and My Dell - Page 63
computers, TVs, set-top boxes, DVD and Blu-ray players, gaming consoles, and so on. Advantages of HDMI • Supports high resolutions and high refresh‑rates • Supports 3D transmission • Supports HDCP • Commonly available in most computers and consumer multi‑media devices • Can be used to set up audio - Dell Inspiron 20 3048 | Me and My Dell - Page 64
Micro High Definition Multimedia Interface (HDMI) provides digital connection between your computer and as sound cards, speakers, home theater systems, TVs, and so on. It provides 5.1 audio support. There are two kinds of S/PDIF connections: • Optical - Uses optical fiber with TOSLINK connectors - Dell Inspiron 20 3048 | Me and My Dell - Page 65
communicates regularly with the Computrace server to report system information, location, and user identity. Computrace offers the following packages and features: Complete Absolute Track software Recovers within 30 days NOTE: Computrace may not be supported on all computers. Computrace 65 - Dell Inspiron 20 3048 | Me and My Dell - Page 66
Enabling Computrace 1. Turn on (or restart) your computer. 2. When the DELL logo appears, press immediately to enter BIOS setup program. NOTE: If you wait too long and the operating system logo appears, continue to wait until you see the Windows desktop; then, shut down your computer and try - Dell Inspiron 20 3048 | Me and My Dell - Page 67
alerts, performance improvement tips, and links to other Dell tools and diagnostic services. Downloading or Upgrading My Dell To download or upgrade to the latest version of My Dell, go to dell.com/support. NOTE: It is recommended to download the software from the Internet when prompted during the - Dell Inspiron 20 3048 | Me and My Dell - Page 68
up your computer, help with common errors and troubleshooting, virus and spyware removal, wireless‑network setup, and more. You can also find articles and FAQs on the most common problems and instructions on performing common tasks. The support categories provide flexible pricing and varying degrees - Dell Inspiron 20 3048 | Me and My Dell - Page 69
‑hardware upgrades TV and home theater installation Antivirus installation Internet and email setup Computer‑accessories setup Internet parental control setup File transfer and data backup Speed up your computer Virus and spyware removal Data recovery Computer errors and troubleshooting Network - Dell Inspiron 20 3048 | Me and My Dell - Page 70
Installing Quickset Quickset is pre-installed on a new Dell computer. If you need to reinstall Quickset, download it from the Dell support website at dell.com/support. NOTE: If you restore your computer using PC Restore or a similar application, Quickset is restored as well. NVIDIA 3D Applications - Dell Inspiron 20 3048 | Me and My Dell - Page 71
Description Shows/hides stereoscopic 3D effects Increases 3D depth Decreases 3D depth Shows/hides in-game compatibility message Increases convergence Decreases convergence Function Turns 3DTV Play on or off. NOTE: The gaming performance may reduce when using HD 3D mode even if 3DTV Play is disabled - Dell Inspiron 20 3048 | Me and My Dell - Page 72
diagnose and resolve issues on your computer. It allows an technical support representative to interact with your computer with your permission. A DellConnect request is initiated by a technical support agent when required during troubleshooting. NOTE: To access DellConnect and terms of usage, see - Dell Inspiron 20 3048 | Me and My Dell - Page 73
first solution to recover your operating system. Use when operating system failure prevents the use of Dell Backup and Recovery or when installing Windows on a new or replacement hard drive. Use this to restore your operating system configuration to an earlier point in time without affecting your - Dell Inspiron 20 3048 | Me and My Dell - Page 74
Backup and Recovery NOTE: Dell Backup and Recovery option is available only in Windows 8.1. Dell Backup and Recovery has two versions: • Dell Backup and Recovery Basic • Dell Backup and Recovery Premium Features Restore your system back to factory state Backup files manually Restore files from - Dell Inspiron 20 3048 | Me and My Dell - Page 75
separate drive or disk before using the recovery option. NOTE: If you ordered Dell Backup and Recovery Premium with your computer through Digital Delivery application, you need to download the Dell Backup and Recovery Basic first to get the Dell Backup and Recovery Premium option. Upgrading to Dell - Dell Inspiron 20 3048 | Me and My Dell - Page 76
Backup 1. Launch Dell Backup and Recovery. 2. Click the Recovery tile, and then select System Recovery. 3. Click Yes, Continue. 4. Follow the instructions on the screen. Dell DataSafe Local Backup CAUTION: Using Dell DataSafe Local Backup permanently removes any programs or drivers installed after - Dell Inspiron 20 3048 | Me and My Dell - Page 77
Local Backup. Creating system reinstall disks 1. Launch Dell DataSafe Local Backup. 2. Click Backup→ Create Recovery Media. 3. Follow the instructions on the screen. Restoring your computer to a previous date or factory settings 1. Launch Dell DataSafe Local Backup. 2. Click Restore→ Restore your - Dell Inspiron 20 3048 | Me and My Dell - Page 78
pre-installed on your computer. Upgrading to Dell DataSafe Local Backup Premium 1. Launch Dell DataSafe Local Backup. 2. Click UPGRADE NOW! Restoring system data 1. Launch Dell DataSafe Local Backup. 2. Click Backup→ Full System Backup. 3. Follow the instructions on the screen. Restoring data using - Dell Inspiron 20 3048 | Me and My Dell - Page 79
permanently deletes all data on the hard drive and removes any programs or drivers installed after you received your computer. If possible, back up the data before performing Dell Factory Image Restore. Use Dell Factory Image Restore only if other recovery methods fail. After two failed attempts - Dell Inspiron 20 3048 | Me and My Dell - Page 80
on the hard drive and removes any programs or drivers installed after you received your computer. If possible, back up the data before performing Dell Factory Image Restore. Use Dell Factory Image Restore only if System Restore did not resolve your operating system problem. 1. Turn on or restart - Dell Inspiron 20 3048 | Me and My Dell - Page 81
time you install a software or device driver, your computer updates Windows system files to support the new software or device. Sometimes, Recovery and click Open System Restore. 3. Follow the instructions on the screen. Undoing the Last System Restore 1. Switch to the traditional Windows desktop. - Dell Inspiron 20 3048 | Me and My Dell - Page 82
box, type System Restore and press . NOTE: The User Account Control window may appear. If you are an administrator on the computer, click Continue; otherwise, contact the administrator of the computer. 3. Click Next and follow the instructions on the screen. Undoing the Last System Restore In - Dell Inspiron 20 3048 | Me and My Dell - Page 83
your computer. You must reinstall all drivers and software after reinstalling the operating drive from the list and press . 4. Follow the instructions on the screen. System Reinstall Discs The system reinstall discs created using Dell Backup and Recovery allows you to return your hard drive - Dell Inspiron 20 3048 | Me and My Dell - Page 84
disc: 1. Turn off your computer. 2. Insert the system recovery disc into the optical drive or connect the USB key and power on the computer. 3. When the DELL logo appears from the boot device. 6. Follow the instructions on the screen to complete the recovery process. 84 Operating System Disc - Dell Inspiron 20 3048 | Me and My Dell - Page 85
(PSA) to diagnose various hardware problems. The ePSA tests devices such as the system board, keyboard, display, memory, hard drive, and so on. NOTE: PSA may not be supported on all computers. Invoking PSA 1. Turn on or restart your computer. 2. Press at the Dell logo to access the Boot Menu - Dell Inspiron 20 3048 | Me and My Dell - Page 86
Note the error code(s) and search for solutions at dell.com/support or contact Dell. Follow the instructions on the screen to continue to the next test, problems. The ePSA tests devices such as the system board, keyboard, display, memory, hard drive, and so on. NOTE: ePSA may not be supported - Dell Inspiron 20 3048 | Me and My Dell - Page 87
the status of the battery, power adapter, fans, and so if a display problem is caused by the Turn on or restart your computer. 2. Press at the Dell logo to access the Boot Menu. NOTE: If you wait too long and the operating system logo appears, continue to wait until you see the Windows desktop - Dell Inspiron 20 3048 | Me and My Dell - Page 88
/support or contact Dell. Follow the instructions on the screen to continue to the next test, retest the component that failed, or stop the test and restart the computer. If the PSA completes successfully, the following message appears on your screen: " No problems have been found with this system - Dell Inspiron 20 3048 | Me and My Dell - Page 89
Dell for assistance. NOTE: Some of the beep codes mentioned in the table below may not apply to your computer. Beep Codes One Two Three Four Five Six Seven Eight Possible Problem Possible system board failure - BIOS ROM checksum failure No RAM detected NOTE: If you installed or replaced the memory - Dell Inspiron 20 3048 | Me and My Dell - Page 90
can use BIOS setup program to: • Set or change a user-selectable option such as the user password. • Determine the devices installed on your computer, such as amount of memory, type of hard drive, and so on. • Change the system configuration information after you add, change, or remove any hardware - Dell Inspiron 20 3048 | Me and My Dell - Page 91
location of the coin‑cell battery and instruction on removing and replacing it, see the Service Manual at dell.com/support. Use System‑Board Jumper Almost all system boards on desktop computers contain a jumper to clear CMOS settings along with the BIOS password. The location of this jumper varies - Dell Inspiron 20 3048 | Me and My Dell - Page 92
operating system or, using a recovery disc or USB drive. You can select the boot order using the Boot Menu or the BIOS setup program. Using Boot Menu boot device using the Boot Menu: 1. Turn on or restart your computer. 2. Press at the Dell logo to enter BIOS setup program. NOTE: If you wait too - Dell Inspiron 20 3048 | Me and My Dell - Page 93
these online self-help resources: Self-Help Information Accessing Windows Help and Support For more information about Dell products and services For troubleshooting information, user manuals, technical help blogs, driver, software updates, and so on For more information about your Microsoft Windows - Dell Inspiron 20 3048 | Me and My Dell - Page 94
errors using My Dell and other tools available on your computer. • Clean your computer regularly using a soft, dry cloth. CAUTION: Using water or other solvents to clean your computer may damage your computer. • Ensure that there is enough free space on your internal hard drive. Not having enough - Dell Inspiron 20 3048 | Me and My Dell - Page 95
of sleep and hibernation. It puts any open documents and programs in memory and on your hard disk, and then puts your computer into a low-power state so that you can quickly resume your work. When hybrid sleep is turned on, putting your computer into sleep automatically puts your computer into - Dell Inspiron 20 3048 | Me and My Dell - Page 96
computer is running on battery and when it is connected to a power adapter. 4. Click Save changes. Improving Battery Life The operating time operating time of your battery significantly reduces if you use: • Optical drives. • Wireless communication devices, ExpressCards, media cards, or USB devices - Dell Inspiron 20 3048 | Me and My Dell - Page 97
mode may not be supported on all laptops. To configure Dell longevity mode: 1. Right-click the battery icon on the Windows notification area and click Dell Extended Battery Life Options. The Battery Meter dialog box appears. 2. Click the Longevity mode tab. 3. Click Enable to turn on, or Disable to - Dell Inspiron 20 3048 | Me and My Dell - Page 98
enable Desktop Mode. NOTE: Dell desktop mode may not be supported on all computers. To enable or disable desktop mode you purchase a new computer or when you upgrade to a new operating systems. CAUTION: documents, and so on. Migrating from one Windows Operating System to a newer Operating System - Dell Inspiron 20 3048 | Me and My Dell - Page 99
are available (from Dell and other sources) to distance is 510 mm-610 mm (20 in-24 in) from your eyes. chair that provides good back support. • Keep your forearms horizontal power cords that may interfere with comfortable seating or present a potential trip hazard. Ergonomic Instructions 99 - Dell Inspiron 20 3048 | Me and My Dell - Page 100
level 2 monitor and keyboard positioned directly in front of the user 3 monitor stand 4 feet flat on the floor 5 arms at desk level 6 wrists relaxed and flat NOTE: For the latest ergonomic instructions, see dell.com/regulatory_compliance. Dell and the Environment Green is not about limitation, it - Dell Inspiron 20 3048 | Me and My Dell - Page 101
for you to offset the greenhouse gas emissions from your computer equipment and to help build a healthier planet - one tree and forest at a time. Recycle With Dell As you upgrade computers and electronics, please join our efforts to keep technology out of the world's landfills. Recycling your home - Dell Inspiron 20 3048 | Me and My Dell - Page 102
. Contact Details for Regulatory Compliance Web site For any questions related to Product Safety, EMC or Ergonomics, send an e-mail to [email protected]. Additional Compliance Information The World Wide Trade Compliance Organization (WWTC) is responsible for managing
-
 1
1 -
 2
2 -
 3
3 -
 4
4 -
 5
5 -
 6
6 -
 7
7 -
8
-
9
-
10
-
11
-
12
-
13
-
14
-
15
-
16
-
17
-
18
-
19
-
20
-
21
-
22
-
23
-
24
-
25
-
26
-
27
-
28
-
29
-
30
-
31
-
32
-
33
-
34
-
35
-
36
-
37
-
38
-
39
-
40
-
41
-
42
-
43
-
44
-
45
-
46
-
47
-
48
-
49
-
50
-
51
-
52
-
53
-
54
-
55
-
56
-
57
-
58
-
59
-
60
-
61
-
62
-
63
-
64
-
65
-
66
-
67
-
68
-
69
-
70
-
71
-
72
-
73
-
74
-
75
-
76
-
77
-
78
-
79
-
80
-
81
-
82
-
83
-
84
-
85
-
86
-
87
-
88
-
89
-
90
-
91
-
92
-
93
-
94
-
95
-
96
-
97
-
98
-
99
-
100
-
101
-
102
 |
 |

Me and My Dell
© 2014 Dell Inc.