Dell M210X User's Guide - Page 26
Using the On-Screen Display, Main Menu, AUTO-ADJUST
 |
UPC - 884116026433
View all Dell M210X manuals
Add to My Manuals
Save this manual to your list of manuals |
Page 26 highlights
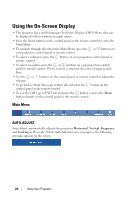
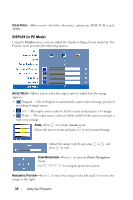
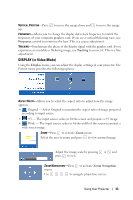
Using the On-Screen Display • The projector has a multi-language On-Screen Display (OSD) Menu that can be displayed with or without an input source. • Press the Menu button on the control panel or the remote control to enter the Main Menu. • To navigate through the tabs in the Main Menu, press the or buttons on your projectors control panel or remote control. • To select a submenu, press the button on your projectors control panel or remote control. • To select an option, press the or buttons on your projectors control panel or remote control. When an item is selected, the color changes to dark blue. • Use the or buttons on the control panel or remote control to adjust the settings. • To go back to Main Menu, go to Back tab and press the button on the control panel or the remote control. • To exit the OSD, go to EXIT tab and press the button or press the Menu button directly on the control panel or the remote control. Main Menu AUTO-ADJUST Auto Adjust automatically adjusts the projectors Horizontal, Vertical, Frequency and Tracking in PC mode. While Auto Adjustment is in progress, the following message appears on the screen: 26 Using Your Projector
-
 1
1 -
2
-
3
-
4
-
5
-
6
-
7
-
8
-
9
-
10
-
11
-
12
-
13
-
14
-
15
-
16
-
17
-
18
-
19
-
20
-
 21
21 -
 22
22 -
 23
23 -
 24
24 -
 25
25 -
 26
26 -
 27
27 -
 28
28 -
 29
29 -
 30
30 -
 31
31 -
32
-
33
-
34
-
35
-
36
-
37
-
38
-
39
-
40
-
41
-
42
-
43
-
44
-
45
-
46
-
47
-
48
-
49
-
50
-
51
-
52
-
53
-
54
-
55
-
56
-
57
-
58
-
59
-
60
 |
 |
