Dell OptiPlex GX240 Service Manual - Page 77
Hard Drive Removal, Tabs 2
 |
View all Dell OptiPlex GX240 manuals
Add to My Manuals
Save this manual to your list of manuals |
Page 77 highlights
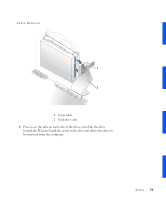
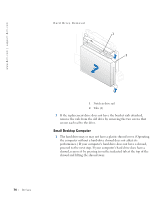
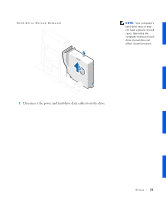
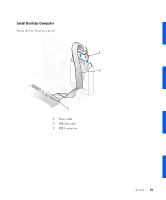
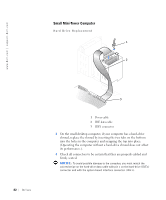
Hard Drive Removal 1 1 Tabs (2) 4 If the replacement drive does not have the bracket rails attached, remove the rails from the old drive by removing the two screws that secure each rail to the drive. Small Mini-Tower Computer 1 Disconnect the power and hard-drive data cables from the drive. Drives 77
-
 1
1 -
2
-
3
-
4
-
5
-
6
-
7
-
8
-
9
-
10
-
11
-
12
-
13
-
14
-
15
-
16
-
17
-
18
-
19
-
20
-
21
-
22
-
23
-
24
-
25
-
26
-
27
-
28
-
29
-
30
-
31
-
32
-
33
-
34
-
35
-
36
-
37
-
38
-
39
-
40
-
41
-
42
-
43
-
44
-
45
-
46
-
47
-
48
-
49
-
50
-
51
-
52
-
53
-
54
-
55
-
56
-
57
-
58
-
59
-
60
-
61
-
62
-
63
-
64
-
65
-
66
-
67
-
68
-
69
-
70
-
71
-
 72
72 -
 73
73 -
 74
74 -
 75
75 -
 76
76 -
 77
77 -
 78
78 -
 79
79 -
 80
80 -
 81
81 -
 82
82 -
83
-
84
-
85
-
86
-
87
-
88
-
89
-
90
-
91
-
92
-
93
-
94
-
95
-
96
-
97
-
98
-
99
-
100
-
101
-
102
-
103
-
104
-
105
-
106
-
107
-
108
-
109
-
110
-
111
-
112
-
113
-
114
-
115
-
116
-
117
-
118
-
119
-
120
-
121
-
122
-
123
-
124
-
125
-
126
-
127
-
128
-
129
-
130
-
131
-
132
-
133
-
134
-
135
-
136
-
137
-
138
-
139
-
140
-
141
-
142
-
143
-
144
 |
 |

Drives
77
Hard Drive Removal
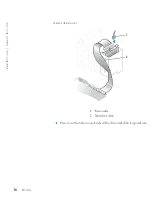
4
If the replacement drive does not have the bracket rails attached,
remove the rails from the old drive by removing the two screws that
secure each rail to the drive.
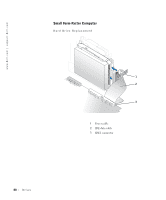
Small Mini-Tower Computer
1
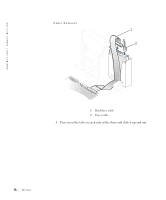
Disconnect the power and hard-drive data cables from the drive.
1
Tabs (2)
1