Dell PowerConnect W-IAP Remote Hardware Installation Guide - Page 29
Installing the device, Desktop installation,
 |
View all Dell PowerConnect W-IAP Remote manuals
Add to My Manuals
Save this manual to your list of manuals |
Page 29 highlights
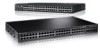
Preparing the installation site 2 • Allow for the unit to be connected to a separate grounded power outlet that provides 110 to 240 VAC, 50 to 60 Hz, is within 2 m (6.6 feet) of each device and is powered from an independent circuit breaker. As with any equipment, a filter or surge suppressor is recommended. Installing the device You can install Dell devices on a desktop or in an equipment rack, use appropriate retainer nuts and screws provided. CAUTION Make sure the rack or cabinet housing the device is adequately secured to prevent it from becoming unstable or falling over. Desktop installation FIGURE 18 Attaching the adhesive feet 1. Attach the four adhesive feet to the bottom of the first switch. 2. Set the device on a flat desktop, table, or shelf near an AC power source. Make sure that adequate ventilation is provided for the system. A 3 inch clearance is recommended on each side. 3. If installing a single switch only, refer to "Powering on the system" on page 24. 4. If installing multiple switches, attach the adhesive feet to each one. Place each device squarely on top of the one below, in any order. PowerConnect B-FCX Switch Hardware Installation Guide 19 53-1002267-01
-
 1
1 -
2
-
3
-
4
-
5
-
6
-
7
-
8
-
9
-
10
-
11
-
12
-
13
-
14
-
15
-
16
-
17
-
18
-
19
-
20
-
21
-
22
-
23
-
 24
24 -
 25
25 -
 26
26 -
 27
27 -
 28
28 -
 29
29 -
 30
30 -
 31
31 -
 32
32 -
 33
33 -
 34
34 -
35
-
36
-
37
-
38
-
39
-
40
-
41
-
42
-
43
-
44
-
45
-
46
-
47
-
48
-
49
-
50
-
51
-
52
-
53
-
54
-
55
-
56
-
57
-
58
-
59
-
60
-
61
-
62
-
63
-
64
-
65
-
66
-
67
-
68
-
69
-
70
-
71
-
72
-
73
-
74
-
75
-
76
-
77
-
78
-
79
-
80
-
81
-
82
-
83
-
84
-
85
-
86
 |
 |
