Dell PowerEdge 1955 Getting Started Guide - Page 10
Install the Server Modules
 |
View all Dell PowerEdge 1955 manuals
Add to My Manuals
Save this manual to your list of manuals |
Page 10 highlights
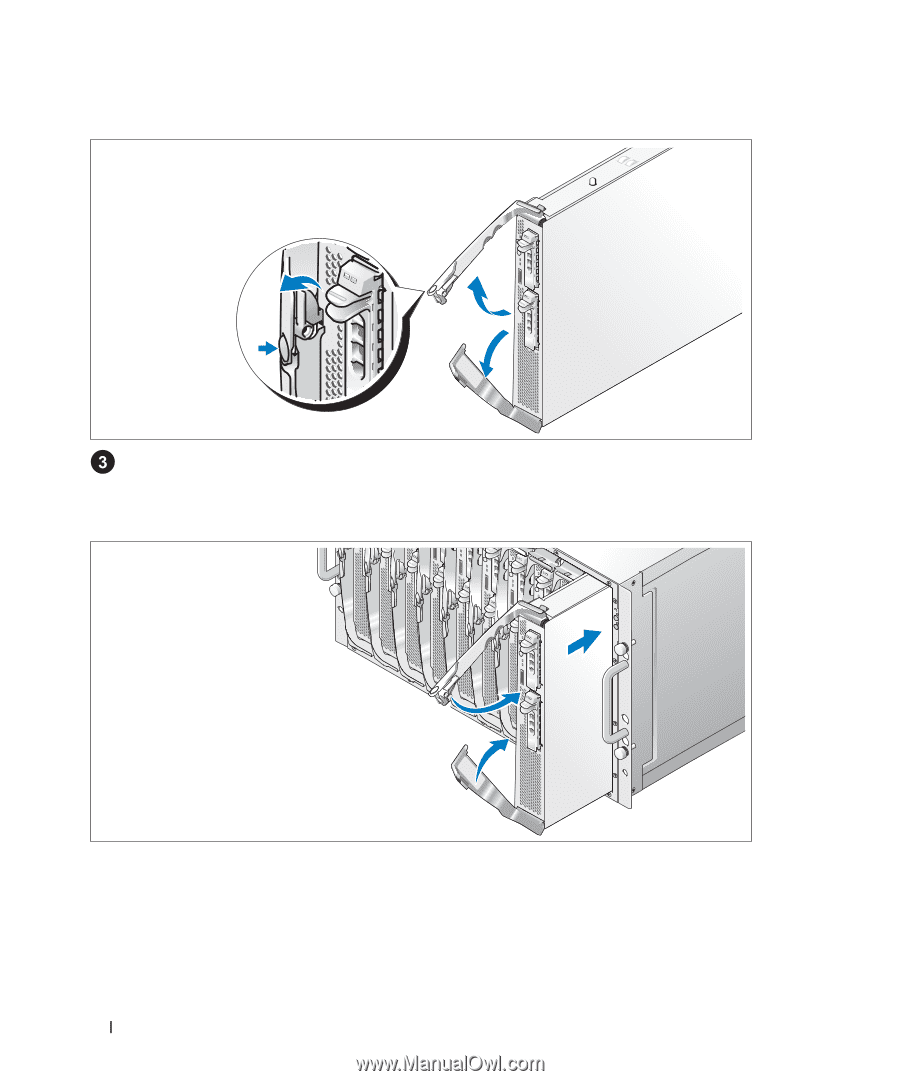
Install the Server Modules Before installing the modules, orient each module so that the upper handle has the logo on it and "TOP-SIDE" on the module edge faces upward. Press the release latch on the inside of the upper handle. Pull out the upper and lower handles. Beginning from left to right, slide the modules into the chassis. When the open handles contact the chassis front panel, begin to rotate the handles together (the lower handle will close first) until the lower handle is flush against the module's front panel. Continue to rotate the upper handle downward until it is flush against the lower handle. (When the handles are fully closed, the release latch will secure both handles to the front panel.) 8 Getting Started With Your System
-
 1
1 -
2
-
3
-
4
-
 5
5 -
 6
6 -
 7
7 -
 8
8 -
 9
9 -
 10
10 -
 11
11 -
 12
12 -
 13
13 -
 14
14 -
 15
15 -
16
-
17
-
18
-
19
-
20
-
21
-
22
-
23
-
24
-
25
-
26
-
27
-
28
-
29
-
30
-
31
-
32
-
33
-
34
-
35
-
36
-
37
-
38
-
39
-
40
-
41
-
42
-
43
-
44
-
45
-
46
-
47
-
48
-
49
-
50
-
51
-
52
-
53
-
54
-
55
-
56
-
57
-
58
-
59
-
60
-
61
-
62
-
63
-
64
-
65
-
66
-
67
-
68
-
69
-
70
-
71
-
72
-
73
-
74
 |
 |
8
Getting Started With Your System
Install the Server Modules
Before installing the modules, orient each module so that the upper handle has the logo on it and
"TOP-SIDE" on the module edge faces upward. Press the release latch on the inside of the upper
handle. Pull out the upper and lower handles.
Beginning from left to right, slide the modules into the chassis. When the open handles contact the
chassis front panel, begin to rotate the handles together (the lower handle will close first) until the
lower handle is flush against the module’s front panel. Continue to rotate the upper handle downward
until it is flush against the lower handle. (When the handles are fully closed, the release latch will
secure both handles to the front panel.)