Dell PowerEdge 2550 Activating the Dell PERC 3/Di - Page 7
Changing the System Setup Settings - hard drives
 |
View all Dell PowerEdge 2550 manuals
Add to My Manuals
Save this manual to your list of manuals |
Page 7 highlights
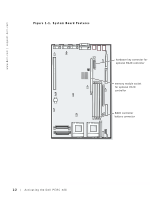
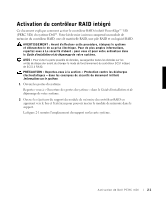
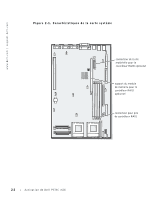
8 Connect the battery cable to the RAID battery connector on the system board (see Figure 1-1). 9 Close the system doors, reconnect the system and peripherals to their electrical outlets, and turn them on. 10 Enter the System Setup program and verify that the setting for the SCSI controller has changed to reflect the presence of the RAID hardware. See "Changing the System Setup Settings." 11 Install the RAID software. For more information, see the RAID controller documentation. Changing the System Setup Settings 1 Turn on your system. If your system is already turned on, shut the system down and then turn it on again. 2 Press immediately after you see the following message: Press for System Setup If you wait too long and your operating system begins to load into memory, allow the system to complete the load operation, and then shut down the system and try again. NOTE: To ensure an orderly system shutdown, see the documentation that accompanied your operating system. 3 Press to switch to Page 2 of the System Setup screen. • If the system detects the new RAID controller memory module and RAID hardware key, the system displays the RAID option in the Integrated Devices section of the screen. • If the system displays the SCSI option, it did not detect the integrated RAID controller. Ensure that the RAID hardware key and RAID memory module are the correct type and repeat all hardware installation steps found earlier in this document. NOTICE: To avoid possible data loss, back up all data on the hard-disk drives before changing the mode of operation of the integrated SCSI controller from SCSI to RAID. Activating the Dell PERC 3/Di 1-5
-
 1
1 -
 2
2 -
 3
3 -
 4
4 -
 5
5 -
 6
6 -
 7
7 -
 8
8 -
 9
9 -
 10
10 -
 11
11 -
 12
12 -
13
-
14
-
15
-
16
-
17
-
18
-
19
-
20
-
21
-
22
-
23
-
24
-
25
-
26
-
27
-
28
-
29
-
30
-
31
-
32
 |
 |