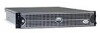
Dell PowerEdge 2650 2-Post Rack Installation - Page 6
Installation Instructions, continued - power supply
 |
View all Dell PowerEdge 2650 manuals
Add to My Manuals
Save this manual to your list of manuals |
Page 6 highlights
www.dell.com | support.dell.com CAUTION: Safety Instructions (continued) • Use caution when pressing the component rail release latches and sliding a component into or out of a rack; the slide rails can pinch your fingers. • After a component is inserted into the rack, carefully extend the rail into a locking position, and then slide the component into the rack. • Do not overload the AC supply branch circuit that provides power to the rack. The total rack load should not exceed 80 percent of the branch circuit rating. • Ensure that proper airflow is provided to components in the rack. • Do not step on or stand on any component when servicing other components in a rack. Installation Instructions This installation guide provides instructions for trained service technicians installing one or more systems in an open-frame relay rack. One rack kit is required for each system to be installed in the rack cabinet. This guide includes procedures for the two-post kit (installed in either center-mount or flush-mount configuration, for 3- or 6-inch-wide racks) For ease in troubleshooting and the identification of system health, this rack kit includes a status-indicator cable that extends the information on the two-color status indicators on the front and back panels to the back of the cable-management arm. For more information on these indicators, see your system User's Guide. Before attempting this installation, you should read through this entire document carefully. CAUTION: Do not install rack kit components designed for another system. Use only the rack kit for your system. Using the rack kit for another system may result in damage to the system and personal injury to yourself and to others. 1-2 2-Post Rack Installation
-
 1
1 -
 2
2 -
 3
3 -
 4
4 -
 5
5 -
 6
6 -
 7
7 -
 8
8 -
 9
9 -
 10
10 -
 11
11 -
 12
12 -
13
-
14
-
15
-
16
-
17
-
18
-
19
-
20
 |
 |
