Dell PowerEdge 800 Information Update - Dell OpenManage™ Server Suppor - Page 2
Installation and Troubleshooting Guide - nic
 |
View all Dell PowerEdge 800 manuals
Add to My Manuals
Save this manual to your list of manuals |
Page 2 highlights
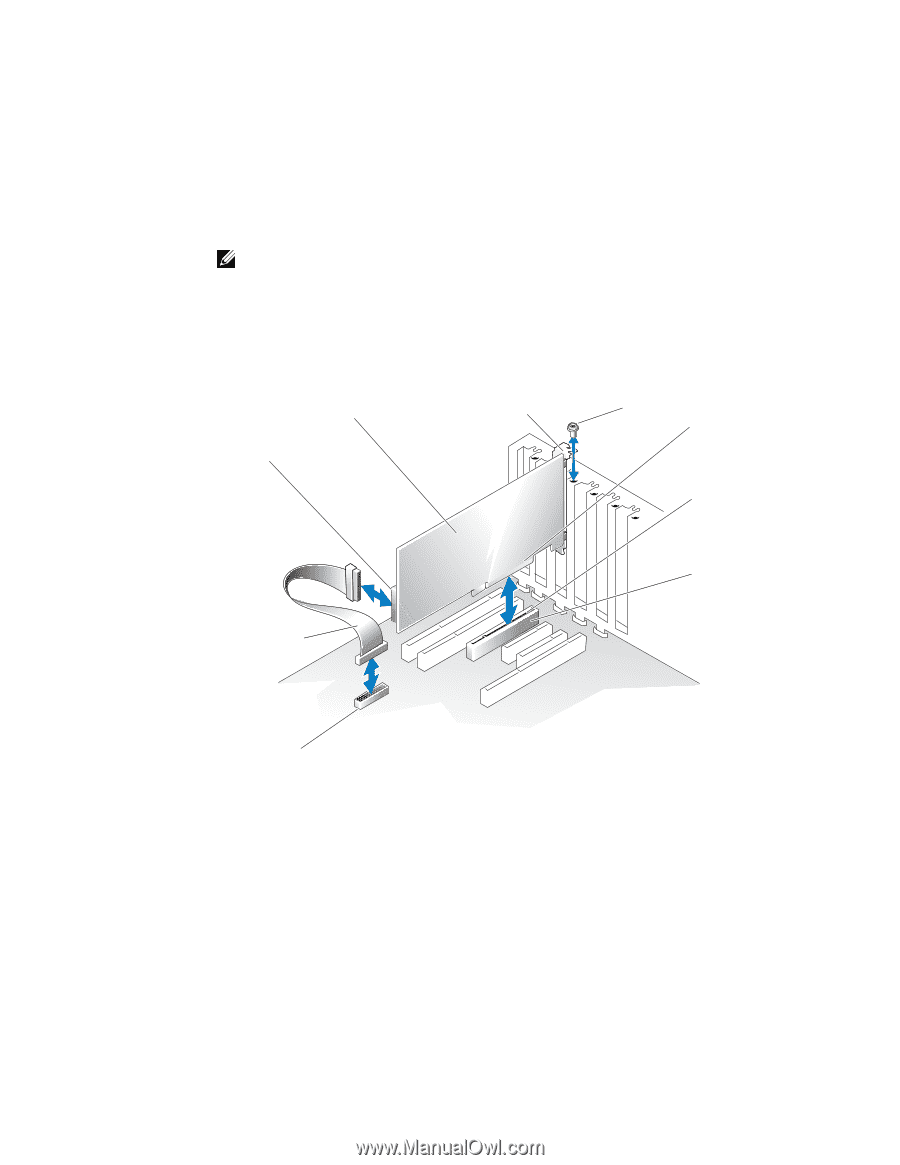
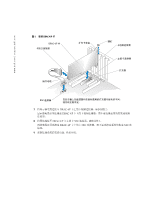
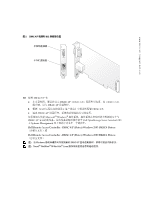
www.dell.com | support.dell.com b Insert the card-edge connector firmly into the system-board card connector until the card is fully seated. NOTE: Some systems use a plastic bar to secure the expansion-card bracket to the back panel instead of a screw. c Install the screw that secures the expansion-card bracket to the back panel. 6 Close the system. See "Closing the System" in the Installation and Troubleshooting Guide for instructions. Figure 1. Installing the DRAC 4/P Card DRAC 4/P card card-interface connector expansion-card bracket screw card-edge connector systemboard card connector expansion slot interface cable RAC connector The connectors on your system board and the actual expansion slot that you use may vary on your system board. 7 Connect the monitor cable to the card video connector on the DRAC 4/P card. See Figure 2. The monitor cable must be connected to the card video connector on the DRAC 4/P card- not to the system's integrated video connector. 8 Connect the network to the card NIC connector on the DRAC 4/P card. See Figure 2. The network cable must be connected to the card NIC connector on the DRAC 4/P card- not to the system's integrated NIC connector. 9 Reattach the system to its AC power source and turn on the system.
-
 1
1 -
 2
2 -
 3
3 -
 4
4 -
 5
5 -
 6
6 -
 7
7 -
 8
8 -
9
-
10
-
11
-
12
-
13
-
14
-
15
-
16
-
17
-
18
-
19
-
20
-
21
-
22
-
23
-
24
-
25
-
26
-
27
-
28
 |
 |