Dell PowerEdge M620 Brocade 4424 Blade Server SAN I/O Module Hardware Referenc - Page 18
Dell PowerEdge M620 Manual
 |
View all Dell PowerEdge M620 manuals
Add to My Manuals
Save this manual to your list of manuals |
Page 18 highlights
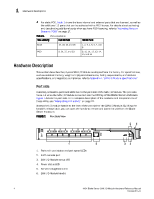
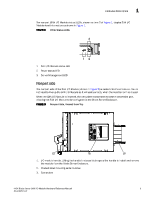
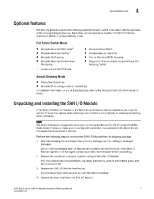
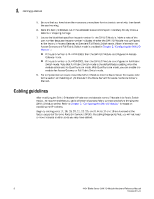
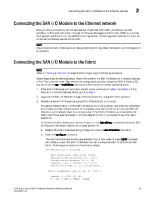
1 Cabling guidelines 5. Be sure that you have taken the necessary precautions for electrostatic sensitivity; then break the seal warning. 6. Slide the SAN I/O Module out of the antistatic sleeve and inspect it carefully for any obvious defects or shipping damage. 7. Locate the label that specifies the part number for the SAN I/O Module. Make a note of the part number because the part number indicates whether the SAN I/O Module was configured at the factory in Access Gateway or Standard Full Fabric Switch mode. (More information on Access Gateway and Full-Fabric Switch mode is provided in Chapter 2, "Configuring the SAN I/O Module".) • If the part number is DL-4424-0003, then the SAN I/O Module is configured in Access Gateway mode. • If the part number is DL-4424-0001, then the SAN I/O Module is configured in Full Fabric Switch mode. Note that Full Fabric Switch mode is the default factory setting when the module is licensed for Dual Function mode. With Dual Function mode, you can enable the module for Access Gateway or Full Fabric Switch mode. 8. For complete instructions to install the SAN I/O Module into the Blade Server Enclosure, refer to the section on installing an I/O module in the Blade Server Enclosure Hardware Owner's Manual. Cabling guidelines After modifying the SAN I/O Module's IP address and domain name (if Module is in Fabric Switch mode), we recommend that you cable all external ports to fabric connections before bringing the SAN I/O Module online. Refer to Chapter 2, "Configuring the SAN I/O Module," for steps on modifying the IP address. Begin by cabling ports 17, 18, 19, 20, 21, 22, 23, and 0. Ports 17 and 18 are licensed at the factory as part of Dynamic Ports On Demand (DPOD). By cabling these ports first, you will not need to move licenses to other ports you may have cabled. 8 4424 Blade Server SAN I/O Module Hardware Reference Manual 53-0000571-01
-
 1
1 -
2
-
3
-
4
-
5
-
6
-
7
-
8
-
9
-
10
-
11
-
12
-
 13
13 -
 14
14 -
 15
15 -
 16
16 -
 17
17 -
 18
18 -
 19
19 -
 20
20 -
 21
21 -
 22
22 -
 23
23 -
24
-
25
-
26
-
27
-
28
-
29
-
30
-
31
-
32
-
33
-
34
-
35
-
36
-
37
-
38
-
39
-
40
-
41
-
42
-
43
-
44
-
45
-
46
-
47
-
48
 |
 |
