Dell PowerVault 735N Boot Hard-Disk Drive Replacement Instructions - Page 5
NOTE: If the Microsoft - service manual
 |
View all Dell PowerVault 735N manuals
Add to My Manuals
Save this manual to your list of manuals |
Page 5 highlights
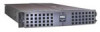
Dell™ PowerVault™ 735N NAS Appliances Boot Hard-Disk Drive Replacement support.dell.com This document describes how to remove a faulty hard-disk drive containing the operating system from your Dell PowerVault network attached storage (NAS) appliance. See your system Installation and Troubleshooting document for detailed information on troubleshooting your system. NOTE: If the Microsoft® Windows® Powered operating system becomes inoperable, you can use the Dell PowerVault 735N Systems Reinstallation CD to reinstall the operating system. If you can successfully restore the operating system on the boot harddisk drive and the drive passes all the Dell Diagnostics, it is not necessary to replace the boot hard-disk drive at this time. Install this customer kit only when your boot hard-disk drive (SCSI ID 0, located in the top left slot in your system) fails to successfully install the operating system. Kit Contents This customer kit consists of a hard-disk drive and this document. You will also need a #2 Phillips screwdriver (to remove the faulty hard-disk drive from its drive carrier and to install the new replacement hard-disk drive). You should be familiar with the contents of your System Administrator's Guide and your Service Manual. Hard-Disk Drive Removal Each hard-disk drive installed in the system is mounted in a hard-disk drive carrier. The front bezel must be removed from the system front panel, and the square metal locking pin must be lifted out before you remove a drive carrier. To remove a hard-disk drive and its drive carrier, perform the following steps. NfoOr TinICfoEr:mSeaetiothneosnapfertoyteinctsitnrguctthioenssyisnteymoufrroSmysteelmectIrnofsotramtiactdioisncdhoacrugme.ent 1. Shut down the system and disconnect the power cables. 2. If the optional bezel is installed, remove it. Dell PowerVault NAS Appliances Boot Hard-Disk Replacement 1
-
 1
1 -
 2
2 -
 3
3 -
 4
4 -
 5
5 -
 6
6 -
 7
7 -
 8
8 -
 9
9 -
 10
10
 |
 |
