Dell PowerVault MD3200i Deployment Guide - Page 41
Specify Configuration Manually, CHAP Configuration, Summary, Apply, Con Additional Arrays
 |
View all Dell PowerVault MD3200i manuals
Add to My Manuals
Save this manual to your list of manuals |
Page 41 highlights
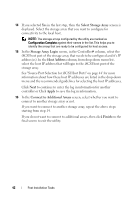
If you have not selected Specify Configuration Manually for any of the two protocols, then you can skip step 8. 8 If you have selected Specify Configuration Manually for any of the two protocols in the last step, a series of screens showing the backend view image of the storage array controllers is displayed. Each image contains IP addresses of management ports of the controllers. Also each image has one management port highlighted in red. For IPv4 address of the highlighted port, enter the IP address, subnet mask and gateway address in the fields shown below the image in order to modify it. For IPv6 address of the highlighted port, enter the local IP address, routable IP, and router IP address in the fields shown below the image in order to modify it. Click Next to continue through these images to complete the configuration of all the management ports for the selected protocols. 9 In the CHAP Configuration screen, select the CHAP method and click Next. For more information on CHAP see "Understanding CHAP Authentication" on page 61. 10 In the Summary screen, review the information that you entered for the storage array. Click Apply to save the changes to the storage array. NOTE: To abort the configuration for the storage array and to go back to select a storage array for configuration, click Cancel Array. 11 On the Configure Additional Arrays screen, select whether you want to configure additional array. Click Next to continue. 12 If you selected Yes in the above step, then start again from step 4. 13 If you selected No in step 12, then on the Configure Host Connectivity screen, select whether you want to configure the connectivity for current host's iSCSI initiator. Click Next to continue. If you selected No above, then you are done with the configuration task. Click Finish on the final screen to exit the utility. Post Installation Tasks 41
-
 1
1 -
2
-
3
-
4
-
5
-
6
-
7
-
8
-
9
-
10
-
11
-
12
-
13
-
14
-
15
-
16
-
17
-
18
-
19
-
20
-
21
-
22
-
23
-
24
-
25
-
26
-
27
-
28
-
29
-
30
-
31
-
32
-
33
-
34
-
35
-
 36
36 -
 37
37 -
 38
38 -
 39
39 -
 40
40 -
 41
41 -
 42
42 -
 43
43 -
 44
44 -
 45
45 -
 46
46 -
47
-
48
-
49
-
50
-
51
-
52
-
53
-
54
-
55
-
56
-
57
-
58
-
59
-
60
-
61
-
62
-
63
-
64
-
65
-
66
-
67
-
68
-
69
-
70
-
71
-
72
-
73
-
74
-
75
-
76
-
77
-
78
-
79
-
80
-
81
-
82
 |
 |
