Dell PowerVault TL2000 Setting Up Your iSCSI Bridge - Page 6
Using Linux Server, Using RHEL 5 or SLES 10 SP1 - service manual
 |
View all Dell PowerVault TL2000 manuals
Add to My Manuals
Save this manual to your list of manuals |
Page 6 highlights
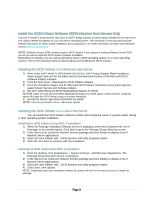
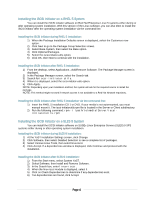
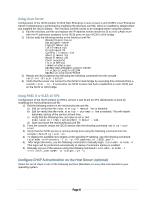
Using Linux Server Configuration of the iSCSI initiator for Red Hat® Enterprise Linux® version 4 and SUSE® Linux Enterprise Server 9 distributions is performed by modifying the /etc/iscsi.conf file, which is installed by default when you installed the iSCSI initiator. The /etc/iscsi.conf file needs to be changed before using the initiator: 1) Edit the /etc/iscsi.conf file and replace the IP address entries shown for DiscoveryAddress= with the IP addresses assigned to the iSCSI ports on your iSCSI to SAS bridge: 2) Edit (or add) the following entries to the /etc/iscsi.conf file: HeaderDigest=never DataDigest=never LoginTimeout=15 IdleTimeout=15 PingTimeout=5 ConnFailTimeout=144 AbortTimeout=10 ResetTimeout=30 Continuous=no InitialR2T=no ImmediateData=yes MaxRecvDataSegmentLength=65536 FirstBurstLength=262144 MaxBurstLength=16776192 3) Restart the iSCSI daemon by executing the following command from the console: /etc/init.d/iscsi restart 4) Verify that the server can connect to the iSCSI to SAS bridge by executing this command from a console: iscsi -ls. If successful, an iSCSI session has been established to each iSCSI port on the iSCSI to SAS bridge. Using RHEL 5 or SLES 10 SP1 Configuration of the iSCSI initiator for RHEL version 5 and SLES 10 SP1 distributions is done by modifying the /etc/iscsi/iscsid.conf file. 1) Edit the following entries in the /etc/iscsi/iscsid.conf file: a) Edit (or verify) that the node.startup = manual line is disabled. b) Edit (or verify) that the node.startup = automatic line is enabled. This will enable automatic startup of the service at boot time. c) Verify that the following time-out value is set to 144: node.session.timeo.replacement_timeout = 144 d) Save and close the /etc/iscsi/iscsid.conf file. 2) From the console, restart the iSCSI service with the following command: service iscsi start 3) Verify that the iSCSI service is running during boot using the following command from the console: chkconfig iscsi on 4) To display the available iscsi targets at the specified IP address, use the following command: iscsiadm -m discovery -t st -p 5) After target discovery, use the following command to manually login: iscsiadm -m node -l. This logon will be performed automatically at startup if automatic startup is enabled. 6) Manually log out of the session using the following command: iscsiadm -m node -T -p -u Configure CHAP Authentication on the Host Server (optional) Select the set of steps in one of the following sections (Windows or Linux) that corresponds to your operating system. Page 6
-
 1
1 -
 2
2 -
 3
3 -
 4
4 -
 5
5 -
 6
6 -
 7
7 -
 8
8 -
 9
9 -
 10
10 -
 11
11 -
 12
12 -
13
-
14
-
15
-
16
 |
 |
