Dell Precision M60 Reference Guide - Page 23
Installing a Battery
 |
View all Dell Precision M60 manuals
Add to My Manuals
Save this manual to your list of manuals |
Page 23 highlights
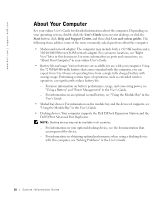
3 Slide and hold the battery-bay latch release on the bottom of the computer, and then remove the battery from the bay. Installing a Battery CAUTION: Before performing this procedure, read and follow the safety instructions that begin on page 5. Slide the battery into the bay and lower the battery until the latch release clicks. For more information about installing the second battery, see "Using the Module Bay" in your online User's Guide. System Infor mation Guide 21
-
 1
1 -
2
-
3
-
4
-
5
-
6
-
7
-
8
-
9
-
10
-
11
-
12
-
13
-
14
-
15
-
16
-
17
-
 18
18 -
 19
19 -
 20
20 -
 21
21 -
 22
22 -
 23
23 -
 24
24 -
 25
25 -
 26
26 -
 27
27 -
 28
28 -
29
-
30
-
31
-
32
-
33
-
34
-
35
-
36
-
37
-
38
-
39
-
40
-
41
-
42
-
43
-
44
-
45
-
46
-
47
-
48
-
49
-
50
-
51
-
52
-
53
-
54
-
55
-
56
-
57
-
58
-
59
-
60
-
61
-
62
-
63
-
64
-
65
-
66
-
67
-
68
-
69
-
70
-
71
-
72
-
73
-
74
-
75
-
76
-
77
-
78
-
79
-
80
-
81
-
82
-
83
-
84
-
85
-
86
-
87
-
88
-
89
-
90
-
91
-
92
-
93
-
94
-
95
-
96
-
97
-
98
-
99
-
100
-
101
-
102
-
103
-
104
-
105
-
106
-
107
-
108
-
109
-
110
-
111
-
112
-
113
-
114
-
115
-
116
-
117
-
118
-
119
-
120
-
121
-
122
-
123
-
124
-
125
-
126
-
127
-
128
-
129
-
130
-
131
-
132
-
133
-
134
-
135
-
136
-
137
-
138
-
139
-
140
-
141
-
142
-
143
-
144
 |
 |

System Information Guide
21
3
Slide and hold the battery-bay latch release on the bottom of the computer, and then
remove the battery from the bay.
Installing a Battery
CAUTION: Before performing this procedure, read and follow the safety
instructions that begin on page 5.
Slide the battery into the bay and lower the battery until the latch release clicks.
For more information about installing the second battery, see "Using the Module Bay" in
your online
User’s Guide
.