Dell S520 Dell Interactive Projector Quick Start Guide - Page 2

Wireless Projection - video

Page 2 highlights

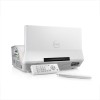
1 Connect power, video, Mini USB, DC to DC cables to projector Mini USB、DC到DC eᅂ྅eMini USBeDC ᔷ DC USBɺDC DC 2 Attach Laser Curtain Kit onto whiteboard 3 Connect DC to DC cable to Laser Curtain Kit 将DC到DC DC ᔷ DC DC DC 4 Turn on Projector, adjust image zoom & focus d Aspect Ratio 5 Connect video & USB cables to computer USB USB USB 1 2 6 Install Touch Driver & Initialize Touch Control Function in your computer d MOLEX 1 2 3 4 Wireless Projection From your computer Switch the projector to Wireless Display or Intel® WiDi source mode and follow the on-screen instructions. Note: Refer to the User's Guide for system requirements Intel® WiDi Intel® WiDi d f ௪ൗj d Intel® WiDi From your mobile devices Dell S520 supports wireless transmission of supported content from Android & iOS devices. Download WiFi-Doc (Bundle Version) from the Apple App Store or Google Play Store. Switch the projector to Wireless Display source mode and launch the app on your mobile device. Dell S520 Android和iOS Apple App Store或Google Play Store下载WiFi-Doc Android ၾ iOS Dell S520fሗί Apple App Store ‫ א‬Google Play Store ɨ༱ WiFiDoc f d f Dell S520 ͸ɺAndroid ͓Αͼ iOS Apple App Store ·ͨ͸ Google Play Store ͔Β WiFi-Doc

  • 1
  • 2

Connect power, video, Mini USB, DC to DC
cables to projector
将电源、视频、
Mini USB
DC
DC
等线缆连接到投影仪
將電源、影像、
Mini USB
DC
DC
纜線連接投影機
電源、ビデオ、ミニ
USB
DC
をプロジェクタの
DC
ケーブルに接続します
Connect DC to DC cable to Laser Curtain Kit
DC
DC
线连接到激光幕套件
DC
DC
纜線連接雷射幕組件
DC
をレーザーカーテンキットの
DC
ケーブルに接続します
Turn on Projector, adjust image zoom & focus
开启投影仪,调整图像变焦和对焦
開啟投影機,調整影像縮放與焦距
プロジェクタに電源を入れ、画像のズームとフォーカスを調整します
Install Touch Driver & Initialize Touch Control
Function in your computer
在计算机中安装触控驱动程序和初始化触控功能
在電腦上安裝觸控功能驅動程式,再將觸控功能初始化
お使いのコンピュータにタッチドライバをインストールし、タッチコントロール機能を初期化します
Connect video & USB cables to computer
将视频线和
USB
线连接到计算机
將影像與
USB
纜線連接電腦
ビデオおよび
USB
ケーブルをコンピュータに接続します
1
3
4
6
5
2
Aspect
Ratio
Wireless Projection
无线投影
|
無線投影
|
ワイヤレスプロジェクション
Attach Laser Curtain Kit onto whiteboard
将激光幕套件安装到白板上
將雷射幕組件裝在白板上
レーザーカーテンキットをホワイトボード上に取り付けます
MOLEX
1
2
1
3
4
2
From your computer
从计算机
|
透過電腦
|
コンピュータから
From your mobile devices
从移动设备
|
透過行動裝置
|
モバイルデバイスから
Switch the projector to Wireless Display or Intel
®
WiDi source
mode and follow the on-screen instructions.
Note: Refer to the User’s Guide for system requirements
将投影仪切换到无线显示或
Intel
®
WiDi
输入源模式,然后按照屏
幕说明进行操作。
注:参见用户指南以了解系统要求
將投影機切換為無線顯示或
Intel
®
WiDi
訊號源模式,再遵照螢幕
上的指示。
備註:如需查看系統需求,請參閱使用指南
プロジェクタをワイヤレスディスプレイモードまたは
Intel
®
WiDi
ースモードに切り替え、スクリーン上の指示に従います。
メモ:システム要件については、ユーザーズガイドを参照してくだ
さい
Dell S520 supports wireless transmission of supported
content from Android & iOS devices. Download WiFi-Doc
(Bundle Version) from the Apple App Store or Google Play
Store.
Switch the projector to Wireless Display source mode and
launch the app on your mobile device.
Dell S520
支持以无线方式传输来自
Android
iOS
设备的受支持内
容。从
Apple App Store
Google Play Store
下载
WiFi-Doc
(捆
绑版本)。
将投影仪切换到无线显示输入源模式,然后在移动设备上启动应
用程序。
可透過
Android
iOS
裝置以無線方式傳輸支援內容至
Dell
S520
。請在
Apple App Store
Google Play Store
下載
WiFi-
Doc
(搭售版)。
將投影機切換至無線顯示訊號源模式,然後在行動裝置上執行上
述應用程式。
Dell S520
は、
Android
および
iOS
デバイスからサポートするコ
ンテンツの無線伝送をサポートします。
Apple App Store
または
Google Play Store
から
WiFi-Doc
(バンドル版)をダウンロードし
ます。
プロジェクタをワイヤレスディスプレイモードに切り替え、モバイル
デバイス上でアプリを起動します。