Dell SP1908FP User Guide - Page 20
Using the Front Panel
 |
View all Dell SP1908FP manuals
Add to My Manuals
Save this manual to your list of manuals |
Page 20 highlights
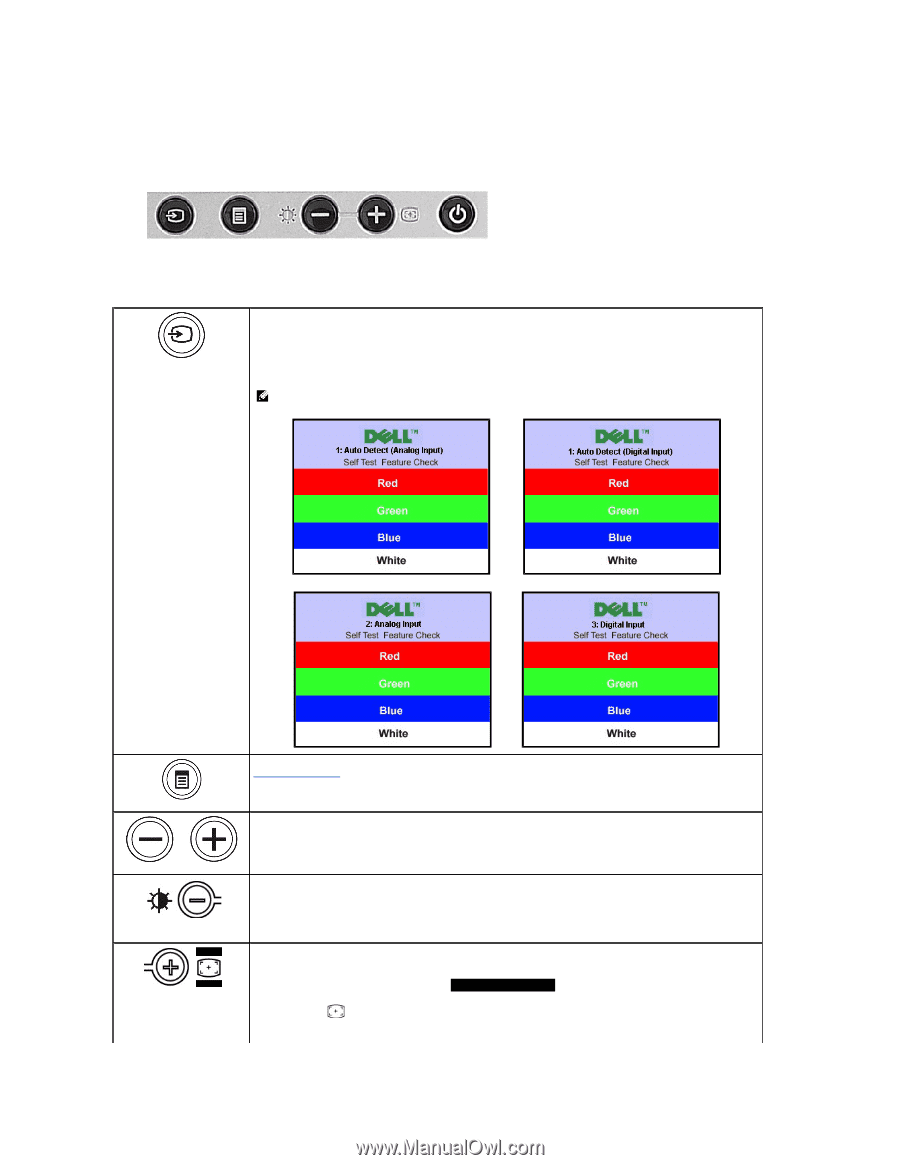
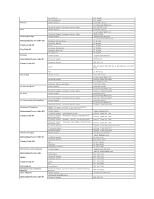
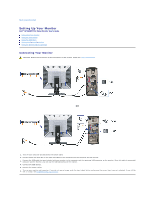
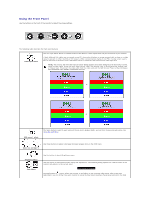
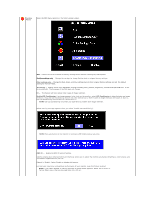
Using the Front Panel Use the buttons on the front of the monitor to adjust the image settings. The following table describes the front panel buttons: Video input select Use the Input Select button to choose between two different video signals that may be connected to your monitor. If both VGA and DVI cables are connected to one PC, the monitor displays an image automatically as long as a video signal is present in either the VGA or DVI outputs. When connecting one display to two PCs, if using screen savers, best to set both to the exact times. Whichever mouse is moved first will activate that video input first. NOTE: The floating 'Dell Self-test Feature Check' dialog appears on a black background if the monitor cannot sense a video signal. Using the input select button, select the desired input to be tested either Analog Input or Digital Input. Disconnect the video cable from the video card and the Dell Self-test Feature Check dialogue box will appear if the display is operating correctly. or or OSD menu / select The Menu button is used to open and exit the on-screen display (OSD), and exit from menus and sub-menus. See Using the OSD Menu. Down (-) and Up (+) Use these buttons to adjust (decrease/increase ranges) items in the OSD menu. Brightness Menu Auto Adjust Use this button to launch Brightness menu. Use this button to activate automatic setup and adjustment. The following dialog appears on a black screen as the monitor self-adjusts to the current input: Auto Adjust In Progress Auto Adjustment button allows the monitor to self-adjust to the incoming video signal. After using Auto Adjustment, you can further tune your monitor by using the Pixel Clock (Coarse), Phase (Fine) controls in the OSD.
-
 1
1 -
2
-
3
-
4
-
5
-
6
-
7
-
8
-
9
-
10
-
11
-
12
-
13
-
14
-
 15
15 -
 16
16 -
 17
17 -
 18
18 -
 19
19 -
 20
20 -
 21
21 -
 22
22 -
 23
23 -
 24
24 -
 25
25 -
26
-
27
-
28
-
29
-
30
-
31
-
32
-
33
 |
 |