Dell TL2000 Product Guide - Page 11
Windows Host Setup
 |
View all Dell TL2000 manuals
Add to My Manuals
Save this manual to your list of manuals |
Page 11 highlights
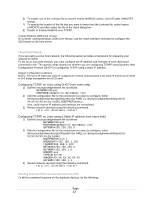
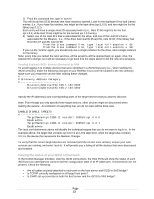
Guidelines for Configuring Your Network for iSCSI This section gives general guidelines for setting up your network environment and IP addresses for use with the iSCSI ports on your host server and iSCSI to SAS bridge. Your specific network environment may require different or additional steps than shown here, so make sure you consult with your system administrator before performing this setup. Windows Host Setup If you are using a Windows host network, the following section provides a framework for preparing your network for iSCSI. To set up a Windows host network, you must configure the IP address and netmask of each iSCSI port connected to the iSCSI to SAS Bridge. The specific steps depend on whether you are using a Dynamic Host Configuration Protocol (DHCP) server, static IP addressing, Domain Name System (DNS) server, or Windows Internet Name Service (WINS) server. NOTE: The server IP addresses must be configured for network communication to the same IP subnet as the iSCSI to SAS bridge management and iSCSI ports. If using a DHCP server 1) On the Control Panel, select Network connections or Network and Sharing Center. Then click Manage network connections. 2) Right-click the network connection you want to configure and select Properties 3) On the General tab (for a local area connection) or the Networking tab (for all other connections), select Internet Protocol (TCP/IP), and then click Properties. 4) Select Obtain an IP address automatically, then OK. If using Static IP addressing 1) On the Control Panel, select Network connections or Network and Sharing Center. Then click Manage network connections. 2) Right-click the network connection you want to configure and select Properties. 3) On the General tab (for a local area connection) or the Networking tab (for all other connections), select Internet Protocol (TCP/IP), and then click Properties. If using a DNS server 1) On the Control Panel, select Network connections or Network and Sharing Center. Then click Manage network connections. 2) Right-click the network connection you want to configure and select Properties. 3) On the General tab (for a local area connection) or the Networking tab (for all other connections), select Internet Protocol (TCP/IP), and then click Properties. 4) Select Obtain DNS server address automatically or enter the preferred and alternate DNS server IP addresses and click OK. If using a WINS server NOTE: If you are using a DHCP server to allocate WINS server IP addresses, you do not need to add WINS server addresses. 1) On the Control Panel, select Network connections. 2) Right-click the network connection you want to configure and select Properties. 3) On the General tab (for a local area connection) or the Networking tab (for all other connections), select Internet Protocol (TCP/IP), and then click Properties. 4) Select Advanced, then the WINS tab, and click Add. 5) In the TCP/IP WINS server window, type the IP address of the WINS server and click Add. Page 11
-
 1
1 -
2
-
3
-
4
-
5
-
 6
6 -
 7
7 -
 8
8 -
 9
9 -
 10
10 -
 11
11 -
 12
12 -
 13
13 -
 14
14 -
 15
15 -
 16
16
 |
 |
