Dell Vostro 2420 User Manual - Page 5
Specifications, Help and Support
 |
View all Dell Vostro 2420 manuals
Add to My Manuals
Save this manual to your list of manuals |
Page 5 highlights
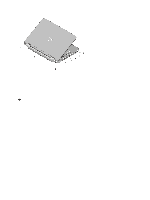
Figure 5. AC Adapter 2. Connect the network cable (optional). Figure 6. Network Connector 3. Connect USB devices, such as a mouse or keyboard (optional). Figure 7. USB Connector 4. Open the computer display and press the power button to turn on the computer. Figure 8. Power Button NOTE: It is recommended that you turn on and shut down your computer at least once before you install any cards or connect the computer to a docking device or other external device, such as a printer. Specifications NOTE: Offerings may vary by region. The following specifications are only those required by law to ship with your computer. For more information regarding the configuration of your computer, click Start → Help and Support and select the option to view information about your computer. Power AC adapter Vostro 2420 / Vostro 2520 with integrated video card 65 W 5
-
 1
1 -
 2
2 -
 3
3 -
 4
4 -
 5
5 -
 6
6 -
 7
7
 |
 |
