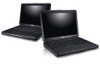
Dell Vostro 2421 Dell Vostro 2421 Owner's Manual - Page 15
Installing the Optical-Drive Assembly, Removing the Keyboard
 |
View all Dell Vostro 2421 manuals
Add to My Manuals
Save this manual to your list of manuals |
Page 15 highlights
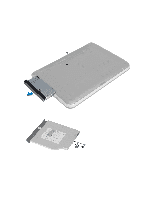
Installing the Optical-Drive Assembly 1. Place the optical-drive bezel on the optical drive and snap it in place. 2. Place the optical-drive bracket in to the optical drive. 3. Tighten the screws to secure the bracket to the optical-drive assembly. 4. Slide the optical-drive assembly into the drive bay in the computer. 5. Tighten the screw to secure the optical-drive assembly to the computer. 6. Install the battery. 7. Follow the procedures in After Working Inside Your Computer. Removing the Keyboard 1. Follow the procedures in Before Working Inside Your Computer. 2. Remove the battery. 3. Remove the screws from the back of the computer. 4. Flip the computer and release the keyboard by pressing the tabs on the palmrest assembly. Slide the keyboard towards the display assembly. 15
-
 1
1 -
2
-
3
-
4
-
5
-
6
-
7
-
8
-
9
-
 10
10 -
 11
11 -
 12
12 -
 13
13 -
 14
14 -
 15
15 -
 16
16 -
 17
17 -
 18
18 -
 19
19 -
 20
20 -
21
-
22
-
23
-
24
-
25
-
26
-
27
-
28
-
29
-
30
-
31
-
32
-
33
-
34
-
35
-
36
-
37
-
38
-
39
-
40
-
41
-
42
-
43
-
44
-
45
-
46
-
47
-
48
-
49
-
50
-
51
-
52
-
53
-
54
-
55
 |
 |
