Dell Vostro 3052 Dell Vostro 203052 Quick Start Guide - Page 1

Dell Vostro 3052 Manual

Page 1 highlights

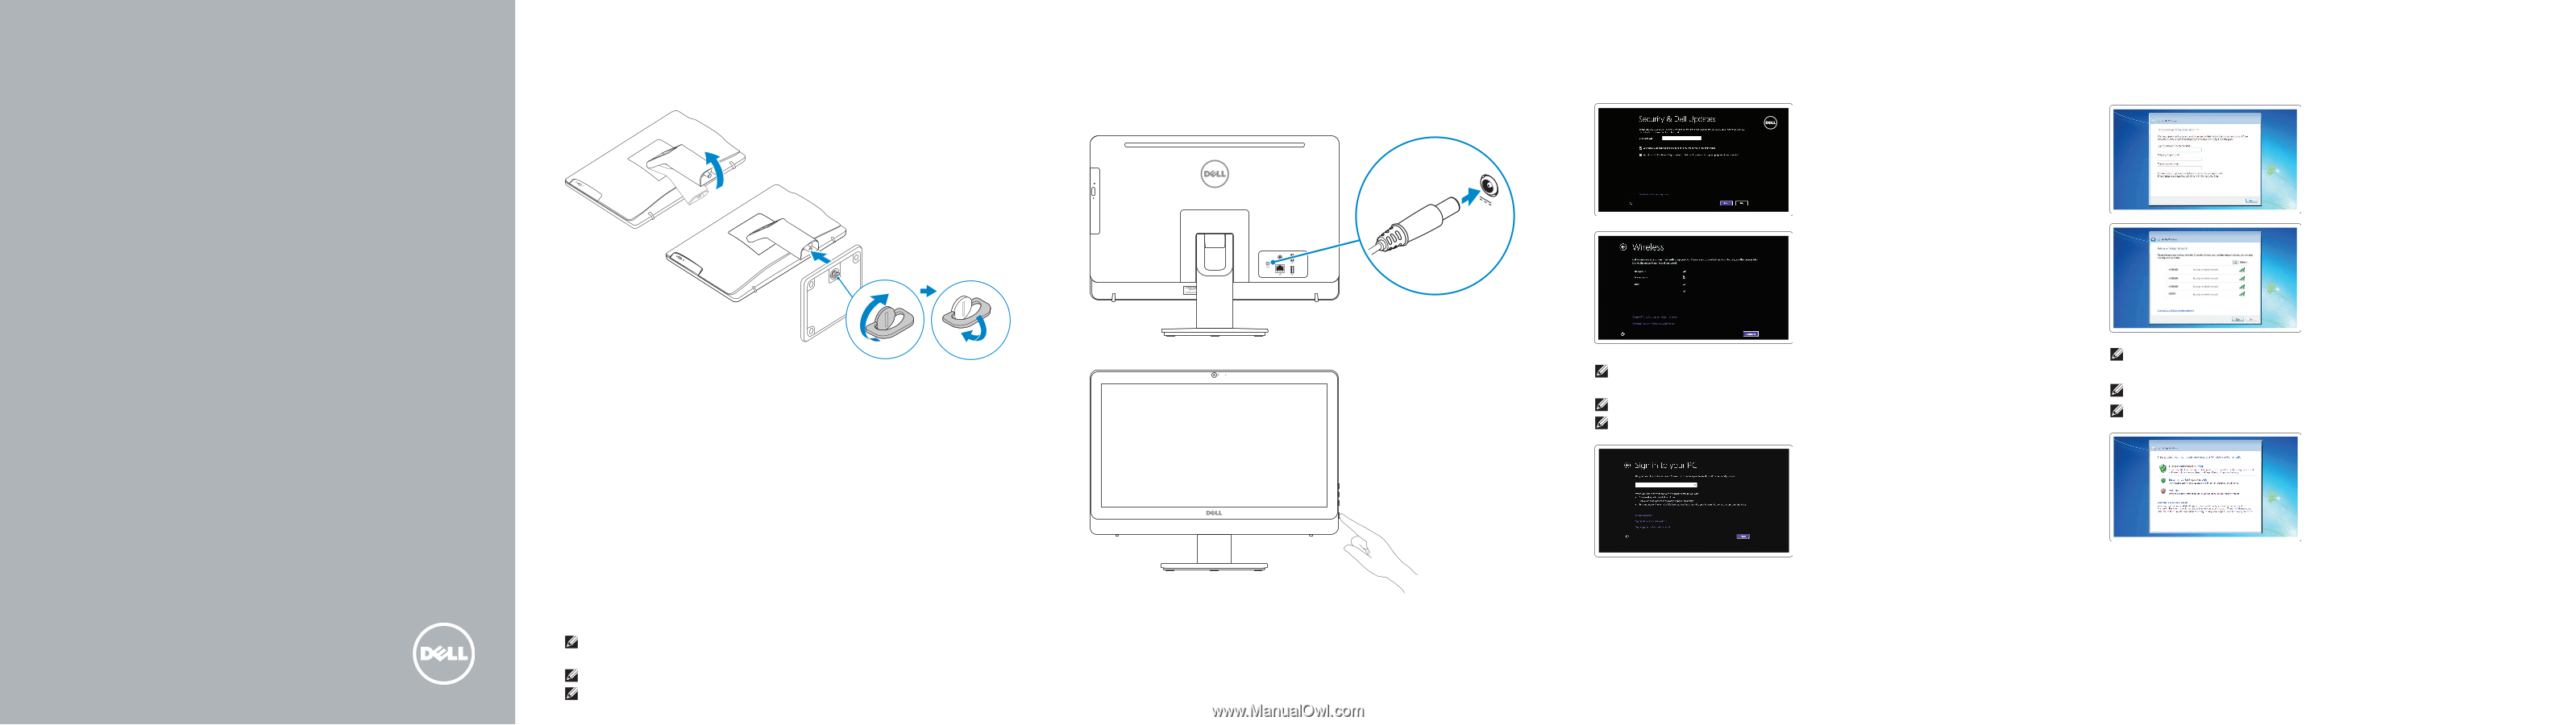
Vostro 20 3000 Series Quick Start Guide 1 Set up the stand 2 Connect the keyboard and mouse 3 Connect the power cable and press the power button 4 Finish Windows setup 完成 Windows Windows 設定 Windows 8 Enable security and updates Windows 7 Set up password for Windows 设置 Windows Windows 密碼 Connect to your network Connect to your network NOTE: If you are connecting to a secured wireless network, enter the password for the wireless network access when prompted Sign-in to your Microsoft account or create a local account Microsoft Microsoft NOTE: If you are connecting to a secured wireless network, enter the password for the wireless network access when prompted Protect your computer NOTE: If you are connecting a wireless keyboard or mouse, see the documentation that shipped with it

  • 1
  • 2

快速入门指南
快速入門指南
Vostro 20
3000 Series
Quick Start Guide
4
Finish Windows setup
完成
Windows
设置
|
完成
Windows
設定
3
Connect the power cable and press the
power button
连接电源电缆并按下电源按钮
連接電源線然後按下電源按鈕
1
Set up the stand
安装机架
設定腳架
2
Connect the keyboard and mouse
连接键盘和鼠标
連接鍵盤與滑鼠
NOTE: If you are connecting a wireless keyboard or mouse, see the
documentation that shipped with it.
注:
如果您要连接无线键盘或鼠标,请参阅随附的文档。
註:
如果您要連接無線鍵盤或滑鼠,請參閱隨附的說明文件。
Windows 7
Set up password for Windows
设置
Windows
密码
設定
Windows
密碼
Connect to your network
连接到网络
連接網路
NOTE: If you are connecting to a secured wireless network, enter the
password for the wireless network access when prompted.
注:
如果要连接到加密的无线网络,请在提示时输入密码以接入无线网络。
註:
如果您要連線至安全的無線網路,請在提示下輸入存取無線網路的密碼。
Protect your computer
保护您的计算机
保護電腦
Windows 8
Enable security and updates
启用安全和更新
啟用安全性與更新
Connect to your network
连接到网络
連接網路
NOTE: If you are connecting to a secured wireless network, enter the
password for the wireless network access when prompted.
注:
如果要连接到加密的无线网络,请在提示时输入密码以接入无线网络。
註:
如果您要連線至安全的無線網路,請在提示下輸入存取無線網路的密碼。
Sign-in to your Microsoft account
or create a local account
登录您的
Microsoft
帐户或创建一个本地
帐户
登入您的
Microsoft
帳號或建立本機帳號