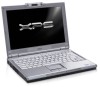
Dell XPS M1210 MXC062 XPS M1210 Owners Manual
Dell XPS M1210 MXC062 Manual
 |
View all Dell XPS M1210 MXC062 manuals
Add to My Manuals
Save this manual to your list of manuals |
Dell XPS M1210 MXC062 manual content summary:
- Dell XPS M1210 MXC062 | XPS M1210 Owners Manual - Page 1
Dell™ XPS™ M1210 Owner's Manual Model PP11S www.dell.com | support.dell.com - Dell XPS M1210 MXC062 | XPS M1210 Owners Manual - Page 2
tells you how to avoid the problem. CAUTION: A CAUTION indicates a Dell, the DELL logo, Inspiron, Dell Precision, Dimension, OptiPlex, Latitude, PowerEdge, PowerConnect, PowerVault, PowerApp, Dell TravelLite, ExpressCharge, Wi-Fi Catcher, Dell MediaDirect, Strike Zone, and XPS are trademarks of Dell - Dell XPS M1210 MXC062 | XPS M1210 Owners Manual - Page 3
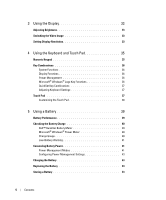
Contents Finding Information 11 1 About Your Computer 15 Determining Your Computer's Configuration 15 Front View 16 Left Side View 20 Right Side View 21 Back View 22 Bottom View 23 2 Setting Up Your Computer 25 Connecting to the Internet 25 Setting Up Your Internet Connection 25 - Dell XPS M1210 MXC062 | XPS M1210 Owners Manual - Page 4
Keyboard Settings 37 Touch Pad 37 Customizing the Touch Pad 38 5 Using a Battery 39 Battery Performance 39 Checking the Battery Charge 40 Dell™ QuickSet Battery Meter 40 Microsoft® Windows® Power Meter 40 Charge Gauge 40 Low-Battery Warning 41 Conserving Battery Power 41 Power Management - Dell XPS M1210 MXC062 | XPS M1210 Owners Manual - Page 5
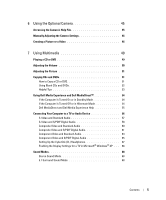
the Camera's Help File 45 Manually Adjusting the Camera Settings 46 Creating the Computer Is Turned Off or in Hibernate Mode 54 Dell MediaDirect and Dell Media Experience Help 55 Connecting Your Computer to a TV in Microsoft® Windows® XP . . . 68 Sound Modes 68 Stereo Sound Mode 68 5.1 - Dell XPS M1210 MXC062 | XPS M1210 Owners Manual - Page 6
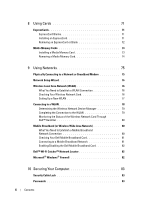
the Wireless Network Device Manager 79 Completing the Connection to the WLAN 79 Monitoring the Status of the Wireless Network Card Through Dell™ QuickSet 80 Mobile Broadband (or Wireless Wide Area Network 80 What You Need to Establish a Mobile Broadband Network Connection 80 Checking Your - Dell XPS M1210 MXC062 | XPS M1210 Owners Manual - Page 7
Your Computer Is Lost or Stolen 84 11 Troubleshooting 85 Dell Diagnostics 85 Dell Support Utility 88 Accessing the Dell Support Utility 88 Clicking the Dell Support Icon 88 Double-Clicking the Dell Support Icon 88 Drive Problems 89 CD and DVD drive problems 89 If you cannot eject the CD, CD - Dell XPS M1210 MXC062 | XPS M1210 Owners Manual - Page 8
display is readable 105 Drivers 105 What Is a Driver 105 Identifying Drivers 105 Reinstalling Drivers and Utilities 106 Resolving Software and Hardware Incompatibilities 108 Restoring Your Operating System 108 Using Microsoft Windows XP System Restore 108 Using Dell PC Restore by Symantec - Dell XPS M1210 MXC062 | XPS M1210 Owners Manual - Page 9
137 14 Traveling With Your Computer 139 Identifying Your Computer 139 Packing the Computer 139 Travel Tips 140 Traveling by Air 140 15 Contacting Dell 141 16 Specifications 163 17 Appendix 171 Using the System Setup Program 171 Viewing the System Setup Screen 171 System Setup Screen 171 - Dell XPS M1210 MXC062 | XPS M1210 Owners Manual - Page 10
173 Computer, Keyboard, and Display 173 Touch Pad 173 Floppy Drive 174 CDs and DVDs 174 Camera 174 Dell Technical Support Policy (U.S. Only 174 Definition of "Dell-Installed" Software and Peripherals 175 Definition of "Third-Party" Software and Peripherals 175 FCC Notice (U.S. Only 175 FCC - Dell XPS M1210 MXC062 | XPS M1210 Owners Manual - Page 11
users. • Warranty information • Terms and Conditions (U.S. only) • Safety instructions • Regulatory information • Ergonomics information • End User License Agreement NOTE: Drivers and documentation updates can be found at support.dell.com. Dell™ Product Information Guide Finding Information 11 - Dell XPS M1210 MXC062 | XPS M1210 Owners Manual - Page 12
It Here Setup Diagram • Service Tag and Express Service Code • Microsoft Windows License Label Service Tag and Microsoft® Windows® License These labels are located on the bottom of your computer. • Use the Service Tag to identify your computer when you use support.dell.com or contact technical - Dell XPS M1210 MXC062 | XPS M1210 Owners Manual - Page 13
information, see "Dell Support Utility" on page 88. • How to use Windows XP • How to work with programs and files • How to personalize my desktop Windows Help and Support Center 1 Click the Start button and click Help and Support. 2 Type a word or phrase that describes your problem and click the - Dell XPS M1210 MXC062 | XPS M1210 Owners Manual - Page 14
affecting data files. • Dell PC Restore - Dell PC Restore returns your computer to its original operating state. Dell PC Restore may not ship system, use the Drivers and Utilities CD (ResourceCD) (see "Reinstalling Drivers and Utilities" on page 106) to reinstall drivers for the devices that - Dell XPS M1210 MXC062 | XPS M1210 Owners Manual - Page 15
Center. For instructions, see "Windows Help and Support Center" on page 13. 2 Under Pick a Task, click Use Tools to view your computer information and diagnose problems. 3 Under My Computer Information, select Hardware. From the My Computer Information - Hardware screen, you can view the type - Dell XPS M1210 MXC062 | XPS M1210 Owners Manual - Page 16
8 media control buttons 9 microphone/line-in connector 10 headphone connectors (2) 11 touch pad buttons 12 touch pad 13 keyboard 14 Dell MediaDirect™ button C A M E R A - For more information about the camera, see "Using the Optional Camera" on page 45. D I S P L A Y - For more information about - Dell XPS M1210 MXC062 | XPS M1210 Owners Manual - Page 17
S P E A K E R S ( 2 ) - To adjust the volume of the integrated speakers, press the media control buttons. DEVICE STATUS LIGHTS Turns on when you turn on the computer, and blinks when the computer is in a power management mode. Turns on when the computer reads or writes data. NOTICE: To avoid loss - Dell XPS M1210 MXC062 | XPS M1210 Owners Manual - Page 18
on when wireless networking is enabled. To enable or disable wireless networking, use the wireless switch. For information on using the wireless switch, see "Dell™ Wi-Fi Catcher™ Network Locator" on page 82. Turns on when a card with Bluetooth® wireless technology is enabled. NOTE: The card with - Dell XPS M1210 MXC062 | XPS M1210 Owners Manual - Page 19
the functionality of a mouse. K E Y B O A R D - The keyboard includes a numeric keypad as well as the Microsoft Windows logo key. For information on supported keyboard shortcuts, see "Key Combinations" on page 36. D E L L M E D I A D I R E C T ™ B U T T O N - Press the button to launch either - Dell XPS M1210 MXC062 | XPS M1210 Owners Manual - Page 20
devices such as Wi-Fi and internal cards with Bluetooth technology and scans for wireless networks. For more information about scanning for wireless networks, see "Dell™ Wi-Fi Catcher™ Network Locator" on page 82. 20 About Your Computer - Dell XPS M1210 MXC062 | XPS M1210 Owners Manual - Page 21
found E X P R E S S C A R D S L O T - Supports one ExpressCard. The computer ships with a plastic blank installed in the slot. You can software and data. For more information, see "Hard Drive" on page 116 and "Hard drive problems" on page 90. Right Side View 1 2 34 5 1 optical drive bay 2 5-in - Dell XPS M1210 MXC062 | XPS M1210 Owners Manual - Page 22
VIDEO CONNECTOR Connects an external VGA-compatible monitor. Back View 1 2 34 1 network connector 2 battery 3 AC adapter connector 4 security cable slot NETWORK CONNECTOR (RJ-45) Connects the computer to a network. The green and yellow lights next to the connector indicate activity for wired - Dell XPS M1210 MXC062 | XPS M1210 Owners Manual - Page 23
-bay latch release H A R D D R I V E - Stores software and data. For more information, see "Hard Drive" on page 116 and "Hard drive problems" on page 90. O P T I C A L - D R I V E L O C K I N G S C R E W - Holds the optical drive in place. For more information, see "Optical Drive" on page 115 - Dell XPS M1210 MXC062 | XPS M1210 Owners Manual - Page 24
CAUTION: Do not block, push objects into, or allow dust to accumulate in the air vents. Do not store your computer in a low-airflow environment, such as a closed briefcase, while it is running. Restricting the airflow can damage the computer or cause a fire. A I R V E N T S - The computer uses fans - Dell XPS M1210 MXC062 | XPS M1210 Owners Manual - Page 25
the Internet, you need a modem or network connection and an Internet service provider (ISP). Your ISP will offer one or more of the following 2 Double-click the ISP icon on the Microsoft® Windows® desktop. 3 Follow the instructions on the screen to complete the setup. If you do not have an ISP icon - Dell XPS M1210 MXC062 | XPS M1210 Owners Manual - Page 26
selected Set up my connection manually, continue to step 6. Otherwise, follow the instructions on the screen to complete Problems" on page 90. If you cannot connect to the Internet but have successfully connected in the past, the ISP might have a service outage. Contact your ISP to check the service - Dell XPS M1210 MXC062 | XPS M1210 Owners Manual - Page 27
. Do not click Next at this time. Copy Data From the Old Computer 1 On the old computer, insert the Windows XP Operating System CD. 2 On the Welcome to Microsoft Windows XP screen, click Perform additional tasks. 3 Under What do you want to do?, click Transfer files and settings. 4 On the Files - Dell XPS M1210 MXC062 | XPS M1210 Owners Manual - Page 28
Wizard welcome screen appears, click Next. 3 On the Which computer is this? screen, click New Computer and click Next. 4 On the Do you have a Windows XP CD? screen, click I want to create a Wizard Disk in the following drive: and click Next. 5 Insert the removable media, such as a writable CD, and - Dell XPS M1210 MXC062 | XPS M1210 Owners Manual - Page 29
Next. Follow the instructions on the screen. support.dell.com for document #PA1089586 (How Do I Transfer Files From My Old Computer to My New Dell™ Computer Using the Microsoft Windows XP Operating System CD?). NOTE: Access to the Dell install updated drivers. • Connect owner's manual or contact - Dell XPS M1210 MXC062 | XPS M1210 Owners Manual - Page 30
on the printer and then turn on the computer. If the Add New Hardware Wizard window appears, click Cancel. 4 Install the printer driver if necessary. See the documentation that came with your printer. Power Protection Devices Several devices are available to protect against power fluctuations and - Dell XPS M1210 MXC062 | XPS M1210 Owners Manual - Page 31
electrical outlet. Many surge protectors have a telephone connector for modem protection. See the surge protector documentation for modem connection instructions. NOTICE: Not all surge protectors offer network adapter protection. Disconnect the network cable from the network wall connector during - Dell XPS M1210 MXC062 | XPS M1210 Owners Manual - Page 32
32 Setting Up Your Computer - Dell XPS M1210 MXC062 | XPS M1210 Owners Manual - Page 33
Using the Display Adjusting Brightness When a Dell™ computer is running on battery power, you can at a specific resolution, both the graphics card and the display must support the program, and the necessary video drivers must be installed. Before you change any of the default display settings - Dell XPS M1210 MXC062 | XPS M1210 Owners Manual - Page 34
If you choose a resolution or color palette that is higher than the display supports, the settings adjust automatically to the closest supported values. 1 Click the Start button and click Control Panel. 2 Under Pick a category, click Appearance and Themes. 3 Under Pick a task..., click the area you - Dell XPS M1210 MXC062 | XPS M1210 Owners Manual - Page 35
Using the Keyboard and Touch Pad Numeric Keypad The numeric keypad functions like the numeric keypad on an external keyboard. Each key on the keypad has multiple functions. The keypad numbers and symbols are marked in blue on the right of the keypad keys. To type a number or symbol, press and - Dell XPS M1210 MXC062 | XPS M1210 Owners Manual - Page 36
Key Combinations System Functions Display Functions Opens the Task Manager window. Displays icons representing all currently available display options (for example, display only, external monitor or projector only, both display and projector, and so on). Highlight - Dell XPS M1210 MXC062 | XPS M1210 Owners Manual - Page 37
Printers and Other Hardware, and click Keyboard. For information about the Control Panel, see the Windows Help and Support Center. To access the Help and Support Center, see "Windows Help and Support Center" on page 13. Touch Pad The touch pad detects the pressure and movement of your finger to - Dell XPS M1210 MXC062 | XPS M1210 Owners Manual - Page 38
Printers and Other Hardware, and then click Mouse. For information about the Control Panel, see the Windows Help and Support Center. To access the Help and Support Center, see "Windows Help and Support Center" on page 13. 2 In the Mouse Properties window, click the Touch Pad tab to adjust touch pad - Dell XPS M1210 MXC062 | XPS M1210 Owners Manual - Page 39
NOTE: For information about the Dell warranty for your computer, see the Product Information Guide or separate paper warranty document that shipped with your computer. For optimal computer performance and to help preserve BIOS settings, operate your Dell™ portable computer with the battery - Dell XPS M1210 MXC062 | XPS M1210 Owners Manual - Page 40
See "Battery Disposal" in the Product Information Guide. CAUTION: Misuse of the battery may increase damage. Checking the Battery Charge The Dell QuickSet Battery Meter, the Microsoft® Windows doubleclick the icon on the taskbar. For instructions on accessing more information about the Power Meter - Dell XPS M1210 MXC062 | XPS M1210 Owners Manual - Page 41
battery health in one of two ways: by using the charge gauge on the battery as described below or by using the Battery Meter in Dell QuickSet. For information about QuickSet, right-click the icon in the taskbar, and click Help. To check the battery health using the charge gauge, press - Dell XPS M1210 MXC062 | XPS M1210 Owners Manual - Page 42
undock your computer while your computer is in hibernate mode. Your computer enters hibernate mode if the battery charge level becomes critically low. To manually enter hibernate mode: • Click Start→ Shut Down, press and hold , and then click Hibernate. or • Depending on how you set the power - Dell XPS M1210 MXC062 | XPS M1210 Owners Manual - Page 43
to the information that you need. Charging the Battery NOTE: With Dell™ ExpressCharge™, the AC adapter charges a completely discharged 6-cell battery in more information about resolving problems with a battery, see "Power Problems" on page 100. Replacing the Battery For instructions about how to - Dell XPS M1210 MXC062 | XPS M1210 Owners Manual - Page 44
44 Using a Battery - Dell XPS M1210 MXC062 | XPS M1210 Owners Manual - Page 45
allows you to take photos and videos and to communicate visually and verbally with other computer users. The swivel action of the camera is manually adjustable. The blue camera light appears when the camera is turned on. For more information about camera features, see "Specifications" on page 163 - Dell XPS M1210 MXC062 | XPS M1210 Owners Manual - Page 46
Adjusting the Camera Settings If you do not want the camera to use automatic settings, you can manually adjust the camera settings. 1 Double-click the icon in the notification area and click Camera Settings. 2 In the Camera Settings window: • Click the Video tab - Dell XPS M1210 MXC062 | XPS M1210 Owners Manual - Page 47
1 1 shutter button The QuickCapture window appears and the blue camera light turns on. You can now direct the camera to point at the object or person that you want to record. The QuickCapture window on the screen shows you the camera target view. 2 To take a picture, click Take a Picture, or press - Dell XPS M1210 MXC062 | XPS M1210 Owners Manual - Page 48
48 Using the Optional Camera - Dell XPS M1210 MXC062 | XPS M1210 Owners Manual - Page 49
Using Multimedia Playing a CD or DVD NOTICE: Do not press down on the CD or DVD tray when you open or close it. Keep the tray closed when you are not using the drive. NOTICE: Do not move the computer when you are playing CDs or DVDs. NOTE: Depending on the aspect ratio of your display, movies may - Dell XPS M1210 MXC062 | XPS M1210 Owners Manual - Page 50
use a CD/DVD drive that shipped with another computer, you may need to install the drivers and software necessary to play CDs or DVDs or write data. For more information, see the Drivers and Utilities CD (the Drivers and Utilities CD is optional and may not be available for your computer or in - Dell XPS M1210 MXC062 | XPS M1210 Owners Manual - Page 51
by Dell may vary by country. The following instructions explain how to make an exact copy of a CD or DVD using Roxio Creator Plus - Dell recording problems, check for available software patches on the Sonic support website at www.sonic.com. The DVD-writable drives installed in Dell computers can - Dell XPS M1210 MXC062 | XPS M1210 Owners Manual - Page 52
NOTE: Most commercial DVDs have copyright protection and cannot be copied using Roxio Creator Plus. 1 Click Start→ All Programs→ Roxio→ Creator Projects→ RecordNow Copy. 2 Under the Copy tab, click Disc Copy. 3 To copy the CD or DVD: • If you have one CD/DVD drive, ensure that the settings are - Dell XPS M1210 MXC062 | XPS M1210 Owners Manual - Page 53
or on computers that have MP3 software installed. • Commercially available DVD players used in home theater systems may not support all available DVD formats. For a list of formats supported by your DVD player, see the documentation provided with your DVD player or contact the manufacturer. • Do not - Dell XPS M1210 MXC062 | XPS M1210 Owners Manual - Page 54
support for: • Dell Media Experience - A multimedia user interface for accessing and playing digital media such as music and videos • Dell If you press the Dell MediaDirect button while the computer is on or in standby mode, either Windows XP Media Center Manager or Dell Media Experience launches, - Dell XPS M1210 MXC062 | XPS M1210 Owners Manual - Page 55
1 1 Dell MediaDirect button Dell MediaDirect and Dell Media Experience Help The Dell media application program on your computer provides help information. When you launch either program, click the desktop icon for additional help. Using Multimedia 55 - Dell XPS M1210 MXC062 | XPS M1210 Owners Manual - Page 56
. Your computer has an S-video TV-out connector that, together with a standard S-video cable (available from Dell), enables you to connect the computer to a TV. 1 2 3 4 5 1 S-video TV-out connector 3 S/PDIF digital audio connector 2 composite video adapter 4 composite video-output connector - Dell XPS M1210 MXC062 | XPS M1210 Owners Manual - Page 57
your computer and your TV, you must enable your computer to work with the TV. See "Enabling the Display Settings for a TV in Microsoft® Windows® XP" on page 68 to ensure that the computer recognizes and works properly with the TV. Additionally, if you are using S/PDIF digital audio, see "Enabling - Dell XPS M1210 MXC062 | XPS M1210 Owners Manual - Page 58
computer (without the component video adapter) if your TV or audio device supports S-video but not S/PDIF digital audio. 2 Plug one end of the . 7 See "Enabling the Display Settings for a TV in Microsoft® Windows® XP" on page 68 to ensure that the computer recognizes and works properly with the - Dell XPS M1210 MXC062 | XPS M1210 Owners Manual - Page 59
1 2 3 1 composite video adapter 2 S-video cable 3 S/PDIF digital audio cable 1 Turn off the computer and the TV and/or the audio device that you want to connect. 2 Connect the composite video adapter to the S-video TV-out connector on your computer. 3 Plug one end of the S-video cable into the - Dell XPS M1210 MXC062 | XPS M1210 Owners Manual - Page 60
8 See "Enabling the Display Settings for a TV in Microsoft® Windows® XP" on page 68 to ensure that the computer recognizes and works properly with the TV. Composite Video and Standard Audio 1 2 3 1 audio input connector 2 S-video TV- - Dell XPS M1210 MXC062 | XPS M1210 Owners Manual - Page 61
any audio device that you connected (if applicable), and then turn on the computer. 8 See "Enabling the Display Settings for a TV in Microsoft® Windows® XP" on page 68 to ensure that the computer recognizes and works properly with the TV. Composite Video and S/PDIF Digital Audio 1 2 1 S-video TV - Dell XPS M1210 MXC062 | XPS M1210 Owners Manual - Page 62
1 2 3 1 composite video adapter 2 composite video cable 3 standard audio cable 1 Turn off the computer and the TV and/or audio device that you want to connect. 2 Connect the composite video adapter to the S-video TV-out connector on the computer. 3 Plug one end of the composite video cable into - Dell XPS M1210 MXC062 | XPS M1210 Owners Manual - Page 63
on any audio device that you connected (if applicable), and then turn on the computer. 8 See "Enabling the Display Settings for a TV in Microsoft® Windows® XP" on page 68 to ensure that the computer recognizes and works properly with the TV. Component Video and Standard Audio 1 2 1 S-video TV-out - Dell XPS M1210 MXC062 | XPS M1210 Owners Manual - Page 64
on any audio device that you connected (if applicable), and then turn on the computer. 8 See "Enabling the Display Settings for a TV in Microsoft® Windows® XP" on page 68 to ensure that the computer recognizes and works properly with the TV. 64 Using Multimedia - Dell XPS M1210 MXC062 | XPS M1210 Owners Manual - Page 65
Component Video and S/PDIF Digital Audio 1 2 1 S-video TV-out connector 2 component video adapter 1 2 3 1 component video adapter 2 component video cable 3 standard audio cable Using Multimedia 65 - Dell XPS M1210 MXC062 | XPS M1210 Owners Manual - Page 66
on any audio device that you connected (if applicable), and then turn on the computer. 8 See "Enabling the Display Settings for a TV in Microsoft® Windows® XP" on page 68 to ensure that the computer recognizes and works properly with the TV. 66 Using Multimedia - Dell XPS M1210 MXC062 | XPS M1210 Owners Manual - Page 67
the Back button once, and then click the Back button again to return to the main menu screen. Enabling S/PDIF in the Windows Audio Driver 1 Double-click the speaker icon in the Windows notification area. 2 Click the Options menu and then click Advanced Controls. 3 Click Advanced. 4 Click S/PDIF - Dell XPS M1210 MXC062 | XPS M1210 Owners Manual - Page 68
the Display Settings for a TV in Microsoft® Windows® XP Video Controller NOTE: To ensure that the display options appear Support Center. To access the Help and Support Center, click Start→ Help and Support. Under Pick a Task, click Use Tools to view your computer information and diagnose problems - Dell XPS M1210 MXC062 | XPS M1210 Owners Manual - Page 69
1 1 black cable connector 2 Connect the speaker's green cable connector to the left headphone connector. 3 Connect the speaker's yellow cable connector to the right headphone connector. Using Multimedia 69 - Dell XPS M1210 MXC062 | XPS M1210 Owners Manual - Page 70
1 2 1 green cable connector 2 yellow cable connector 70 Using Multimedia - Dell XPS M1210 MXC062 | XPS M1210 Owners Manual - Page 71
. See "Specifications" on page 163 for information on supported ExpressCards. NOTE: An ExpressCard is not a bootable device you begin any of the procedures in this section, follow the safety instructions in the Product Information Guide. To install an ExpressCard: 1 Hold the card with the top - Dell XPS M1210 MXC062 | XPS M1210 Owners Manual - Page 72
tells you to load the manufacturer's drivers, use the floppy disk or CD that came with the ExpressCard. Removing an ExpressCard or Blank CAUTION: Before you begin any of the procedures in this section, follow the safety instructions in the Product Information Guide. NOTICE: Use the ExpressCard - Dell XPS M1210 MXC062 | XPS M1210 Owners Manual - Page 73
is not clear, see the documentation that came with the card. CAUTION: Before you begin any of the procedures in this section, follow the safety instructions in the Product Information Guide. Using Cards 73 - Dell XPS M1210 MXC062 | XPS M1210 Owners Manual - Page 74
tells you to load the manufacturer's drivers, use the CD that came with the media memory card, if applicable. Removing a Media Memory Card CAUTION: Before you begin any of the procedures in this section, follow the safety instructions in the Product Information Guide. NOTICE: Use the media memory - Dell XPS M1210 MXC062 | XPS M1210 Owners Manual - Page 75
Using Networks Physically Connecting to a Network or Broadband Modem Before you connect your computer to a network, the computer must have a network adapter installed and a network cable connected to it. To connect a network cable: 1 Connect the network cable to the network adapter connector on the - Dell XPS M1210 MXC062 | XPS M1210 Owners Manual - Page 76
Network Setup Wizard The Microsoft® Windows® XP operating system provides a Network Setup Wizard to guide you through the process of sharing files, provided with Windows XP Service Pack 2 (SP2). 2 Complete the checklist. 3 Return to the Network Setup Wizard and follow the instructions on the screen. - Dell XPS M1210 MXC062 | XPS M1210 Owners Manual - Page 77
a Wireless Router and a Broadband Modem 1 Contact your Internet service provider (ISP) to obtain specific information about the connection requirements usually contain installation and troubleshooting information. Install the required software according to the instructions provided by the router - Dell XPS M1210 MXC062 | XPS M1210 Owners Manual - Page 78
name of your router's broadcast name is Service Set Identifier (SSID) or network name. instructions in the user documentation for your wireless network card. Verify the type of wireless network card installed in your computer and then search for that name on the Dell Support website at support.dell - Dell XPS M1210 MXC062 | XPS M1210 Owners Manual - Page 79
information, the Windows XP operating system is Support Center. To access the Help and Support Center: 1 Click Start→ Help and Support. 2 Under Pick a Help topic, click Dell User and System Guides.s 3 Under Device Guides Windows desktop). Follow the instructions provided in any utility prompts - Dell XPS M1210 MXC062 | XPS M1210 Owners Manual - Page 80
as the computer is within a cellular-data coverage zone. Contact your Service Provider for coverage of a high-speed digital cellular network. NOTE: Even see the Dell Mobile Broadband Card Utility user's guide for instructions. The user's guide is available through the Windows Help and Support Center - Dell XPS M1210 MXC062 | XPS M1210 Owners Manual - Page 81
to the Internet, you must activate Mobile Broadband service through your cellular service provider. For instructions and for additional information about using the Dell Mobile Broadband Card Utility, see the user's guide available through the Windows Help and Support Center. To access the Help and - Dell XPS M1210 MXC062 | XPS M1210 Owners Manual - Page 82
move the switch to the "on" position to enable the switch and the Dell Mobile Broadband card. For information about the wireless switch positions, see "wireless Support Center for the Microsoft® Windows® XP operating system. To access the Help and Support Center, see "Windows Help and Support Center - Dell XPS M1210 MXC062 | XPS M1210 Owners Manual - Page 83
cable lock is a commercially available antitheft device. To use the lock, attach it to the security cable slot on your Dell™ computer. For more information, see the instructions included with the device. NOTICE: Before you buy an antitheft device, ensure that it will work with the security cable - Dell XPS M1210 MXC062 | XPS M1210 Owners Manual - Page 84
agency where you live. • If the computer belongs to a company, notify the security office of the company. • Contact Dell customer service to report the missing computer. Provide the computer Service Tag, the case number, and the name, address, and phone number of the law enforcement agency to which - Dell XPS M1210 MXC062 | XPS M1210 Owners Manual - Page 85
Troubleshooting Dell Diagnostics CAUTION: Before you begin any of the procedures in this section, follow the safety instructions in the Product Information Guide. When to Use the Dell Diagnostics If you experience a problem with your computer, perform the checks in "Lockups and Software Problems" on - Dell XPS M1210 MXC062 | XPS M1210 Owners Manual - Page 86
any key to start the Dell Diagnostics from the diagnostics utility partition on your hard drive. Starting the Dell Diagnostics From the Drivers and Utilities CD 1 Insert the Drivers and Utilities CD. 2 Shut Test first to increase the possibility of tracing the problem quickly. 86 Troubleshooting - Dell XPS M1210 MXC062 | XPS M1210 Owners Manual - Page 87
problem description and follow the instructions on the screen. If you cannot resolve the error condition, contact Dell. See "Contacting Dell" on page 141. NOTE: The Service Tag for your computer is located at the top of each test screen. If you contact Dell, technical support . Troubleshooting 87 - Dell XPS M1210 MXC062 | XPS M1210 Owners Manual - Page 88
manually check your computing environment, view frequently asked questions, access the help file for the Dell Support Utility, and view Dell Support settings. For more information about the Dell Support Utility, click the question mark (?) at the top of the Dell Support screen. 88 Troubleshooting - Dell XPS M1210 MXC062 | XPS M1210 Owners Manual - Page 89
Drive Problems CAUTION: Before you begin any of the procedures in this section, follow the safety instructions in the Product Information Guide. E N S U R E T H A T M I C R O S O ELL D IAGNOSTICS - See "Dell Diagnostics" on page 85. CD and DVD drive problems NOTE: High-speed CD or Troubleshooting 89 - Dell XPS M1210 MXC062 | XPS M1210 Owners Manual - Page 90
Click Start. E-Mail, Modem, and Internet Problems CAUTION: Before you begin any of the procedures in this section, follow the safety instructions in the Product Information Guide. NOTE: Connect the modem to an analog modem and connect it to a telephone. Listen for a dial tone. 90 Troubleshooting - Dell XPS M1210 MXC062 | XPS M1210 Owners Manual - Page 91
your Internet service provider. SCAN problems support.dell.com and search for the keyword spyware. Error Messages CAUTION: Before you begin any of the procedures in this section, follow the safety instructions in the Product Information Guide problem persists, contact Dell. See "Contacting Dell" - Dell XPS M1210 MXC062 | XPS M1210 Owners Manual - Page 92
Drive" on page 116), and boot the computer from a CD. Then shut down the computer, reinstall the hard drive, and restart the computer. If the problem persists, try another drive. Run the Hard-Disk Drive tests in the Dell Diagnostics (see page 85). 92 Troubleshooting - Dell XPS M1210 MXC062 | XPS M1210 Owners Manual - Page 93
problem persists, try another drive. Run the Hard-Disk Drive tests in the Dell Diagnostics R E A D V A L U E E X P E C T I N G V A L U E - A memory module may be faulty or improperly seated. Reinstall the memory modules and, if necessary, replace them (see "Memory" on page 119). Troubleshooting 93 - Dell XPS M1210 MXC062 | XPS M1210 Owners Manual - Page 94
program documentation for installation instructions. SECTOR NOT FOUND supports the system configuration settings may require recharging. Connect your computer to an electrical outlet to charge the battery. If the problem persists, contact Dell. See "Contacting Dell" on page 141. 94 Troubleshooting - Dell XPS M1210 MXC062 | XPS M1210 Owners Manual - Page 95
Problems CAUTION: Before you begin any of the procedures in this section, follow the safety instructions in the Product Information Guide D - Contact Dell. See "Contacting Dell" on page 141. Also, for Mobile Broadband (WWAN) ExpressCards, see "For information about troubleshooting wireless local area - Dell XPS M1210 MXC062 | XPS M1210 Owners Manual - Page 96
section, follow the safety instructions in the Product Information Guide. NOTE: Use the integrated keyboard when running the Dell Diagnostics or the system setup program. When you attach an external keyboard, the integrated keyboard remains fully functional. External Keyboard problems NOTE: When you - Dell XPS M1210 MXC062 | XPS M1210 Owners Manual - Page 97
Lockups and Software Problems CAUTION: Before you begin any of the procedures in this section, follow the safety instructions in the Product Information Guide. The computer does not start up ENSURE THAT THE to 10 seconds until the computer turns off. Then restart your computer. Troubleshooting 97 - Dell XPS M1210 MXC062 | XPS M1210 Owners Manual - Page 98
Dell MediaDirect provides access to media files outside the Windows XP Dell for assistance. See "Contacting Dell" on page 141. Other software problems CHECK THE SOFTWARE DOCUMENTATION OR CONTACT THE SOFTWARE MANUFACTURER FOR TROUBLESHOOTING • Verify that the device drivers do not conflict with the - Dell XPS M1210 MXC062 | XPS M1210 Owners Manual - Page 99
problem. See "Dell Diagnostics" on page 85. Memory Problems CAUTION: Before you begin any of the procedures in this section, follow the safety instructions in the Product Information Guide (WLAN) For information about troubleshooting wireless local area networks, see "Wireless Local Area Network (WLAN)" - Dell XPS M1210 MXC062 | XPS M1210 Owners Manual - Page 100
instructions located within the Dell service - Contact your cellular service provider to verify your plan coverage and supported services. Power Problems CAUTION: Before you begin any of the procedures in this section, follow the safety instructions in the Product Information Guide Troubleshooting - Dell XPS M1210 MXC062 | XPS M1210 Owners Manual - Page 101
rapidly flashes orange, the battery may be defective. Contact Dell. See "Contacting Dell" on page 141. CHECK THE BATTERY TEMPERATURE - If Problems CAUTION: Before you begin any of the procedures in this section, follow the safety instructions in the Product Information Guide Troubleshooting 101 - Dell XPS M1210 MXC062 | XPS M1210 Owners Manual - Page 102
N T E R DRIVER - See the printer documentation for instructions. Scanner Problems CAUTION: Before you begin instructions. Sound and Speaker Problems CAUTION: Before you begin any of the procedures in this section, follow the safety instructions in the Product Information Guide. 102 Troubleshooting - Dell XPS M1210 MXC062 | XPS M1210 Owners Manual - Page 103
THE AUDIO DRIVER - See "Reinstalling Drivers and Utilities" on page 106. R U N T H E D ELL D IAGNOSTICS - See "Dell Diagnostics" on turned up and that the sound is not muted. Touch Pad or Mouse Problems CHECK THE TOUCH PAD SETTINGS - 1 Click the Start button, click Control Panel Troubleshooting 103 - Dell XPS M1210 MXC062 | XPS M1210 Owners Manual - Page 104
Drivers and Utilities" on page 106. Video and Display Problems CAUTION: Before you begin any of the procedures in this section, follow the safety instructions in the Product Information Guide Support Center. To access the Help and Support Center, see "Windows Help and Support . 104 Troubleshooting - Dell XPS M1210 MXC062 | XPS M1210 Owners Manual - Page 105
device. Identifying Drivers If you experience a problem with any device, identify whether the driver is the source of your problem and, if necessary, update the driver. 1 Click the Start button and click Control Panel. 2 Under Pick a Category, click Performance and Maintenance. Troubleshooting 105 - Dell XPS M1210 MXC062 | XPS M1210 Owners Manual - Page 106
at support.dell.com and your Drivers and Utilities CD provide approved drivers for Dell™ computers. If you install drivers obtained from other sources, your computer might not work correctly. NOTE: The Drivers and Utilities CD is optional and may not ship with your computer. Using Windows XP Device - Dell XPS M1210 MXC062 | XPS M1210 Owners Manual - Page 107
, or click Extract, follow the extracting instructions, and then read the readme file. If instructed to navigate to the driver files, click the CD directory on the driver information window to display the files associated with that driver. Manually Reinstalling Drivers NOTE: If your computer has an - Dell XPS M1210 MXC062 | XPS M1210 Owners Manual - Page 108
Troubleshooter to resolve the incompatibility. To start the Hardware Troubleshooter: 1 Click the Start button and click Help and Support. 2 Type hardware troubleshooter instructions, see "Using Microsoft Windows XP System Restore" on page 108. • Dell system problem. For instructions, see "Using Dell - Dell XPS M1210 MXC062 | XPS M1210 Owners Manual - Page 109
Support. 2 Click the task for System Restore. 3 Follow the instructions on the screen. Restoring the Computer to an Earlier Operating State If problems occur after you install a device driver, use Device Driver System Restore. 2 Click Undo my last restoration and click Next. Troubleshooting 109 - Dell XPS M1210 MXC062 | XPS M1210 Owners Manual - Page 110
application programs or drivers installed after you received your computer. If possible, back up the data before using PC Restore. Use PC Restore only if System Restore (see "Using Microsoft Windows XP System Restore" on page 108) did not resolve your operating system problem. NOTE: Dell PC Restore - Dell XPS M1210 MXC062 | XPS M1210 Owners Manual - Page 111
remove PC Restore: 1 Log on to the computer as a local administrator. 2 In Windows Explorer, go to c:\dell\utilities\DSR. 3 Double-click the filename DSRIRRemv2.exe. NOTE: If you do not log on as a local Finish to close the PC Restore Removal window. 8 Restart the computer. Troubleshooting 111 - Dell XPS M1210 MXC062 | XPS M1210 Owners Manual - Page 112
affect programs installed on your hard drive. Therefore, do not reinstall Windows XP unless a Dell technical support representative instructs you to do so. NOTICE: To prevent conflicts with Windows XP, disable any virus protection software installed on your computer before you reinstall Windows - Dell XPS M1210 MXC062 | XPS M1210 Owners Manual - Page 113
" (see this page) and "Before Working Inside Your Computer" (see page 114). • You have read the safety information in your Dell™ Product Information Guide. • A component can be replaced-or if purchased separately-installed by performing the removal procedure in reverse order. Recommended Tools The - Dell XPS M1210 MXC062 | XPS M1210 Owners Manual - Page 114
of the procedures in this section, follow the safety instructions in the Product Information Guide. NOTICE: Handle components and cards with care. Do Only a certified service technician should perform repairs on your computer. Damage due to servicing that is not authorized by Dell is not covered by - Dell XPS M1210 MXC062 | XPS M1210 Owners Manual - Page 115
Hard Drive" on page 116). Optical Drive CAUTION: Before you begin any of the procedures in this section, follow the safety instructions in the Product Information Guide. 1 Turn the computer upside-down. 2 Remove the optical-drive locking screw. 3 Insert a scribe into the notch by the screw hole and - Dell XPS M1210 MXC062 | XPS M1210 Owners Manual - Page 116
follow the safety instructions in the Product Information Guide. NOTICE: To Dell does not guarantee compatibility or provide support for hard drives from sources other than Dell. NOTE: If you are installing a hard drive from a source other than Dell, you need to install an operating system, drivers - Dell XPS M1210 MXC062 | XPS M1210 Owners Manual - Page 117
NOTICE: When the hard drive is not in the computer, store it in protective antistatic packaging. See "Protecting Against Electrostatic Discharge" in the Product Information Guide. 3 Slide the hard drive out of the computer. Adding and Replacing Parts 117 - Dell XPS M1210 MXC062 | XPS M1210 Owners Manual - Page 118
and tighten the four hard drive screws. 9 Install the operating system for your computer (see "Restoring Your Operating System" on page 108). 10 Install the drivers and utilities for your computer (see "Reinstalling Drivers and Utilities" on page 106). 118 Adding and Replacing Parts - Dell XPS M1210 MXC062 | XPS M1210 Owners Manual - Page 119
procedures in this section, follow the safety instructions in the Product Information Guide. You can increase your computer memory by installing memory modules on the system board. See "Specifications" on page 163 for information on the memory supported by your computer. Install only memory modules - Dell XPS M1210 MXC062 | XPS M1210 Owners Manual - Page 120
NOTICE: To prevent damage to the memory module connector, do not use tools to spread the memory-module securing clips. NOTICE: To avoid electrostatic discharge, ground yourself by using a wrist grounding strap or by periodically touching an unpainted metal surface (such as a connector on the back of - Dell XPS M1210 MXC062 | XPS M1210 Owners Manual - Page 121
memory installed in the computer, click Start→ Help and Support→ Dell System Information. Hinge Cover CAUTION: Before you begin any of the procedures in this section, follow the safety instructions in the Product Information Guide. NOTICE: To avoid electrostatic discharge, ground yourself by using - Dell XPS M1210 MXC062 | XPS M1210 Owners Manual - Page 122
2 1 hinge cover 2 scribe Keyboard CAUTION: Before you begin any of the procedures in this section, follow the safety instructions in the Product Information Guide. NOTICE: To avoid electrostatic discharge, ground yourself by using a wrist grounding strap or by periodically touching an unpainted - Dell XPS M1210 MXC062 | XPS M1210 Owners Manual - Page 123
NOTICE: To help prevent damage to the system board, you must remove the battery from the battery bay before you begin working inside the computer. 1 Follow the procedures in "Before You Begin" on page 113. 2 Open the display. 3 Remove the hinge cover (see "Hinge Cover" on page 121). 4 Remove the - Dell XPS M1210 MXC062 | XPS M1210 Owners Manual - Page 124
WLAN Card CAUTION: Before you begin any of the procedures in this section, follow the safety instructions in the Product Information Guide. NOTICE: To help prevent damage to the system board, you must remove the main battery from the battery bay before you begin working inside the - Dell XPS M1210 MXC062 | XPS M1210 Owners Manual - Page 125
5 If a WLAN card is not already installed, go to step 6. If you are replacing a WLAN card, remove the existing card: a Disconnect the two antenna cables from the WLAN card. 1 2 1 WLAN card 2 antenna cable connectors (2) b Release the WLAN card by pushing the metal securing tabs toward the back of - Dell XPS M1210 MXC062 | XPS M1210 Owners Manual - Page 126
1 1 metal securing tabs (2) NOTICE: The connectors are keyed to ensure correct insertion. If you feel resistance, check the connectors on the card and on the system board, and realign the card. 6 Install the replacement WLAN card: a Insert the WLAN card connector into the system board connector at a - Dell XPS M1210 MXC062 | XPS M1210 Owners Manual - Page 127
NOTICE: To avoid damage to the WLAN card, never place cables under the card. NOTE: Your WLAN card may have two or three connectors, depending on the type of card you ordered. NOTE: If your computer has a gray cable, connect it to the connector with the gray triangle, if one is available on your card - Dell XPS M1210 MXC062 | XPS M1210 Owners Manual - Page 128
connectors (2) 2 triangles (2) Mobile Broadband Card CAUTION: Before you begin any of the procedures in this section, follow the safety instructions in the Product Information Guide. NOTICE: To help prevent damage to the system board, you must remove the main battery from the battery bay before you - Dell XPS M1210 MXC062 | XPS M1210 Owners Manual - Page 129
5 If a Mobile Broadband card is not already installed, go to step 6. If you are replacing a Mobile Broadband card, remove the existing card: a Disconnect the two antenna cables from the Mobile Broadband card. Adding and Replacing Parts 129 - Dell XPS M1210 MXC062 | XPS M1210 Owners Manual - Page 130
1 2 1 Mobile Broadband card 2 antenna cable connectors (2) b Release the Mobile Broadband card by pushing the metal securing tabs toward the front of the computer until the card pops up slightly. c Lift the Mobile Broadband card out of its system board connector. 130 Adding and Replacing Parts - Dell XPS M1210 MXC062 | XPS M1210 Owners Manual - Page 131
1 1 metal securing tabs (2) NOTICE: The connectors are keyed to ensure correct insertion. If you feel resistance, check the connectors on the card and on the system board, and realign the card. Adding and Replacing Parts 131 - Dell XPS M1210 MXC062 | XPS M1210 Owners Manual - Page 132
6 Install the replacement Mobile Broadband card: a Insert the Mobile Broadband card connector into the system board connector at a 45-degree angle, and then press the other end of the Mobile Broadband card down into the securing tabs until the card clicks into place. 132 Adding and Replacing Parts - Dell XPS M1210 MXC062 | XPS M1210 Owners Manual - Page 133
NOTICE: To avoid damage to the Mobile Broadband card, never place cables under the card. b Connect the two antenna cables to the Mobile Broadband card (black cable to the connector labeled "AUX" and the white cable to the connector labeled "MAIN"). 1 1 antenna cable connectors (2) Adding and - Dell XPS M1210 MXC062 | XPS M1210 Owners Manual - Page 134
Subscriber Identity Module (SIM) Card CAUTION: Before you begin any of the procedures in this section, follow the safety instructions in the Product Information Guide. NOTICE: To help prevent damage to the system board, you must remove the main battery from the battery bay before you begin working - Dell XPS M1210 MXC062 | XPS M1210 Owners Manual - Page 135
If you ordered a card with Bluetooth wireless technology with your computer, it is already installed. NOTICE: To help prevent damage to the system board, you must remove the main battery from the battery bay before you begin working inside the computer. 1 Follow the procedures in "Before You Begin" - Dell XPS M1210 MXC062 | XPS M1210 Owners Manual - Page 136
136 Adding and Replacing Parts - Dell XPS M1210 MXC062 | XPS M1210 Owners Manual - Page 137
or view the following types of settings: • Network connectivity • Power management • Display • System information Depending on what you want to do in Dell™ QuickSet, you can start it by either clicking, doubleclicking, or right-clicking the QuickSet icon, , in the Microsoft® Windows® taskbar. The - Dell XPS M1210 MXC062 | XPS M1210 Owners Manual - Page 138
138 Dell™ QuickSet - Dell XPS M1210 MXC062 | XPS M1210 Owners Manual - Page 139
Tag and store it in a safe place away from the computer or carrying case • Use the Service Tag if you need to report a loss or theft to law enforcement officials and to Dell. • Create a file on the Microsoft® Windows® desktop called if_found. Place information such as your name, address, and phone - Dell XPS M1210 MXC062 | XPS M1210 Owners Manual - Page 140
time. To disable wireless activity, use the wireless switch on the side of computer. For information on using the wireless switch, see "Dell™ Wi-Fi Catcher™ Network Locator" on page 82. • Consider changing your power management options (see "Configuring Power Management Settings" on page 43 - Dell XPS M1210 MXC062 | XPS M1210 Owners Manual - Page 141
the table below. NOTE: Toll-free numbers are for use within the country for which they are listed. NOTE: In certain countries, support specific to Dell™ XPS™ computers is available at a separate telephone number listed for participating countries. If you do not see a telephone number listed that is - Dell XPS M1210 MXC062 | XPS M1210 Owners Manual - Page 142
Technical Support Technical Support Services Sales Aruba Website: www.dell.com.aw E-mail: [email protected] General Support Australia (Sydney) Website: support.ap.dell.com International Access Code: 0011 E-mail: support.ap.dell.com/contactus Country Code: 61 Technical Support (XPS - Dell XPS M1210 MXC062 | XPS M1210 Owners Manual - Page 143
Country Code: 673 Department Name or Service Area, Website and E-Mail Address Website: www.dell.com/bb E-mail: [email protected] General Support Website: support.euro.dell.com Tech Support for XPS Tech Support for all other Dell computers Tech Support Fax Customer Care Corporate Sales Fax - Dell XPS M1210 MXC062 | XPS M1210 Owners Manual - Page 144
support.ca.dell.com AutoTech (automated Hardware and Warranty Support) Customer Service (Home/Home Office) Customer Service (small/med./large business, government) Customer Service (printers, projectors, televisions, handhelds, digital jukebox, and wireless) Hardware Warranty Phone Support (XPS - Dell XPS M1210 MXC062 | XPS M1210 Owners Manual - Page 145
Colombia Department Name or Service Area, Website and E-Mail Address Technical Support website: support.dell.com.cn Technical Support E-mail: support.dell.com.cn/email Customer Care E-mail: [email protected] Technical Support Fax Technical Support (XPS) Technical Support (Dimension and Inspiron - Dell XPS M1210 MXC062 | XPS M1210 Owners Manual - Page 146
Name or Service Area, Website and E-Mail Address Website: www.dell.com/cr E-mail: [email protected] General Support Website: support.euro.dell.com E-mail: [email protected] Technical Support Customer Care Fax Technical Fax Switchboard Website: support.euro.dell.com Technical Support for XPS - Dell XPS M1210 MXC062 | XPS M1210 Owners Manual - Page 147
Service Area, Website and E-Mail Address El Salvador Website: www.dell.com/ec E-mail: [email protected] General Support Finland (Helsinki) Website: support.euro.dell Code: 33 Technical Support for XPS City Codes: (1) (4) Technical Support for all other Dell computers Customer Care - Dell XPS M1210 MXC062 | XPS M1210 Owners Manual - Page 148
Country Code: 30 Grenada Guatemala Guyana Department Name or Service Area, Website and E-Mail Address Website: support.euro.dell.com E-mail: [email protected] Technical Support for XPS Technical Support for all other Dell computers Home/Small Business Customer Care Global Segment - Dell XPS M1210 MXC062 | XPS M1210 Owners Manual - Page 149
Code City Code Department Name or Service Area, Website and E-Mail Address Hong Kong Website: support.ap.dell.com International Access Code: 001 Technical Support E-mail: Country Code: 852 support.dell.com.cn/email Technical Support (XPS) Technical Support (Dimension and Inspiron) Technical - Dell XPS M1210 MXC062 | XPS M1210 Owners Manual - Page 150
Name or Service Area, Website and E-Mail Address Website: support.euro.dell.com E-mail: [email protected] Sales Ireland Sales Dell Outlet Online Corporate Customer Care Technical Support Technical Support for XPS computers only Technical Support for all other Dell computers General Fax/ - Dell XPS M1210 MXC062 | XPS M1210 Owners Manual - Page 151
Name or Service Area, Website and E-Mail Address Jamaica E-mail: [email protected] General Support (dial from within Jamaica only) Japan (Kawasaki) Website: support.jp.dell.com International Access Code: 001 Technical Support (XPS) Country Code: 81 Technical Support outside of - Dell XPS M1210 MXC062 | XPS M1210 Owners Manual - Page 152
Code Country Code City Code Department Name or Service Area, Website and E-Mail Address Korea (Seoul) E-mail: [email protected] International Access Code: 001 Support Country Code: 82 Technical Support (XPS) City Code: 2 Support (Dimension, PDA, Electronics, and Accessories) Sales Fax - Dell XPS M1210 MXC062 | XPS M1210 Owners Manual - Page 153
Code: 00 Country Code: 60 City Code: 4 Department Name or Service Area, Website and E-Mail Address Website: support.ap.dell.com Technical Support (XPS) Technical Support (Dell Precision, OptiPlex, and Latitude) Technical Support (Dimension, Inspiron, and Electronics and Accessories) Technical - Dell XPS M1210 MXC062 | XPS M1210 Owners Manual - Page 154
Code: 00 Country Code: 47 Panama Peru Department Name or Service Area, Website and E-Mail Address Website: support.euro.dell.com Technical Support for XPS Technical Support for all other Dell computers Technical Support Fax Home/Small Business Customer Care Relational Customer Care Home/Small - Dell XPS M1210 MXC062 | XPS M1210 Owners Manual - Page 155
Access Code Country Code City Code Department Name or Service Area, Website and E-Mail Address Poland (Warsaw) Website: support.euro.dell.com International Access Code: 011 E-mail: [email protected] Country Code: 48 Customer Service Phone City Code: 22 Customer Care Sales Customer - Dell XPS M1210 MXC062 | XPS M1210 Owners Manual - Page 156
Name or Service Area, Website and E-Mail Address Singapore (Singapore) International Access Code: 005 Country Code: 65 NOTE: The phone numbers in this section should be called from within Singapore or Malaysia only. Website: support.ap.dell.com Technical Support (XPS) Technical Support (Dimension - Dell XPS M1210 MXC062 | XPS M1210 Owners Manual - Page 157
Name or Service Area, Website and E-Mail Address Website: support.euro.dell.com Home and Small Business Technical Support Customer Care Sales Switchboard Fax Corporate Technical Support Customer Care Switchboard Fax Website: support.euro.dell.com Technical Support for XPS Technical Support for all - Dell XPS M1210 MXC062 | XPS M1210 Owners Manual - Page 158
Code City Code Department Name or Service Area, Website and E-Mail Address Taiwan Website: support.ap.dell.com International Access Code: 002 E-mail: support.dell.com.cn/email Country Code: 886 Technical Support (XPS) Technical Support (OptiPlex, Latitude, Inspiron, Dimension, and Electronics - Dell XPS M1210 MXC062 | XPS M1210 Owners Manual - Page 159
Access Code: 00 Country Code: 44 City Code: 1344 Uruguay Department Name or Service Area, Website and E-Mail Address Website: support.euro.dell.com E-mail: [email protected] Customer Care website: support.euro.dell.com/uk/en/ECare/form/home.asp Sales Home and Small Business Sales - Dell XPS M1210 MXC062 | XPS M1210 Owners Manual - Page 160
Americas Consumer XPS Support Consumer (Home and Home Office) Support for all other Dell products Customer Service Employee Purchase Program (EPP) Customers Financial Services website: www.dellfinancialservices.com Financial Services (lease/loans) Financial Services (Dell Preferred Accounts - Dell XPS M1210 MXC062 | XPS M1210 Owners Manual - Page 161
Code Country Code City Code U.S. Virgin Islands Venezuela Department Name or Service Area, Website and E-Mail Address E-mail: [email protected] General Support Website: www.dell.com/ve E-mail: [email protected] General Support Area Codes, Local Numbers, and Toll-Free Numbers toll-free - Dell XPS M1210 MXC062 | XPS M1210 Owners Manual - Page 162
162 Contacting Dell - Dell XPS M1210 MXC062 | XPS M1210 Owners Manual - Page 163
chip set Data bus width DRAM bus width Processor address bus width Flash EPROM Graphics bus PCI bus ExpressCard ExpressCard controller ExpressCard connector Cards supported ExpressCard connector size Mobile Intel 945 GM Express or Mobile Intel 945 PM Express 64 bits 64 bits 32 bits 4 MB 64 bits 32 - Dell XPS M1210 MXC062 | XPS M1210 Owners Manual - Page 164
5-in-1 Media Memory Card Reader 5-in-1 media memory card controller Ricoh R5C832 5-in-1 media memory card connector 5-in-1 combo card connector Cards supported MS MS Pro SD/SDIO MMC xD 5-in-1 media memory card connector 36.8 x 29.3 x 4.75 mm size Memory Memory module connector Memory module - Dell XPS M1210 MXC062 | XPS M1210 Owners Manual - Page 165
memory (with 256 MB of system memory) or 224 MB of shared memory (with 512 MB or more of system memory) LCD interface LVDS TV support NTSC or PAL in S-video, composite via dongle, and component modes Video type: discrete video card Data bus PCI Express X16 Video controller NVIDIA GeForce - Dell XPS M1210 MXC062 | XPS M1210 Owners Manual - Page 166
Audio Audio type Audio controller Stereo conversion Interfaces: Internal External Speaker Internal speaker amplifier Volume controls Microphone Display Type (active-matrix TFT) Dimensions: Height Width Diagonal Maximum resolutions Refresh rate Operating angle Viewing angles: Horizontal Vertical - Dell XPS M1210 MXC062 | XPS M1210 Owners Manual - Page 167
(0.94 inch) 206.8 mm (8.14 inches) 11.1 VDC 1 hour (6 cell) (Dell™ ExpressCharge™) 2 hours (9 cell) Battery operating time varies depending on operating conditions and be significantly reduced under certain power-intensive conditions. See "Power Problems" on page 100. See "Using a Battery" on page - Dell XPS M1210 MXC062 | XPS M1210 Owners Manual - Page 168
Battery (continued) Temperature range: Operating Storage Coin-cell battery AC Adapter Input voltage Input current (maximum) Input frequency Output current Output power Rated output voltage Dimensions: Height Width Depth Weight (with cables) Temperature range: Operating Storage Travel adapter 0° to - Dell XPS M1210 MXC062 | XPS M1210 Owners Manual - Page 169
Physical Height Width Depth Weight (with 6-cell battery and optical drive) 31.4 mm (1.2 inches) 299 mm (11.96 inches) 220.98 mm (8.7 inches) 1.98 kg (4.37 lb) Environmental Temperature range: Operating Storage Relative humidity (maximum): Operating Storage Maximum vibration (using a random- - Dell XPS M1210 MXC062 | XPS M1210 Owners Manual - Page 170
170 Specifications - Dell XPS M1210 MXC062 | XPS M1210 Owners Manual - Page 171
• Docking-device settings • Wireless control settings NOTICE: Unless you are an expert computer user or are directed to do so by Dell technical support, do not change the system setup program settings. Certain changes might make your computer work incorrectly. Viewing the System Setup Screen 1 Turn - Dell XPS M1210 MXC062 | XPS M1210 Owners Manual - Page 172
Boot You can set a one-time-only boot sequence without entering the system setup program. (You can also use this procedure to boot the Dell Diagnostics on the diagnostics utility partition on your hard drive.) 1 Shut down the computer through the Start menu. 2 Connect the computer to an electrical - Dell XPS M1210 MXC062 | XPS M1210 Owners Manual - Page 173
3 Turn on the computer. When the DELL logo appears, press immediately. If you wait too long and the you begin any of the procedures in this section, follow the safety instructions located in the Product Information Guide. Computer, Keyboard, and Display CAUTION: Before you clean your computer, - Dell XPS M1210 MXC062 | XPS M1210 Owners Manual - Page 174
, lint-free cloth. Dell Technical Support Policy (U.S. Only) Technician-assisted technical support requires the cooperation and participation of the customer in the troubleshooting process and provides for restoration of the operating system, software programs, and hardware drivers to the original - Dell XPS M1210 MXC062 | XPS M1210 Owners Manual - Page 175
services are provided pursuant to the terms and conditions of your limited warranty and any optional support service contract purchased with the computer. 2 All Dell installed and used in accordance with the manufacturer's instruction manual, may cause interference with radio and television reception - Dell XPS M1210 MXC062 | XPS M1210 Owners Manual - Page 176
in this document in compliance with the FCC regulations: Product name: Model number: Company name: Dell™ XPS™ M1210 PP11S Dell Inc. Worldwide Regulatory Compliance & Environmental Affairs One Dell Way Round Rock, TX 78682 USA 512-338-4400 Macrovision Product Notice This product incorporates - Dell XPS M1210 MXC062 | XPS M1210 Owners Manual - Page 177
computer. In case your hard drive is damaged or your computer has a virus, ensure that you always have a bootable CD or floppy disk available. Your Drivers and Utilities (or ResourceCD) is a bootable CD. bootable disk - A disk that you can use to start your computer. In case your hard drive is - Dell XPS M1210 MXC062 | XPS M1210 Owners Manual - Page 178
to over 400 MHz. device - Hardware such as a disk drive, printer, or keyboard that is installed in or connected to your computer. device driver - See driver. DIMM - dual in-line memory module - A circuit board with memory chips that connects to a memory module on the system board. DIN connector - Dell XPS M1210 MXC062 | XPS M1210 Owners Manual - Page 179
random-access memory - Memory that stores information in integrated circuits containing capacitors. driver - Software that allows the operating system to control a device such as are common types of ExpressCards. ExpressCards support both the PCI Express and USB 2.0 standard. Glossary 179 - Dell XPS M1210 MXC062 | XPS M1210 Owners Manual - Page 180
Code - A numeric code located on a sticker on your Dell™ computer. Use the Express Service Code when contacting Dell for assistance. Express Service Code service may not be available in some countries. extended display mode - A display setting that allows you to use a second monitor as an extension - Dell XPS M1210 MXC062 | XPS M1210 Owners Manual - Page 181
connection must be assigned an IRQ. Although two devices can share the same IRQ assignment, you cannot operate both devices simultaneously. ISP - Internet service provider - A company that allows you to access its host server to connect directly to the Internet, send and receive e-mail, and access - Dell XPS M1210 MXC062 | XPS M1210 Owners Manual - Page 182
- One million bytes per second. This measurement is typically used for data transfer ratings. media bay - A bay that supports devices such as optical drives, a second battery, or a Dell TravelLite™ module. memory - A temporary data storage area inside your computer. Because the data in memory is not - Dell XPS M1210 MXC062 | XPS M1210 Owners Manual - Page 183
Cards. PCI - peripheral component interconnect - PCI is a local bus that supports 32-and 64-bit data paths, providing a high-speed data path between problems are detected during POST, the computer continues the start-up. processor - A computer chip that interprets and executes program instructions - Dell XPS M1210 MXC062 | XPS M1210 Owners Manual - Page 184
on the system board of some computers that can often be used for troubleshooting problems. S SAS - serial attached SCSI - A faster, serial version of your computer when you access Dell Support at support.dell.com or when you call Dell for customer service or technical support. setup program - A - Dell XPS M1210 MXC062 | XPS M1210 Owners Manual - Page 185
displays depends on the capabilities of the monitor, the video controller and its drivers, and the amount of video memory installed in the computer. S-video TV-out graphics array - A video standard for video cards and controllers that supports resolutions up to 1600 x 1200. V video controller - The - Dell XPS M1210 MXC062 | XPS M1210 Owners Manual - Page 186
cellular technology and covering a much larger geographic area than WLAN. WXGA - wide-aspect extended graphics array - A video standard for video cards and controllers that supports resolutions up to 1280 x 800." X XGA - extended graphics array - A video standard for video cards and controllers that - Dell XPS M1210 MXC062 | XPS M1210 Owners Manual - Page 187
ExpressCards, 71 media memory cards, 73, 134 carnet, 140 CD drive problems, 89 CD-RW drive problems, 89 CDs, 51 operating system, 14 playing, 49 Check Disk, 90 , 56 Mobile Broadband network, 80 TV, 56 WLAN network, 78 contacting Dell, 141 copying CDs general information, 51 helpful tips, 53 how to, - Dell XPS M1210 MXC062 | XPS M1210 Owners Manual - Page 188
connector, 20 H hard drive description, 21, 23 problems, 90 replacing, 116 returning to Dell, 119 hardware conflicts, 108 Dell Diagnostics, 85 Hardware Troubleshooter, 108 Help and Support Center, 13 help file QuickSet, 14 Windows Help and Support Center, 13 hibernate mode, 42 hinge cover removing - Dell XPS M1210 MXC062 | XPS M1210 Owners Manual - Page 189
, 19 numeric keypad, 35 problems, 96 removing, 122 shortcuts, 36 keyboard status lights, 17 keypad numeric, 35 L labels Microsoft Windows, 12 Service Tag, 12 lost computer, 84 M media control buttons Dell MediaDirect button, 54 description, 18 play/pause/Dell MediaDirect, 18 media memory cards - Dell XPS M1210 MXC062 | XPS M1210 Owners Manual - Page 190
problems blue screen, 97 CD drive, 89 CD-RW drive, 89 computer crashes, 97 computer does not start up, 97 computer stops responding, 97 conflicts, 108 Dell Diagnostics, 85 Dell MediaDirect, 98 Dell Support Utility, 88 drives, 89 DVD drive, 89 error messages, 91 hard drive, 90 Hardware Troubleshooter - Dell XPS M1210 MXC062 | XPS M1210 Owners Manual - Page 191
computer, 26 traveling with the computer, 139-140 troubleshooting conflicts, 108 Dell Diagnostics, 85 Dell Support Utility, 88 Hardware Troubleshooter, 108 Help and Support Center, 13 restore computer to previous operating state, 108 See also problems TV connecting, 56 enabling display settings, 68 - Dell XPS M1210 MXC062 | XPS M1210 Owners Manual - Page 192
192 Index
-
 1
1 -
 2
2 -
 3
3 -
 4
4 -
 5
5 -
 6
6 -
 7
7 -
8
-
9
-
10
-
11
-
12
-
13
-
14
-
15
-
16
-
17
-
18
-
19
-
20
-
21
-
22
-
23
-
24
-
25
-
26
-
27
-
28
-
29
-
30
-
31
-
32
-
33
-
34
-
35
-
36
-
37
-
38
-
39
-
40
-
41
-
42
-
43
-
44
-
45
-
46
-
47
-
48
-
49
-
50
-
51
-
52
-
53
-
54
-
55
-
56
-
57
-
58
-
59
-
60
-
61
-
62
-
63
-
64
-
65
-
66
-
67
-
68
-
69
-
70
-
71
-
72
-
73
-
74
-
75
-
76
-
77
-
78
-
79
-
80
-
81
-
82
-
83
-
84
-
85
-
86
-
87
-
88
-
89
-
90
-
91
-
92
-
93
-
94
-
95
-
96
-
97
-
98
-
99
-
100
-
101
-
102
-
103
-
104
-
105
-
106
-
107
-
108
-
109
-
110
-
111
-
112
-
113
-
114
-
115
-
116
-
117
-
118
-
119
-
120
-
121
-
122
-
123
-
124
-
125
-
126
-
127
-
128
-
129
-
130
-
131
-
132
-
133
-
134
-
135
-
136
-
137
-
138
-
139
-
140
-
141
-
142
-
143
-
144
-
145
-
146
-
147
-
148
-
149
-
150
-
151
-
152
-
153
-
154
-
155
-
156
-
157
-
158
-
159
-
160
-
161
-
162
-
163
-
164
-
165
-
166
-
167
-
168
-
169
-
170
-
171
-
172
-
173
-
174
-
175
-
176
-
177
-
178
-
179
-
180
-
181
-
182
-
183
-
184
-
185
-
186
-
187
-
188
-
189
-
190
-
191
-
192
 |
 |

www.dell.com | support.dell.com
Dell™ XPS™ M1210
Owner’s Manual
Model PP11S